
Contents
Preface
This document provides information about StrongAuth Key Appliance (SAKA) 4.0.
Default Paths and Filenames
The following table describes the default paths and filenames used in this book:
|
Placeholder |
Description |
|---|---|
|
GLASSFISH_HOME |
The directory where the Payara Application Server is installed. Default location is STRONGAUTH_HOME/payara5/glassfish |
|
JAVA_HOME |
The directory where the Java Development Kit is installed. Default location is /lib/jvm/jre-11 |
|
MYSQL_HOME |
The directory where the MariaDB Relational Database is installed. Default location is STRONGAUTH_HOME/mariadb-10.6.NN |
|
REPL_HOME |
The directory where StrongKey Replication Module-related files are installed. Default location is STRONGAUTH_HOME/replication |
|
SAKA_HOME |
The directory where StrongKey KeyApplianceTM 4.0-related files are installed. Default location is STRONGAUTH_HOME/saka |
|
SKCC_HOME |
The directory where StrongKey CryptoCabinetTM-related files are installed. Default location is STRONGAUTH_HOME/skcc |
|
SKCE_HOME |
The directory where StrongKey CryptoEngineTM-related files are installed. Default location is STRONGAUTH_HOME/skce |
|
STRONGAUTH_HOME |
The directory where StrongKey KeyApplianceTM 4.0 components are installed. Default location is /usr/local/strongauth |
|
STRONGKEYLITE_HOME |
The directory where StrongKey KeyApplianceTM 4.0-related files are installed. Default location is STRONGAUTH_HOME/strongkeylite |
Third-party Website References
Third-party URLs are referenced herein and provide additional, related information.
NOTE: StrongKey is not responsible for third-party websites mentioned in this document. StrongKey does not endorse and is not responsible or liable for any content, advertising, products, or other materials available on or through such sites or resources. StrongKey will not be responsible or liable for any actual or alleged damage or loss caused or alleged to be caused by or in connection with use of or reliance on any such content, goods, or services available on or through such resources.
StrongKey Welcomes Your Comments!
StrongKey is interested in improving its documentation and welcomes your comments and suggestions. To share your comments, please email info@strongkey.com referencing the title of this document in your email with your comments.
KAM Introduction
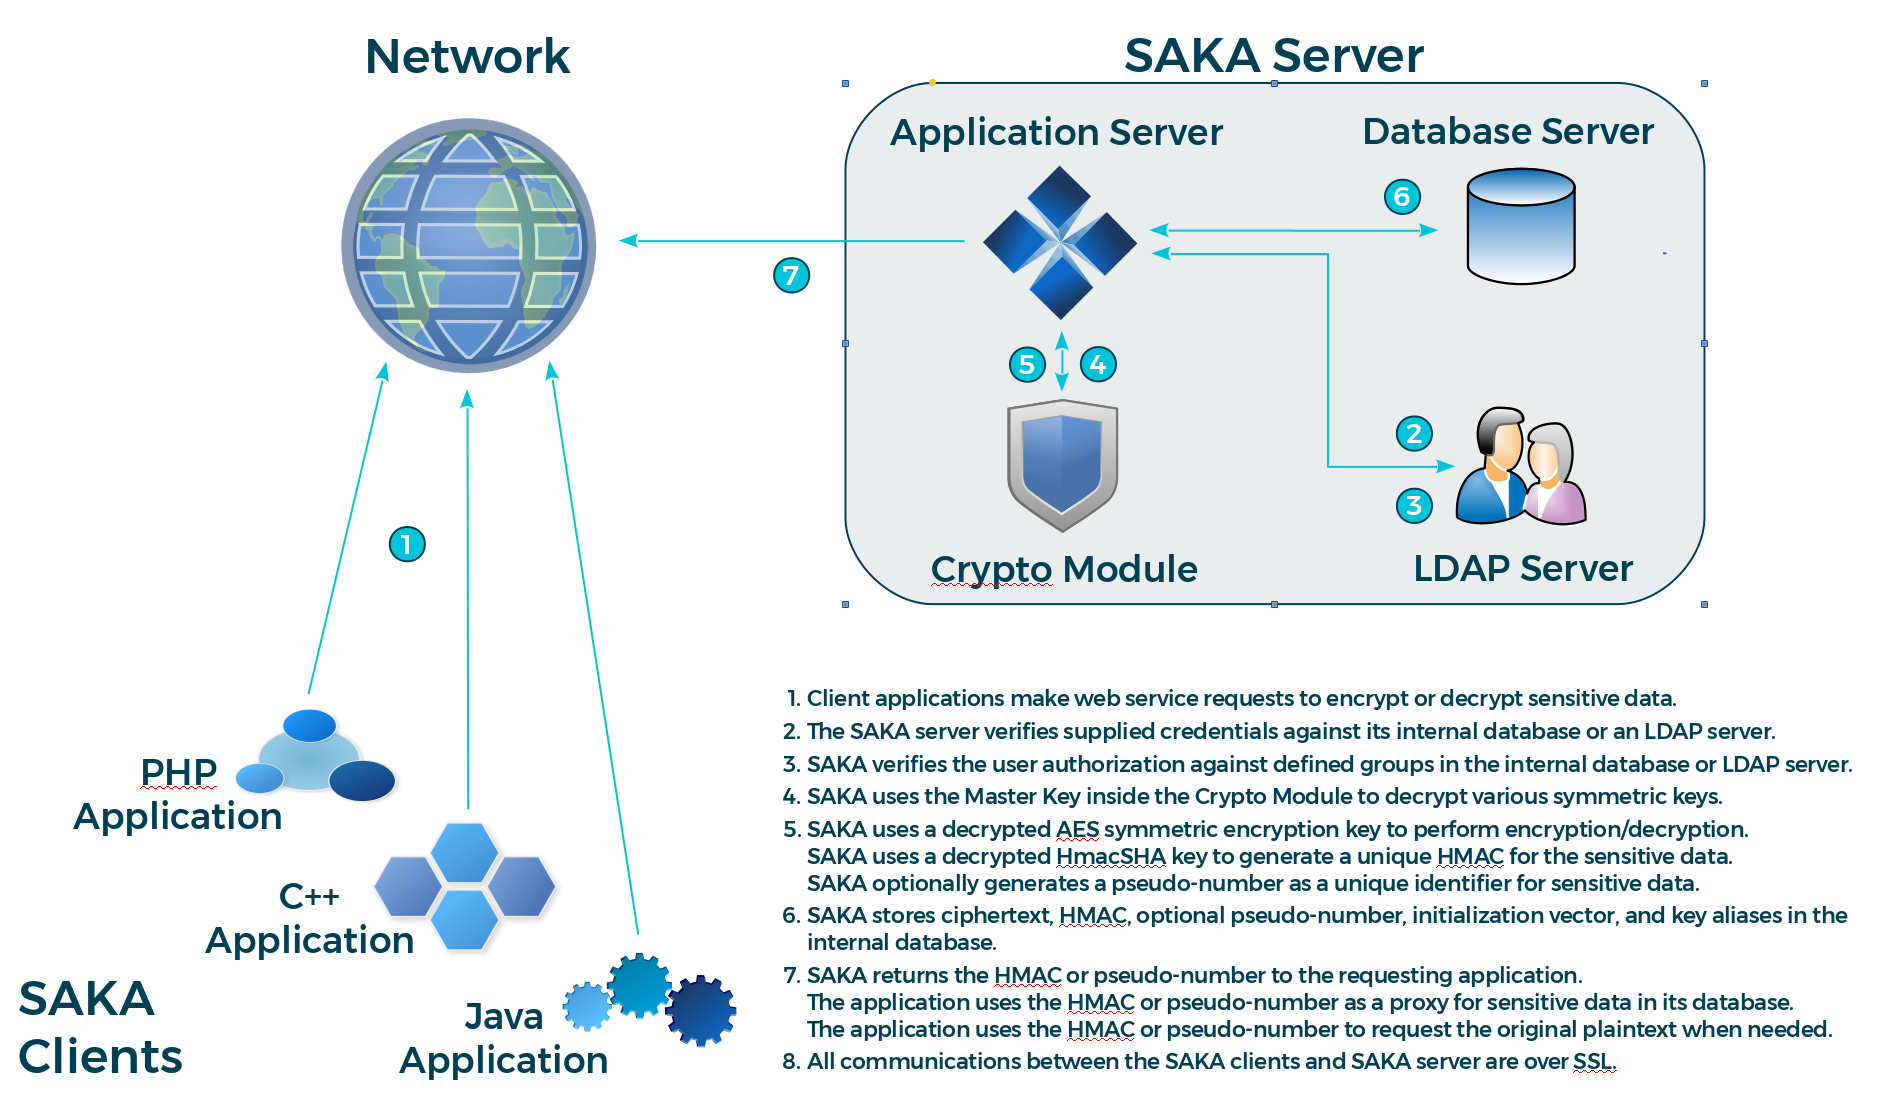
The StrongAuth KeyApplianceTM (SAKA), StrongKey's flagship product, has undergone a radical change in the 4.0 release. The SAKA 4.0 retains all the great features of the 3.0 release, but also adds significant new capability.
The SAKA KeyAppliance Module (KAM) is a collection of technologies designed to assist companies with addressing PCI DSS, 45 CFR 170.299 (k), 201 CMR 17.00, HB-1149, and similar regulations that require encryption of sensitive data.
It does this in the following manner:
Securely generating, storing, using and controlling access to cryptographic keys within the system using a Federal Information Processing Standards (FIPS)140-2 Level 2 (or above) certified cryptographic Hardware Security Module (HSM) or Trusted Platform Module (TPM). These devices are designed to erase cryptographic key material rather than give it up when they sense they are being attacked. Keys generated on these devices never leave the device unless encrypted using other cryptographic keys.
Using only one cryptographic algorithm—the Advanced Encryption System (AES)—with a choice of 128-, 192-, or 256-bit symmetric keys for the encryption and decryption of PANs or PII.
Using only one cryptographic algorithms for generating Hashed Message Authentication Codes (HMAC)—while providing a choice of key sizes for the HMAC: the HmacSHA256 algorithm—with a 256-bit cryptographic key, HmacSHA224, HmacSHA384 and HmacSHA512 for preserving the integrity of encrypted data (ciphertext) in the system.
Storing ciphertext on the appliance system—never allowing it to leave the SAKA—while returning the calculated HMAC or a configurable pseudo-number of the PAN or PII as a “token” to be used by applications as a unique identifier for the PAN/PII.
By choosing the strongest algorithm and cryptographic components recommended by PCI DSS and the US National Institute of Standards and Technology (NIST), and by localizing all cryptographic processing on the SAKA and by storing ciphertext on the appliance, the SAKA narrows the scope of the application system at risk, and consequently, the scope for the PCI DSS/201 CMR 17.00/HB-1149 audit.
Architecture
SAKA is a Java Enterprise Edition 7 (JEE7) application encapsulated within an appliance, and provides secure web services to perform many different kinds of cryptographic functions. It consists of the following components:
A JEE7 application server that hosts multiple web service applications
A relational database that stores the ciphertext along with metadata about the ciphertext
A cryptographic TPM or HSM that performs cryptographic functions
A replication architecture that automatically replicates all transactions to every SAKA node defined within a cluster
A Lightweight Directory Access Protocol (LDAP) server for authenticating and authorizing requesters of web services. In the event a site already has an LDAP directory server—such as Active Directory—SAKA can authenticate requesters against this directory server
A FIDO-enabled web application that enables end-users to encrypt/decrypt files while storing cryptographic keys in the KA module of SAKA.
Versions of underlying components supported by SAKA in the current release are shown here:
|
Component |
Name |
Version |
|---|---|---|
|
OperatingSystem |
Rocky Linux (64-bit) |
9.1 |
|
Java Virtual Machine |
OpenJDK |
11 |
|
Relational Database |
MariaDB RDBMS |
10.6 |
|
JEE7 Application Server |
Payara |
5 |
|
HSM Software |
SafeNet Protect Toolkit C |
7.2 |
|
Utimaco CryptoServer |
4.50.0.1 |
|
|
HSM Java Software |
SafeNet Protect Toolkit J |
7.2 |
|
Utimaco CryptoServer JCE |
4.50.0.1 |
|
|
Replication Software |
JeroMQ |
0.5.1 |
|
LDAP Service |
OpenLDAP |
2.4.46 |
|
Microsoft Active Directory |
Windows 2019 |
In the current release, SAKA supports the cryptographic algorithms and sizes shown below. StrongKey has chosen to restrict the algorithms and key sizes to the the strongest available. As guidelines from PCI and/or NIST evolve, so will SAKA to support the recommended algorithms and key sizes.
|
Algorithm |
Purpose |
Size |
|---|---|---|
|
Elliptic Curve (EC) |
Key Encryption |
256-bit |
|
Key Custodian Authentication |
256-bit |
|
|
Domain Administrator Authentication |
256-bit |
|
|
Advanced Encryption Standard |
Data Encryption |
128-, 192- and 256-bit |
|
Hashed Message Authentication Code |
Message Integrity |
224-, 256-, 384- and 512-bit |
Installation
Strongkey’s StrongAuth KeyAppliance (SAKA) is designed to be installed as a cluster with N appliances (nodes)in the cluster. A Development environment may have only a single node, while a Production environment must have a minimum of two (2) nodes. This is necessary to provide High Availability (HA) for cryptographic services to applications, and to ensure business continuity in the event of a disaster. A cluster may have more than two appliances, but two is the minimum. (If there are more than two nodes in the cluster, the third, fourth, etc. node follow the same steps as the second node).
As a result, SAKA installation follows a process where the tasks are alternated between two appliances. This chapter describes these tasks. The appliance expected to be installed first is known as the Primary SAKA, while appliances installed after the first SAKA instance are designated as Secondary SAKA in this documentation.
NOTE: Notwithstanding the designation of Primary and Secondary nodes within a SAKA 4.0 cluster, all nodes in the cluster are equal: they can receive and respond to web service requests simultaneously while replicating to each other asynchronously. While the replication latency depends on the network bandwidth between nodes of the cluster, the level of traffic on the network, and the number of transactions being processed at any given time, replication latency between nodes is generally in the order of seconds or minutes. If a node disappears from the cluster for any reason, all other nodes hold transactions for the missing node until it returns; when it does, synchronization is automatic.
When SAKA servers are delivered, the Linux operating system has already been installed with the necessary packages to operate the appliance. The operating system is partially configured; some parameters can only be configured upon connecting them to a network.
The uninstalled software components used by the SAKA application are delivered in the /usr/local/software/saka directory of each appliance.
At a high level, after choosing site-specific parameters in the forms shown in this chapter, the sequence of installation steps involves:
Installing the Primary with required software components—but not initializing the cryptographic module.
Installing the Secondary with required software components—but not initializing the cryptographic module.
Initializing the cryptographic module on the Primary.
Initializing the cryptographic module on the Secondary.
Creating a new encryption domain on the Primary, preparing the master key of the new domain for migration and testing the cryptographic web services on this appliance.
Completing the migration of the new encryption domain's master key on the Secondary and testing the cryptographic web services on this appliance.
Starting the appliance's administration console, adding service credentials for applications, configuring site-specific parameters, and running some tests.
Verifying two-way replication on the appliances.
Each SAKA ships with five (5) colored USB flash memory drives. The colored USB drives are intended to be used as described here:
|
Colored USB Drives and their Functions |
|
|---|---|
|
|
The Red flash drive is for use by the Key Custodian (KC) #1 for generating and storing their cryptographic keys and digital certificate. The KC1 who is also a Key Custodian, will use this credential to activate the cryptographic module on SAKA. |
|
|
The Green flash drive is for use by KC #2 for generating and storing their cryptographic keys and digital certificate. KC2 will use this credential to activate the cryptographic module on SAKA. |
|
|
The Blue flash drive is for use by KC #3 for generating and storing their cryptographic keys and digital certificate. KC3 will use this credential to activate the cryptographic module on SAKA. |
|
|
The Yellow flash drive is for use by the Domain Administrator (DA) for generating and storing their cryptographic keys and digital certificate. The DA will use this credential to administer SAKA. |
|
|
The Black flash drive is used optionally during the installation and configuration of SAKA instances to securely transfer the Migration and Storage Keys (MASK) of individual appliances to each other as a preparatory step. |


NOTE: While the Production environment only needs four (4) USB flash drive tokens—Red, Green, Blue and Yellow—on a regular basis, it is recommended that the remaining flash drive tokens are used as secure backups of the primary tokens, in the event any of the primary tokens are lost/damaged. Without the tokens, the cryptographic hardware module cannot be activated; without the cryptographic hardware module, it is impossible to decrypt any cryptographic key in the appliance.
Preliminary Steps
Before getting started with the installation of the appliances, it is helpful to use the following checklist to smooth the process. All passwords should be written down on index cards, sealed in envelopes, and locked away. While the users responsible for the passwords will maintain them in memory, these envelopes will serve as backups in the event the responsible individual is unavailable to carry out a task. To print a copy, use this .PDF version instead.
|
Required Items |
|
|---|---|
|
Physical space for two appliances. The dimensions of the 1U rack-mounted appliance are: 24.69” D × 1.69” H × 17.09” W (43.0 mm H × 434.0 mm W × 627.1mm D) weighing ~31 lbs. each. The rack-mounted 2U High Performance servers are 24.09” D × 17.53” W × 3.42” H (664.6 mm D × 445.2 mm W × 86.7 mm H) weighing ~71 lbs. each. |
|
|
Two fixed IP addresses and fully qualified domain names (FQDN) in your Domain Name Service (DNS) tables. We recommend the use of the following: |
|
saka01.[your-domain-name] |
|
saka02.[your-domain-name] |
|
|
Do not use dynamic IP addresses for the appliances. You must use static IP addresses to ensure the firewall works as configured, but may choose to have them assigned using the Dynamic Host Configuration Protocol (DHCP) rather than set them on the appliances. |
|
|
Two ports on a Gigabit switch/hub with cables. While the machines are capable of standard Ethernet (10Mb) or fast Ethernet (100Mb), they have a Gigabit port. |
|
|
USB keyboard and mouse are required. The graphics port is VGA supporting resolutions up to 1920×1200. |
|
|
Index cards and envelopes to write down and seal strong passwords (including uppercase, lowercase, numeric and special characters) for the following users: |
|
|
System Basic Input Output System (BIOS) (if using the TPM as the cryptographic module) |
|
|
Linux System Administrator (root) |
|
|
Linux user for running the SAKA application (strongauth) |
|
|
Linux user for batch operation file transfers, if needed (domain1) |
|
|
MariaDB Database Administrator (root) |
|
|
MariaDB SAKA database schema owner (skles) |
|
|
Payara JEE7 Application Server Administrator (admin) |
|
|
Key Custodian 1 |
|
|
Key Custodian 2 |
|
|
Key Custodian 3 |
|
|
SAKA encryption domain Administrator (administrator1) |
|
|
Passwords for at least two (2) application user IDs (which are indicative of their privileges within SAKA) |
|
|
a) pinguser (this credential must have the decrypt privilege) |
|
|
b) encryptdecrypt |
|
|
Use these user IDs in the TEST phase. When the appliances are promoted into PRODUCTION, decide if they will be re-created or not. |
|


Before starting the installation, both servers must be connected to the network. During the installation process, it is helpful for the appliances to be next to each to facilitate the exchange of key-material. After the installation is completed successfully, the Secondary SAKA can be relocated to its permanent destination. While the SAKA might undergo a change of the TCP/IP address when they move to their permanent location, the FQDN must remain the same.
As each operation is described, the server (Primary or Secondary) upon which it is performed will be bracketed in the heading.
Install Components [Primary]
Installation of SAKA begins on the Primary server. It installs the various components for the SAKA environment. It is assumed that the installers are familiar with Linux commands and the Linux operating system environment.
If your appliance uses the TPM, verify that the BIOS Setup has activated the TPM. Steps will vary based on the supplier of the BIOS on the appliance; while one manufacturer will identify the task as “Enable the TPM”, another might indicate this as “Enable embedded security.” In either case, the task will require setting up a password for the BIOS Setup and then activating the TPM.
Login to SAKA as root.
Start up a shell window.
Change the password of the root user to the one chosen for your site:
shell> passwd
Change directory to
/usr/local/software/saka.
shell> cd /usr/local/software/saka
If the SAKA software distribution is not on the machine, unarchive the distribution to the
/usr/local/software/sakadirectory:
shell> tar zxvf /media/<device name>/SAKA-4.0-BuildNN-dist.tgz
Using a text editor (gedit or vi), edit the following section of the
install-saka.shscript to customize IP address, passwords, database size, etc.
##########################################
# Company name for self signed certificate
COMPANY="StrongAuth Inc"

# Server Passwords
GLASSFISH_PASSWORD=adminadmin
LINUX_PASSWORD=ShaZam123
MARIA_ROOT_PASSWORD=BigKahuna
MARIA_SKLES_PASSWORD=AbracaDabra

# Batch Request user
BR1_LINUX_USERNAME=domain1
BR1_LINUX_PASSWORD=Prest099
BR1_LINUX_LOCK='Y'                      # Lock Batch request user?

# Servers in cluster. For larger clusters, add more lines like 'SERVER#=<FQDN>' where # = SID
SERVER1=saka201.strongauth.com
SERVER2=saka202.strongauth.com
#SERVER3=saka203.strongauth.com
#SERVER4=saka204.strongauth.com

##########################################
The COMPANY name will be embedded in the digital certificates generated during the installation process. Replace the default value with the name of your company. Do not use commas or special characters in the name; while spaces are allowed, restrict the name to 64 characters or less.
The GLASSFISH_PASSWORD parameter is the password for the admin user for the Payara application server. The admin user is responsible for administrating the Payara server through the provided asadmin command line tool.
The LINUX_PASSWORD parameter is the password for the strongauth user in the Linux operating system environment. The strongauth user owns all files installed under
/usr/local/stronguathand is the owner of the SAKA application. While this password is initially used to setup the account and its privileges, this may be changed at a later time, if desired.The MARIA_ROOT_PASSWORD parameter is the password for the root user of the MariaDB database. While this password is initially used to setup the account and its privileges, this may be changed at a later time, if desired.
The MARIA_SKLES_PASSWORD parameter is the password for the skles user of the MariaDB database. While this password is initially used to setup the account and its privileges, this may be changed at a later time, if desired.
The BR1_LINUX_USERNAME parameter is the name of the batch request user in the Linux operating system environment. This user is used to transfer files to and from the appliance for batch processing operations of the first encryption domain.
The BR1_LINUX_PASSWORD parameter is the password for the domain1 user in the Linux operating system environment. While this password is initially used to setup the account and its privileges, this may be changed later, if desired.
The BR1_LINUX_LOCK parameter is to determine whether the batch request user account will be locked. The account is locked by default. If you expect to use the batch processing features of the appliance, change the value of this variable to N.
The SERVER# variables define the servers in the SAKA cluster. For every appliance that will be a member of the cluster, create a variable named
SERVER<SID>where SID is a numerically incrementing value starting at 1 with no gaps in the sequence. Assign the FQDN of each appliance to these variables.
Run the
install-saka.shscript:shell> ./install-saka.sh
Log out of SAKA.
Login to SAKA as strongauth.
Start up two (2) shell windows.
Install Components [Secondary]
This step installs all the required components for the appliance on a Secondary server.
If your appliance uses the TPM, verify that the BIOS Setup has activated the TPM. The actual steps will vary based on the supplier of the BIOS on the appliance. While one manufacturer will identify the task as “Enable the TPM”, another might indicate this as “Enable embedded security”. In either case, the task will require setting up a password for the BIOS Setup and then activating the TPM.
Login to SAKA as root.
Start a shell window.
Change the password of the root user to the one chosen for your site:
shell> passwd
Change directory to
/usr/local/software/saka.
shell> cd /usr/local/software/saka
If the SAKA software distribution is not on the machine, unarchive the distribution to the
/usr/local/software/sakadirectory:
shell> tar zxvf /media/<device name>/SAKA-4.0-BuildNN-dist.tgz
Using a text editor (gedit or vi), edit the
install-saka.shscript to customize IP address, passwords, database size, etc.NOTE: All parameters must be identical to those chosen for the Primary SAKA.
Run the
install-saka.shscript:
shell> ./install-saka.sh
Log out of SAKA.
Login to SAKA as strongauth.
Start up two (2) shell windows.
Define KCs [Primary]
The next process defines the three KCs for the environment, initializes the cryptographic hardware module, and starts the process of migrating the appliance's master key to the Secondary appliance.
In Window2, use the shell-alias tsl to tail the Payara server logs so you can watch the output of the server application as it scrolls by:
shell> tsl
In Window1, change directory to
/usr/local/strongauth/bin.
shell> cd ~/bin
In Window1, execute
Primary-SAKA-KeyCustodian-Setup-Wizard.sh.shell> ./Primary-SAKA-KeyCustodian-Setup-Wizard.sh
Complete the wizard steps, ensuring there are no errors in Window1 or Window2. If there are any errors, determine the cause of the error, log out of the session, log back in as root and execute the
cleanup.shscript to clean out the installation. Fix the cause of the error and start the installation process with 4.1.1—Install Components [Primary].
Verify KCs [Secondary]
This process verifies the credentials of the three KCs from the Primary SAKA server, initializes the cryptographic hardware module, and starts the process of migrating the appliance's master key to the Primary appliance.
In Window2, use the shell alias TSL to tail the Payara server logs so you can watch the output of the server application as it scrolls by:
shell> tsl
In Window1, change directory to
/usr/local/strongauth/bin.
shell> cd ~/bin
In Window1, execute
Secondary-SAKA-Setup-Wizard.sh.
shell> ./Secondary-SAKA-Setup-Wizard.sh
Follow the wizard steps to completion, ensuring there are no errors in Window1 or Window2. If there are any errors, determine the cause of the error, log out of the session, log back in as root and execute the
cleanup.shscript to clean out the installation. Fix the cause of the error and start the installation process with 4.1.2—Install Components [Secondary].
Set Personal Identification Numbers (PINs) [Primary]
The PINs of the three KCs are set to activate the cryptographic hardware module and a new encryption domain is created.
In Window1, use
sudoand restart the Payara application server (supply the strongauth user's password when prompted).
shell> sudo /sbin/service glassfishd restart
In Window1, execute
KC-SetPINTool.sh.
shell> ./KC-SetPINTool.sh
Using the red, green, and blue flash drives, set the PINs for the three KCs to activate the cryptographic hardware module on the appliance, ensuring there are no errors in either window.
In Window1, execute
New-Domain-Setup-Wizard.sh.
shell> ./New-Domain-Setup-Wizard.sh
Follow the steps of the wizard, ensuring there are no errors in Window1 or Window2. If there are any errors, determine the cause of the error, log out of the session, log back in as root, and execute the
cleanup.shscript to clean out the installation. Fix the cause of the error and start the installation process with 4.1.1—Install Components [Primary].
Set PINs and Complete Key Migration [Secondary]
This step duplicates the previous step on the Secondary server and completes the key migration process for the encryption domain that was just created.
In Window1, use
sudoand restart the Payara application server (supply the strongauth user's password when prompted):
shell> sudo /sbin/service glassfishd restart
In Window1, execute the
KC-SetPINTool.sh.
shell> ./KC-SetPINTool.sh
Using the red, green, and blue flash drives, set the PINs for the three KCs to activate the cryptographic hardware module on the appliance, ensuring no errors in either window.
In Window1, execute
Secondary-SAKA-Replication-Final.sh.
shell> ./Secondary-SAKA-Replication-Final.sh
Follow the steps of the wizard, ensuring there are no errors in Window1 or Window2. If there are any errors, determine the cause of the error, log out of the session, log back in as root, and execute the
cleanup.shscript to clean out the installation. Fix the cause of the error and start the installation process with 4.1.2—Install Components [Secondary].
Create System Users [Primary]
This introduces the Domain Administration Console (DAC) Tool, modifying the encryption domain configuration to add at least two (2) users to the SAKA internal database.
In Window1, execute the
DACTool.shscript.
shell> ./DACTool.sh
Using the yellow flash drive, set the preferences for the Domain Administrator and then connect to
saka01.Under the Users section, create at least two users:
- Username: encryptdecrypt Privileges: encrypt, decrypt
- Username: pinguser Privilege; decrypt
The encryptdecrypt user will be the calling application's main credential to consume the SAKA web service. The name of this user can be modified if another name is preferred, but it is important that the name of the pinguser stays as pinguser.
Additional users beyond these two may be created with whatever privilege desired.
In Window1, import the self-signed certificate from the Secondary SAKA with
certimport.sh:
shell> ./certimport.sh saka02.<domain-name>
In Window1, change directory to the
/usr/local/strongauth/topazdirectory:
shell> cd ~/topaz
In Window1, execute
sakamlient.jaras follows to “ping” both appliances simultaneously.
shell> java -jar sakamclient.jar https://saka01.<domain-name>:8181, https://saka02.<domain-name>:8181 <domain-id> <password> P
Two threads call the appliance “ping” web service. If both servers are “alive”, the installation was successful.
Create a New Encryption Domain [Primary]
Create and replicate a new encryption domain on the SAKA cluster. SKCE and SKCC require a dedicated encryption domain to escrow the encryption keys used by SKCE.
In Window1, change directory to
/usr/local/strongauth/bin.
shell> cd ~/bin
In Window1, execute the script,
New-Domain-Setup-Wizard.sh.
shell> ./New-Domain-Setup-Wizard.sh
Follow the steps of the wizard, ensuring there are no errors in Window1 or Window2. If there are any errors, determine the cause of the error, log out of the session, log back in as root, and execute the
cleanup.shscript to clean out the installation. Fix the cause of the error and start the installation process with 4.1.1—Install Components [Primary].
Complete Second Domain Key Migration [Secondary]
Complete the key migration process for the second domain created in the previous step.
In Window1, execute the script,
Secondary-SAKA-Replication-Final.sh.
shell> ./Secondary-SAKA-Replication-Final.sh
Follow the steps of the wizard, ensuring there are no errors in Window1 or Window2. If there are any errors, determine the cause of the error, log out of the session, log back in as root, and execute the
cleanup.shscript to clean out the installation. Fix the cause of the error and start the installation process with 4.1.2—Install Components [Secondary].
Add System Users [Primary]
Use the DACTool to add two users to SAKA's internal database.
In Window1, execute
DACTool.sh.
shell> ./DACTool.sh
Using the yellow flash drive, set the preferences for the Domain Administrator and then connect to saka01.
Under the Users section, create at least two users:
- Username: encryptdecrypt Privileges: encrypt, decrypt
- Username: pinguser Privilege: decrypt
In Window1, change directory to the
/usr/local/strongauth/topazdirectory:
shell> cd ~/topaz
In Window1, execute the
sakamlient.jarclient application to ping both appliances simultaneously.
shell> java -jar sakamclient.jar https://saka01.<domain-name>:8181, https://saka02.<domain-name>:8181 <domain-id> <password> P
Two threads will attempt to call the ping web service of the appliances and report on their success. If both machines report they are alive, the installation was successful.
Configure the SKCE domain [Primary]
The SKCE module—to be hereafter called the CryptoEngine Module (CEM) in SAKA—requires configuration changes to access the newly created domain. Even if the CEM will not be used it is necessary to make these configurations. Follow these steps to configure the CEM:
In Window1, if using a self-signed certificate for the FIDO applicationID, import it into the Payara TrustStore using the
certimportscript:
shell> certimport.sh <FQDN> -p<PORT> -kGLASSFISH
Examples:
certimport.sh saka01.strongauth.com -p8181 -kGLASSFISH certimport.sh www.domain.com -p443 -kGLASSFISH
In Window1, execute
create-SKCE-Users.shto setup service credentials for the CEM. Specify 2 for domain number 2 and a password for the service credentials:
shell> ./create-SKCE-Users.sh 2 <password>
In Window1, change directory to
/usr/local/strongauth/skce/etc.
shell> cd ~/skce/etc
Edit the
skce-configuration.propertiesfile.Update the value of the following two properties to reflect the values specified in Section 7, Step 3:
skce.cfg.property.saka.cluster.1.domain.1.password=skce.cfg.property.saka.cluster.1.domain.1.username=
In Window1, change directory to
/usr/local/strongauth/skcc/etc.
shell> cd ~/skcc/etc
Edit the
skcc-configuration.propertiesfile. Update the value of the following two properties to reflect the pinguser password specified in Section 7, Step 3 for the propertyskcc.cfg.property.sakapwdand the value of the passwords in Section 10, Step 3 for the following properties:
					skcc.cfg.property.service.cc.ce.password

					skcc.cfg.property.service.cc.fe.password

					skcc.cfg.property.service.cc.ce.ping.password
skcc.cfg.property.sakapwd=skcc.cfg.property.service.cc.ce.password=skcc.cfg.property.service.cc.fe.password=skcc.cfg.property.service.cc.ce.ping.password=
In Window1, use
sudoand restart the Payara application server (supply the strongauth user's password when prompted):
shell> sudo /sbin/service glassfishd restart
In Window1, change directory to
/usr/local/strongauth/bin.
shell> cd ~/bin
In Window1, execute the script,
KC-SetPINTool.sh.
shell> ./KC-SetPINTool.sh
Using the red, green, and blue flash drives, set the PINs for the three Key Custodians to activate the cryptographic hardware module on the appliance, ensuring there are no errors in Window1 or Window2.
Replicate the CEM Domain [Secondary]
The final step of the installation replicates the CEM domain on the Secondary SAKA.
In Window1, execute
create-SKCE-Users.shto setup service credentials for the CEM. Specify 2 for domain number 2 and a password for the service credentials:
shell> ./create-SKCE-Users.sh 2 <password>
This should be the same password as provided in Section 10, Step 2.
In Window1, change directory to
/usr/local/strongauth/skce.
shell> cd ~/skce
In Window1, securely copy the keystore files directory from the primary node to this node using
scporsftpto perform this task:
shell> scp -r strongauth@<primary-node>:skce/keystores .
In Window1, change directory to
/usr/local/strongauth/skce/etc.
shell> cd ~/skce/etc
Edit the
skce-configuration.propertiesfile. Update the value of the following two properties to reflect the values specified in Section 10, Step 2:
skce.cfg.property.saka.cluster.1.domain.1.password=skce.cfg.property.saka.cluster.1.domain.1.username=
In Window1, change directory to
/usr/local/strongauth/skcc/etc.
shell> cd ~/skcc/etc
Edit the
skcc-configuration.propertiesfile. Update the value of the following two properties to reflect the pinguser password specified in Section 7, Step 3 for the propertyskcc.cfg.property.sakapwdand the passwords from Section 10, Step 3:skcc.cfg.property.service.cc.ce.password, skcc.cfg.property.service.cc.fe.password,andskcc.cfg.property.service.cc.ce.ping.password
skcc.cfg.property.sakapwd=
skcc.cfg.property.service.cc.ce.password=
skcc.cfg.property.service.cc.fe.password=
skcc.cfg.property.service.cc.ce.ping.password=
In Window1, if using a self-signed certificate for the applicationID (see Section 11), import it into the Payara TrustStore using the
certimportscript:
shell> certimport.sh <FQDN> -p<PORT> -kGLASSFISH
Examples:
certimport.sh saka01.strongauth.com -p8181 -kGLASSFISH certimport.sh www.domain.com -p443 -kGLASSFISH
In Window1, use
sudoand restart the Payara application server (supply the strongauth user's password when prompted):
shell> sudo /sbin/service glassfishd restart
In Window1, change directory to
/usr/local/strongauth/bin.
shell> cd ~/bin
In Window1, execute
KC-SetPINTool.sh.
shell> ./KC-SetPINTool.sh
Using the red, green, and blue flash drives, set the PINs for the three KCs to activate the cryptographic hardware module on the appliance, ensuring there are no errors in Window1 or Window2.
This concludes the installation of the SAKA cluster. If you have any questions or problems, please contact support@strongkey.com or call us at (408) 331-2000.
Details about how to configure the appliance for a specific environment are presented in 14—KAM Configuration.
Detailed documentation about configuring individual components of SAKA are available at the following sites. It is strongly recommended that you make a full backup of SAKA before making any change that might affect the operations of the appliance.
NOTE: On machines using the TPM, resetting the TPM from the BIOS setup (or any other software that interacts with the TPM directly) will permanently delete the EC keys within the module, thus invalidating all keys and encrypted data within SAKA. It is strongly recommended that the BIOS password is protected very carefully and any administration of the appliance at the BIOS level is performed very carefully.
CCS Web Service Operations
The Card Capture Service (CCS) web service application supports an array of web services for working with the ANSI X9.24-1:2009 Derived Unique Key Per Transaction (DUKPT) algorithm for protecting data and Personal Identification Numbers (PINs). Client applications send requests to the CCS through a standard Simple Object Access Protocol (SOAP)—or Representational State Transfer (REST)-based web services over the Secure Hyper Text Transfer Protocol (HTTPS).
SOAP-based web service calls can be expected to return a CCReturnObject (see definition below). In the case of some errors, you should also anticipate the return of either StrongKeyLiteExceptions or CCExceptions. REST-based web service calls will return HTTP Status Codes corresponding with the success or type of failure encountered. Successful operations always return a 200 OK alongside a JavaScript Object Notation (JSON) or Extensible Markup Language (XML) response. A JSON will be returned unless strongkeylite.cfg.property.ccsresponseformat is overwritten on the SAKA server to specify that “xml” responses should be returned. Other valid Response Statuses specific to failure conditions include:
400 Bad Request
401 Unauthorized
404 Not Found
500 Internal Server Error
CCReturnObject
The following example defines the CCReturnObject type. A line-by-line explanation follows.
|
# |
XML Content |
|---|---|
|
1 |
<xs:complexType name="CCReturnObject"> |
|
2 |
<xs:sequence> |
|
3 |
<xs:element name="did" type="xs:long" minOccurs="0"/> |
|
4 |
<xs:element name="messagekey" type="xs:string" minOccurs="0"/> |
|
5 |
<xs:element name="message" type="xs:string" minOccurs="0"/> |
|
6 |
<xs:element name="objectContent" type="xs:anyType" minOccurs="0"/> |
|
7 |
<xs:element name="objectType" type="xs:int" minOccurs="0"/> |
|
8 |
<xs:element name="srid" type="xs:long" minOccurs="0"/> |
|
9 |
</xs:sequence> |
|
10 |
</xs:complexType> |
|
# |
XML Content Explanation |
|---|---|
|
1 |
The start of the CCReturnObject element. |
|
2 |
The start of a sequence. |
|
3 |
The DID element—the identifier of the encryption domain that serviced this request. |
|
4 |
The messagekey element—a message code used by the appliance as a reference. Messages of the format 'SKL-MSG-NNNN' indication a success and message of the format 'SKL-ERR-NNNN' indication failures (where NNNN are numerals). |
|
5 |
The message element—a message which describes a success or a failure condition. |
|
6 |
The objectContent element—a JSON or XML that contains the result of a successful web service operation. A JSON will be returned by default unless the encryption domain's or SAKA's |
|
7 |
The objectType element—an integer value identifying the kind of object returned.
|
|
8 |
The srid element—a unique request identifier for this transaction. |
|
9 |
The end of the sequence. |
|
10 |
The end of the CCReturnObject. |
Manufacturer Identifiers for Processing CardHolder Data (CHD)
All CCS operations require a cryptographic key—usually called a Base Derivation Key (BDK)—to be identified for use in the web service operation. Each web service provides one or more mechanisms for identifying the right key to use for that operation. One mechanism is to identify a BDK based on a Manufacturer Identifier, as shown in the following table. At any time in a particular domain, there can only be a single BDK loaded into the appliance per manufacturer for use by SAKA in processing CCS transactions. Note that this does not prevent storing many BDKs on SAKA, but for decrypting CHD only one BDK may be loaded for use per manufacturer. By supplying the manufacturer ID as a web service parameter, you can instruct the appliance to use the corresponding BDK for that manufacturer in the DUKPT operation the web service will be performing.
Additionally in the case of the GetCardCaptureData web service, the manufacturer ID also determines how the appliance will parse the card-swipe captured, encrypted, and provided by your application to SAKA for processing. Every terminal manufacturer defines their CHD swipe data format differently, so it is important that the correct manufacturer ID parameter is passed in when submitting a request to the GetCardCaptureData web service. A list of manufacturers by their associated identifiers follows here:
|
ID TECH |
0 |
|
UIC |
1 |
|
MagTek |
2 |
|
Infinite |
3 |
|
Dejavoo |
4 |
|
PAX |
5 |
|
PADV6 |
6 |
NOTE: When processing PINs from cards, this parameter is irrelevant.
CCS Module GetCardCaptureData Mechanics
The GetCardCaptureData GCD) operation receives a card swipe (along with other parameters to authenticate and authorize the transaction), decodes it according to the manufacturer-specific definition of their swipe format, decrypts the track data using the DUKPT algorithm for data-decryption, and either tokenizes or returns the PAN (based on SAKA configuration parameters; by default, only a token is returned). It uses a previously stored BDK identified by the manufacturer ID. The web service operation requires six parameters:
|
DID |
The unique encryption domain identifier. |
|
username |
The username (service-credential) within the encryption domain with the authorization to call this web service. The credential requires the Encryption privilege at a minimum, but may also require Decryption privileges within the encryption-domain if a plaintext PAN is to be returned. |
|
password |
The password of the username to authenticate the credential of the requester. |
|
ccd |
The hex-encoded data containing the captured data. Note that all CCS web services operate on hex-encoded data. |
|
mfr |
The numerical identifier of the manufacturer of the device that captured the card data. |
|
dsn |
The device serial number (DSN) of the device that captured the card data. This value is required, but only currently used for logging purposes. |
When SAKA receives the request, it verifies the credentials presented in the web service operation against its internal database, or an optional LDAP directory server, and then determines their authorization to request the GetCardCaptureData service by determining if they are a member of the EncryptionAuthorized group. Note that if using LDAP, this group and its members must be created in the LDAP directory as a distinct task of the installation process of SAKA; when using the SAKA internal database, this group is created automatically.
If the requester is authorized, SAKA starts by decoding the ccd parameter based on the manufacturer-specific format. The manufacturer can be provided with the mfr parameter, or optionally set automatically via the SAKA configuration property strongkeylite.cfg.property.defaultmanufacturer. If the swipe is properly formatted and can be successfully decoded, the encrypted track data is decrypted using the BDK loaded for this manufacturer. The track data is then parsed to extract details such as Expiration Date, IssuerID, Cardholder Name, etc.
By default, the PAN will be encrypted by the appliance and a token will be returned in the response. If tokenization is not desired, the SAKA configuration property strongkeylite.cfg.property.ccsautodelete must be set to true. Alternatively or in addition to returning a token, the PAN can be returned in a plaintext format if the SAKA configuration property strongkeylite.cfg.property.ccsplaintextpan is set to true. When strongkeylite.cfg.property.ccsplaintextpan is true, the service credential requesting the PAN must also be a member of the DecryptionAuthorized group in addition to being a member of the EncryptionAuthorized group.
On success, the following will be returned, either as a JSON or XML string; in the case of SOAP, the JSON or XML string is embedded in the objectContent attribute of the CCReturnObject object:
|
DID |
Unique encryption domain identifier for the domain that serviced this request. |
|
SRID |
Unique request identifier for this transaction. |
|
Token |
(Optional) If |
|
PAN |
(Optional) If |
|
ExpiryDate |
Four digits to represent the expiration month and expiration year of the card. |
|
ExpiryMonth |
Two digits to represent the expiration month of the card. |
|
ExpiryYear |
Two digits to represent the expiration year of the card. |
|
MaskedPAN |
Masked PAN as received in any available masked data provided in the swipe. |
|
Digest |
Always null. Reserved for future use. |
|
Valid |
True if this PAN conforms to the Luhn Algorithm. |
|
Exists |
(Optional) If |
|
AssociationID |
The Card Association ID recovered from the track data. |
|
IssuerID |
The Card Issuer ID recovered from the track data. |
|
CardholderName |
The full name of the cardholder. |
|
Firstname |
The first name of the cardholder. |
|
Lastname |
The last name of the cardholder. |
|
Track2 |
(Optional)
|
|
Notes |
Always null. Reserved for future use. |
CCS Module DukptEncrypt Mechanics
The DukptEncrypt (DENC) operation encrypts a hex-encoded plaintext using a key derived from the BDK and Key Serial Number (KSN). The cryptographic algorithm and type of cryptographic key to be derived from the BDK+KSN combination are specified as parameters to determine the type of encryption to be performed. The web service operation requires eight (of a total of nine) parameters:
|
DID |
The unique encryption domain identifier. |
|
username |
The username (service credential) within the encryption domain with the authorization to call this web service. The credential requires the Encryption privilege at a minimum, but may also require Decryption privileges if the BDK is recovered through a token parameter in the web service. |
|
password |
The password of the username to authenticate the credential of the requester. |
|
bdktoken |
The token that references the escrowed BDK. If this parameter is specified, the |
|
mfr |
The numerical identifier of the manufacturer for which this BDK is assigned. If this parameter is specified, the |
|
ksn |
The key serial number (KSN) to use to generate a derived key. This must be exactly 10 bytes and must be formatted as a hex-encoded string. |
|
plaintext |
The plaintext to be encrypted. The plaintext must be sent to the web service as a hex-encoded string. Even if the plaintext is only alphanumeric characters, it is expected that the plaintext value is hex-encoded for transport to the web service. |
|
algorithm |
The algorithm to use for this encryption. Valid choices are TDES and AES. Alternately, a full transform can be specified in format, “AES/CBC/ZeroBytePadding” if the default mode and padding of each |
|
derivedkeytype |
The type of key to be derived by the DUKPT process. Valid choices are:
|
When SAKA receives the request, it verifies the credentials presented against its internal database or an optional LDAP directory server, and determines their authorization to request the DukptEncrypt service by verifying if they are a member of the EncryptionAuthorized group. Note that if using LDAP, this group and its members must be created in the LDAP directory as a distinct task of the installation process of SAKA; when using the SAKA internal database, this group is created automatically.
If the requester is authorized, SAKA proceeds to recover the BDK for this operation. If the manufacturer ID is provided in the web service call, the BDK associated with the manufacturer is recovered. If a BDK token is provided, the BDK is recovered based on that token. In this case, the user must also be a member of the DecryptionAuthorized group.
Using the BDK and portions of the provided KSN, an initial key (sometimes called the Initial PIN Encryption Key or IPEK) is derived. Using the IPEK, the derived key (of the type requested for this transaction) is generated based on other portions of the KSN. Each type of derived key has a default encryption mode and padding associated with it:
|
Derived Key Type |
Encryption Mode |
Padding |
|---|---|---|
|
DEK |
CBC |
ZeroBytePadding |
|
DEK_RESPONSE |
CBC |
ZeroBytePadding |
|
PIN |
ECB |
NoPadding |
|
MAC |
ECB |
NoPadding |
|
MAC_RESPONSE |
ECB |
NoPadding |
If the default encryption mode and padding for your chosen type of derived key is correct, then you will just need to select either “AES” or “TDES” as the algorithm in the web service request. You can overwrite the default or explicitly state your preferred encryption mode and padding by supplying the full cryptographic transform as the algorithm parameter in the web service. For instance, a TDES PIN key can be derived and encrypted in CBC mode with ZeroBytePadding if the algorithm web service parameter is specified as “DESede/CBC/ZeroBytePadding”. Take notice that in this case, we specify Triple DES algorithm using Java's official name for the algorithm “DESede.”
NOTE: StrongKey has currently tested only the Electronic Code Book (ECB) and Cipher Block Chain (CBC) modes of encryption and, for the ANSI DUKPT processing module, only ZeroBytePadding and NoPadding mode of padding. Additionally, when using the CBC mode of encryption, the only currently supported Initialization Vector (IV) is an all-zero block. If other encryption modes, padding types, or IVs are desired, please contact support@strongkey.com.
To learn more about Java cryptographic algorithms, modes of encryption and padding, please refer to the Java Cryptography Architecture (JCA) Reference Guide.
Once the plaintext is encrypted, the result is hex-encoded and the following values will be returned, either as a JSON or XML string; in the case of SOAP, the JSON or XML string is embedded in the objectContent attribute of the CCReturnObject object:
|
DID |
The unique encryption domain identifier for the domain that serviced this request. |
|
SRID |
A unique request identifier for this transaction. |
|
BDKToken |
The BDKToken used to service this request (or null if the BDK token was not specified as a web service parameter). |
|
MFR |
The manufacturer ID used to service this request (or null if the manufacturer ID was not specified as a web service parameter). |
|
KSN |
The KSN used to service this request. |
|
Ciphertext |
The ciphertext generated from this request, formatted as a hex-encoded string. |
CCS Module DukptDecrypt Mechanics
The DukptDecrypt (DDEC) operation decrypts a hex-encoded ciphertext string using a key derived from the BDK and KSN. The algorithm and type of derived key are specified as parameters to determine the type of decryption to be performed. The web service operation requires eight (of a total of nine) parameters:
|
DID |
The unique encryption domain identifier. |
|
username |
The username (service credential) within the encryption domain with the authorization to call this web service. The user requires the Decryption privilege to execute this operation. |
|
password |
The password of the username to authenticate the credential of the requester. |
|
bdktoken |
The token that references the BDK within the SAKA encryption domain. If this parameter is specified, the mfr parameter must be null. |
|
mfr |
The numerical identifier of the manufacturer for which this BDK is assigned. If this parameter is specified, the bdktoken parameter must be null. |
|
ksn |
The KSN to use to generate the derived key. This must be exactly 10 bytes sent to the web service, formatted as a hex-encoded string. |
|
ciphertext |
The ciphertext to be decrypted. The ciphertext must be sent to the web service as a hex-encoded string. |
|
algorithm |
The algorithm to use for this decryption. Valid choices are “TDES” and “AES.” Alternatively, a full transform can be specified in the form of “AES/CBC/ZeroBytePadding” if the default mode and padding of each derived key type needs to be overwritten. Continue reading the description of the web service mechanics for more details. |
|
derivedkeytype |
The type of key to be derived by the DUKPT process. Valid choices are:
|
When SAKA receives the request, it verifies the credentials presented against its internal database—or an optional LDAP directory server—and determines their authorization to request the DukptDecrypt service by verifying if they are a member of the DecryptionAuthorized group. If using LDAP, this group and its members must be created in the LDAP directory as a distinct task of the installation process for SAKA; when using the internal database on SAKA, this group is created automatically.
If the requester is authorized, SAKA proceeds to recover the BDK for this operation. If the manufacturer ID is provided in the web service call, the BDK associated with the manufacturer is recovered. If a BDK Token is provided, the BDK is recovered based on that token.
Using the BDK and portions of the provided KSN, an IPEK is derived. Using the IPEK, the derived key (of the type requested for this transaction) is generated based on other portions of the KSN. Each type of derived key has a default encryption mode and padding associated with it.
Those defaults are listed in the following table:
|
Derived Key Type |
Encryption Mode |
Padding |
|---|---|---|
|
DEK |
CBC |
ZeroBytePadding |
|
DEK_RESPONSE |
CBC |
ZeroBytePadding |
|
PIN |
ECB |
NoPadding |
|
MAC |
ECB |
NoPadding |
|
MAC_RESPONSE |
ECB |
NoPadding |
If the default decryption mode and padding for your chosen type of derived key are correct, you will just need to select either “AES” or “TDES” as the algorithm in the web service request. You can override the default values, or explicitly state your preferred decryption mode and padding, by supplying the full cryptographic transform as the algorithm parameter in the web service. For instance, a TDES PIN key can be derived and decrypted in CBC mode with ZeroBytePadding if the algorithm web service parameter I s specified as “DESede/CBC/ZeroBytePadding.” Take notice that in this case, we specify Triple DES algorithm using Java's official name for the algorithm “DESede.”
NOTE: StrongKey has currently tested only the Electronic Code Book (ECB) and Cipher Block Chain (CBC) modes of encryption and, for the ANSI DUKPT processing module, only ZeroBytePadding and NoPadding mode of padding. Additionally, when using the CBC mode of encryption, the only currently supported Initialization Vector (IV) is an all-zero block. If other encryption modes, padding types, or IVs are desired, please contact support@strongkey.com.
To learn more about Java cryptographic algorithms, modes of encryption and padding, please refer to the Java Cryptography Architecture (JCA) Reference Guide.
Once the plaintext is encrypted, the result is hex-encoded and the following values will be returned, either as a JSON or XML string; in the case of SOAP, the JSON or XML string is embedded in the objectContent attribute of the CCReturnObject object.
|
DID |
The unique encryption domain identifier for the domain that serviced this request. |
|
SRID |
A unique request identifier for this transaction. |
|
BDKToken |
The BDKToken used to service this request (or null if the BDK token was not specified as a web service parameter). |
|
MFR |
The manufacture ID used to service this request (or null if the manufacturer ID was not specified as a web service parameter). |
|
KSN |
The KSN used to service this request. |
|
Plaintext |
The plaintext generated from this request, formatted as a hex-encoded string. Be sure to hex decode the value to recover your desired plaintext value. |
CCS Module DukptMAC Mechanics
The DukptMac (DMAC) operation generates a message authentication code (MAC) for some hex-encoded plaintext bytes using a key derived from the BDK and KSN following the ANSI-defined MACing scheme. The type of derived key is specified as parameters.
The web service operation requires seven (of a total of eight) parameters:
|
DID |
The unique encryption domain identifier. |
|
username |
The username (service credential) within the encryption domain with the authorization to call this web service. The credential requires the Encryption privilege at a minimum, but may also require Decryption privileges if the BDK is recovered through a token parameter in the web service. |
|
password |
The password of the username to authenticate the credential of the requester. |
|
bdktoken |
The token that references the BDK within the SAKA encryption domain. If this parameter is specified, the mfr parameter must be null. |
|
mfr |
The numerical identifier of the manufacturer for which this BDK is assigned. If this parameter is specified, the bdktoken parameter must be null. |
|
ksn |
The KSN to use to generate the derived key. This must be exactly 10 bytes sent to the web service, and must be formatted as a hex-encoded string. |
|
plaintext |
The ciphertext to be decrypted. The ciphertext must be sent to the web service as a hex-encoded string. |
|
requesttype |
The type of MAC operation that must be performed by the DUKPT process. Valid choices are:
|
When SAKA receives the request, it verifies the credentials presented against its internal database—or an optional LDAP directory server—and determines their authorization to request the DukptMac service by verifying if they are a member of the EncryptionAuthorized group. Note that if using LDAP, this group and its members must be created in the LDAP directory as a distinct task of the SAKA installation process; when using the internal database on SAKA, this group is created automatically.
If the requester is authorized, SAKA proceeds to recover the BDK for this operation. If the manufacturer ID is provided in the web service call, the BDK associated with the manufacturer is recovered. If a BDK token is provided, the BDK is recovered based on that token. In this case, the user must also be a member of the DecryptionAuthorized group.
Using the BDK and portions of the provided KSN, an IPEK is derived. Using the IPEK, the derived MAC key (of the type requested for this transaction) is generated based on other portions of the KSN. The derived MAC key is then used to generate a MAC for the decoded plaintext input using the ANSI-defined algorithm for generating message authentication codes.
This web service operation does two kinds of operations based on the value of the requesttype parameter. When a customer's application sends a DUKPT-encrypted message to SAKA for decryption, the ATM may have included a MAC with the DUKPT message. The customer's application may extract the MAC from the message sent by the ATM, use the DukptMac web service operation to regenerate a MAC for the specified plaintext. The application may then compare the regenerated MAC with the one sent by the ATM to determine if they are identical: if they are, it indicates that the message was decrypted correctly.
In the second operation, the customer's application may need to send a response to the ATM on a business transaction. In this case, the application may want to send a MAC of the plaintext message-response so the ATM may determine if the integrity of the message-response is intact. In such a situation, the application will call the DukptMac operation and specify MAC_RESPONSE in the requesttype parameter. This tells SAKA, how it should cryptographically process the input parameters to generate the right MAC response.
Once the MAC has been generated, the following values will be returned, either as a JSON or XML string; in the case of SOAP, the JSON or XML string is embedded in the objectContent attribute of the CCReturnObject object:
|
DID |
The unique encryption domain identifier for the domain that serviced this request. |
|
SRID |
A unique request identifier for this transaction. |
|
BDKToken |
The BDKToken used to service this request (or null if the BDK token was not specified as a web service parameter). |
|
MFR |
The manufacture ID used to service this request (or null if the manufacturer ID was not specified as a web service parameter). |
|
KSN |
The KSN used to service this request. |
|
MAC |
The MAC generated from this request, formatted as a hex-encoded string. |
CCS Module ReencryptPINBlock Mechanics
The ReencryptPINBlock (RPB) operation decrypts a hex-encoded PIN block ciphertext string using a PIN encryption key derived from the BDK and KSN. The algorithm to use with the PIN encryption key is specified as a parameter to determine the type of decryption to be performed. The decrypted PIN block is then encrypted again using another derived PIN-encryption key. This second PIN encryption key is derived from the specified Terminal PIN Key (TPK) using the same KSN (as was specified for PIN decryption) and will re-encrypt the PIN Block using the same algorithm as before. Note that the TPK is used in an identical manner as the BDK for the re-encryption process. The RPB web service operation requires eight parameters:
|
DID |
The unique encryption domain identifier. |
|
username |
The username (service credential) within the encryption domain with the authorization to call this web service. The user requires the Decryption privilege to execute this operation. |
|
password |
The password of the username to authenticate the credential of the requester. |
|
bdktoken |
The token that references the BDK. The BDK is used to decrypt the supplied ciphertext. |
|
tpktoken |
The token that references the TPK. The TPK is used to re-encrypt the decrypted PIN block. Note that the escrow of the TPK is handled as a separate web service operation in the Key Management Service module of the SAKA; the TPK token must exist in SAKA for the RPB web service to be executed successfully. |
|
ksn |
The KSN to use to generate a derived key. This must be exactly 10 bytes sent to the web service, and must be formatted as a hex-encoded string. |
|
ciphertext |
The PIN Block ciphertext to be decrypted. The ciphertext must be sent to the web service as a hex-encoded string. |
|
algorithm |
The algorithm to use for this decryption. Valid choices are “TDES” and “AES” with the default value being “TDES”. Alternatively, a full transform can be specified in the form of “AES/CBC/ZeroBytePadding” if the default mode and padding of each derived key type needs to be overwritten. Continue reading the description of the web service mechanics for more details. |
When SAKA receives the request, it verifies the credentials presented against its internal database— or an optional LDAP directory server—and determines their authorization to request the ReencryptPINBlock service by verifying if they are a member of the DecryptionAuthorized group. Note that if using LDAP, this group and its members must be created in the LDAP directory as a distinct task of the SAKA installation process; when using the internal database on SAKA, this group is created automatically.
If the requester is authorized, SAKA proceeds to recover the BDK for this operation based on the BDK Token parameter. Using the BDK and portions of the provided KSN, an IPEK is derived. Using the IPEK, the derived key (of the type requested for this transaction) is generated based on other portions of the KSN.
The default cryptographic mode and padding for the RPB web service is the Electronic Code Book (ECB) and NoPadding, respectively with the TDES algorithm. While you can override this by specifying the full cryptographic algorithm, mode and padding in the web service parameter, most banking infrastructure use the “DESede/ECB/NoPadding” cryptographic transform for PIN block transaction processing. In this situation, specifying either “TDES” or not specifying any parameter for the algorithm parameter of the web service operation produces the same result.
|
DID |
The unique encryption doomain identifier for the domain that serviced this request. |
|
SRID |
A unique request identifier for this transaction. |
|
KSN |
The KSN used to service this request. |
|
ENCPIN |
The hex-encoded PIN block ciphertext as encrypted by the TPK using this KSN. |
KAM Web Service Operations
The KeyAppliance Module (KAM) web service application works by having client applications—whether they are e-commerce, payment processing, business intelligence, healthcare, or other applications that deal with sensitive data—send the sensitive data to SAKA through a standard Simple Object Access Protocol (SOAP)-based web service over Secure Hyper Text Transfer Protocol (HTTPS).
KAM Encryption Mechanics
For encrypting sensitive data, the web service call requires four parameters:
|
DID |
The unique encryption domain identifier. This is a numeric integer that logically represents the context within which the data is encrypted and tokenized. |
|
username |
The encryption domain username with the authorization to call this web service. |
|
password |
The password of the username to authenticate the credential of the requester. |
|
plaintext |
The sensitive data that must be encrypted and tokenized. |
When SAKA receives the request, it first verifies the credentials presented against its internal database or an LDAP directory server (depending on which is configured), and then determines their authorization to request the encryption service by determining if they are a member of an EncryptionAuthorized group. Note that if using LDAP, this group and its members must be created in the LDAP directory as a distinct task of the SAKA installation and configuration process; when using the SAKA internal database, this is performed automatically.
If the requester is authorized, SAKA uses an encryption key to encrypt the plaintext. It also uses a separate HMAC key to generate a unique HMAC of the plaintext. After performing these two cryptographic operations, it stores the ciphertext, the HMAC, the key-identifiers, and metadata about the request in the RDBMS. SAKA never stores the plaintext in the database or anywhere on the system—the plaintext is discarded immediately after the transaction. By default SAKA also generates a numerical token that is characteristically similar to the plaintext (16 digits for a credit-card number, 9 digits for a social security number, etc.) which can be used as a substitute for the plaintext data in applications.
Upon storing the data, SAKA replicates the transaction object to all other SAKA nodes within the same cluster and returns the token to the requester. The requesting application may use this token as a unique identifier for the plaintext and store it within its own database. The token can be configured to be identical in length to the plaintext data (up to a maximum 64 digits).
The replication latency between nodes within a cluster depends on the network capacity between nodes and the saturation of the network at the time of replication. The DEMO appliance provided by StrongKey on the internet has 1GbE ports and the network has light to moderate traffic on it; as a result, we have observed transactions to be replicated from one node to the other in an average of 1–2 seconds.
An illustration of the web service process is shown in the following diagram (to focus on the application's perspective, the replication details are not shown):
KAM Decryption Mechanics
For decrypting ciphertext, the web service call requires four parameters:
|
DID |
The unique encryption domain identifier. |
|
username |
The encryption domain username with the authorization to call this web service. |
|
password |
The password of the username to authenticate the credential of the requester. |
|
token |
The token—by default, a 16-digit number—referencing the object (given to applications during the original encryption call). |
When SAKA receives the request, it first verifies the credentials presented against its internal database or an optional LDAP directory server and then determines their authorization to request the decryption service by determining if they are a member of a DecryptionAuthorized group. Note that if using LDAP, this group and its members must be created in the LDAP directory as a distinct task of the SAKA installation and configuration process; when using the SAKA internal database, this is performed automatically.
If the requester is authorized, SAKA searches its RDBMS for the token, determines the identifier of the key that was used to encrypt it originally and uses that key to decrypt the ciphertext. If the key was rotated at some point due to PCI DSS or other security requirements, SAKA uses the rotated key to decrypt the ciphertext—applications are neither aware nor concerned about cryptographic key management operations when requesting encryption and/or tokenization services from SAKA.
After the decryption process, SAKA retrieves the identifier of the HMAC key originally used by the application and, with the HMAC key, recalculates a new HMAC with the just-decrypted plaintext. It then compares the original HMAC (stored after the successful encryption operation) with the just-calculated HMAC; if the two HMACs are identical, SAKA knows the decryption process was successful.
SAKA logs the decryption request—without storing or logging the sensitive plaintext—replicates the transaction object to all other SAKA nodes within the same cluster and returns the plaintext to the requester.
Notes on the Mechanics
Two separate keys are used for the encryption and HMAC calculation.
The default size of the AES encryption key is 256 bits. This can be customized to use either a 128-bit or 192-bit AES key by modifying the SAKA properties file (see 14—KAM Configuration for details).
The default size of the HMAC key is 256 bits. This can be customized to use either a 224-bit, 384-bit, or 512-bit key by modifying the SAKA properties file (see
14—KAM Configuration for details).The default duration for encryption key usage is one (1) month, while that of the HMAC key is one (1) year. At the start of a new month—starting with the first encryption request past midnight—SAKA starts using a new encryption key that it generates automatically based on configured policies; a new HMAC key is generated on the first day of a new calendar year. However, these durations can be customized to use keys on either a daily, weekly, monthly, or an annual basis in the SAKA properties file (see 14—KAM Configuration for details).
KAM Deletion Mechanics
SAKA can delete encrypted records from its internal database if a site's data retention policy demands it. For deleting ciphertext, the web service call requires four parameters:
|
DID |
The unique encryption domain identifier. |
|
username |
The encryption domain username with the authorization to call this web service. |
|
password |
The password of the username to authenticate the credential of the requester. |
|
token |
The token—by default, a 16-digit number—referencing the object (given to applications during the original encryption call). |
When SAKA receives the request, it first verifies the credentials presented against its internal database or an optional LDAP directory server and then determines their authorization to request the deletion service by determining if they are a member of a DeletionAuthorized group. Note that if using LDAP, this group and its members must be created in the LDAP directory as a distinct task of the SAKA installation and configuration process; when using the SAKA internal database, this is performed automatically.
If the requester is authorized, SAKA searches its RDBMS for the token; if found, the record is deleted and the deletion logged. The deletion is replicated to other nodes of the cluster before a response is returned to the calling application indicating whether or not the deletion was successful.
Once deleted, the original plaintext cannot be returned to any calling application. While the key that encrypted the original plaintext might still be present in SAKA—potentially, to decrypt other records encrypted by the same key—a successful call to the deletion web service permanently removes the record from the database. Note that this does not imply that sites using SAKA may not have other copies of the encrypted record on their backup tapes. It remains the responsibility of the site to ensure compliance to its data retention policy.
KAM Search Mechanics
Certain applications may have a need to search the SAKA internal database to determine if a specific piece of sensitive data exists. SAKA provides a web service method for performing this task. The method requires four parameters:
|
DID |
The unique encryption domain identifier. |
|
username |
The encryption domain username with the authorization to call this web service. |
|
password |
The password of the username to authenticate the credential of the requester. |
|
plaintext |
The sensitive data to for which to search. |
When SAKA receives the request, it verifies the credentials presented against its internal database or an optional LDAP directory server and then determines their authorization to request the search service by determining if they are a member of a SearchAuthorized group. Note that if using LDAP, this group and its members must be created in the LDAP directory as a distinct task of theSAKA installation process; when using the SAKA internal database, this group is created automatically.
If the requester is authorized, SAKA converts the plaintext to an HMAC and searches its RDBMS for the HMAC; if found, the token is returned to the caller and and the search is logged and replicated to other nodes. A non-null return value to the calling application indicates the search was successful.
KAM Entropy Mechanics
Certain applications may have a need for true random numbers generated from a certified hardware-based random number generator (RNG). Since SAKA includes a hardware RNG, it provides a web service for requesting and receiving true random numbers from its underlying RNG. The method requires four parameters:
|
DID |
The unique encryption domain identifier. |
|
username |
The encryption domain username with the authorization to call this web service. |
|
password |
The password of the username to authenticate the credential of the requester. |
|
bytes |
Number of bytes of entropy requested. The bytes are returned as Base64 encoded text. |
When SAKA receives the request, it verifies the credentials presented against its internal database or an optional LDAP directory server and then determines their authorization to request the entropy service by determining if they are a member of an EncryptionAuthorized group. Note that if using LDAP, this group and its members must be created in the LDAP directory as a distinct task of the SAKA installation process; when using the SAKA internal database, this group is created automatically.
If the requester is authorized, SAKA gathers the requested number of bytes of entropy from its cryptographic hardware module, Base64-encodes them and returns the encoded bytes to the calling application. While most applications are likely to Base64-decode the encoded bytesperhaps to seed a Pseudo-Random Number Generator (PRNG) in their application/system—some may choose to use the Base64-encoded text as-is—perhaps as truly random passwords or web session identifiers, etc.
KAM General Purpose Key Encryption Mechanics
For encrypting sensitive data using a General Purpose Key (GPK) previously stored on SAKA, the web service call requires the following parameters:
|
DID |
The unique encryption domain identifier. This is a numeric integer that logically represents the context within which the GPK is stored. |
|
username |
The encryption domain username with the authorization to call this web service. |
|
password |
The password of the username to authenticate the credential of the requester. |
|
gpktoken |
The token of the GPK. |
|
plaintext |
The sensitive data that must be encrypted. |
|
encoding |
The encoding in which to process this transaction. Valid values are Hex and Base64. The iv parameter must be encoded in this format. The ciphertext returned by this web service will be returned in this encoding. |
|
algorithm |
The algorithm transform to use for this encryption. The transform must be in the form of “algorithm/mode/padding.” |
|
iv |
An Initialization Vector to be used for this encryption. For ECB-mode encryption, the iv should be null. |
|
aad |
The Additional Authenticated Data which can be included in GCM-mode encryptions. This value can be null, even in GCM mode (in which case AAD is not required). |
When SAKA receives the request, it first verifies the credentials presented against its internal database or an LDAP directory server (depending on which is configured), and then determines their authorization to request the encryption service by determining if they are a member of both the EncryptionAuthorized group and DecryptionAuthorized group (decryption authorization is necessary to access the GPK key). Note that if using LDAP, these groups and their members must be created in the LDAP directory as a distinct task of the SAKA installation and configuration process; when using the SAKA internal database, this is performed automatically.
If the requester is authorized, SAKA locates and decrypt the GPK key. SAKA then initializes the encryption cipher using the algorithm and optionally iv and aad specified in the web service. The web service has been tested with the following algorithms:
- AES/ECB/ZeroBytePadding
- AES/ECB/PKCS7Padding
- AES/ECB/TBCPadding
- AES/ECB/X9.23Padding
- AES/ECB/ISO7816-4Padding
- AES/ECB/ISO10126-2Padding
- AES/CBC/ZeroBytePadding
- AES/CBC/PKCS7Padding
- AES/CBC/TBCPadding
- AES/CBC/X9.23Padding
- AES/CBC/ISO7816-4Padding
- AES/CBC/ISO10126-2Padding
- AES/OFB/NoPadding
- AES/CFB/NoPadding
- AES/GCM/NoPadding
Upon encrypting the data, SAKA encodes the encrypted bytes using the encoding specified in the web service and returns it to the calling application.
KAM General Purpose Key Decryption Mechanics
For decrypting sensitive data using a GPK previously stored on SAKA, the web service call requires the following parameters:
|
DID |
The unique encryption domain identifier. This is a numeric integer that logically represents the context within which the GPK is stored. |
|
username |
The encryption domain username with the authorization to call this web service. |
|
password |
The password of the username to authenticate the credential of the requester. |
|
gpktoken |
The token of the GPK. |
|
ciphertext |
The encrypted data that must be decrypted. |
|
encoding |
The encoding in which to process this transaction. Valid values are Hex and Base64. The iv and ciphertext parameters must be encoded in this format. |
|
algorithm |
The algorithm transform to use for this decryption. The transform must be in the form of “algorithm/mode/padding”. |
|
iv |
An Initialization Vector to be used for this decryption. For ECB mode decryption, the iv should be null. |
|
aad |
The Additional Authenticated Data which can be included in GCM mode decryptions. This value can be null, even in GCM mode (in which case AAD is not required). |
Upon decrypting the data, SAKA returns UTF-8-encoded plaintext to the calling application.
KAM Batch Operations
Some business operations require performing periodic cryptographic operations on millions of records. While the standard web services are capable of receiving such large requests individually, the operations can be made significantly more efficient by submitting the input data in an eXtensible Markup Language (XML) file and performing the operation on the appliance without authenticating and authorizing each request (except for the first), and by eliminating the network round-trips for each web service call.
SAKA provides four (4) web service methods for encrypting, decrypting, deleting, and searching for sensitive data using XML-based files in batch mode.
The XML input file conforms to the SKLESBatchInput element, defined in the SAKA XML Schema Definition (XSD) file supplied with the appliance. Any number of records may be processed through batch files more efficiently; the only limitation to the number of records in such a batch file would be the appliance's operating system limit on the file size.
NOTE: An XML input file with one million 16-digit credit card numbers, and conforming to the SAKA XSD, uses a little less than 40 megabytes of space, or approximately 25,000 records per megabyte of space. Based on this, a one-Gigabyte file can store 25 million input records. An input file with the maximum file size limitation of Linux (8 Terabytes) can accommodate 200 billion credit card numbers.
The appliance processes the input file in batch mode: it performs just a single authentication and authorization check, a single verification of the encryption domain's status and proceeds to execute the requested cryptographic operation for each record in the input file. It writes the result to a different XML file corresponding the SKLESBatchOutput element in the SAKA XSD. The input and output files may be transferred to and from the appliance using the Secure File Transfer Protocol (SFTP), secure NFS, or SAMBA over TLS.
KAM Relay Mechanics
To minimize the decryption of sensitive PAN data within the application network, SAKA supports a “relay” web service method permitting applications to relay a transaction to a payment gateway (PG). This is accomplished through a Hypertext Transfer Protocol Secure (HTTPS) POST method, or a Simple Object Access Protocol (SOAP) action within an HTTPS POST method.
The business benefit of using the relay web service is that the application dealing with the PG does not need to decrypt credit card numbers (CCN) before sending transaction to the gateway—SAKA performs this service (functioning like a proxy) on behalf of the application and, thus, reduces or eliminates the need for decrypting CCN. However, to relay transactions, SAKA must have direct network connectivity to the PG's web server, either over the internet or through a virtual private network.
Here is a sample representation of how an infrastructure might look when configured to use the relay web service to multiple payment gateways:
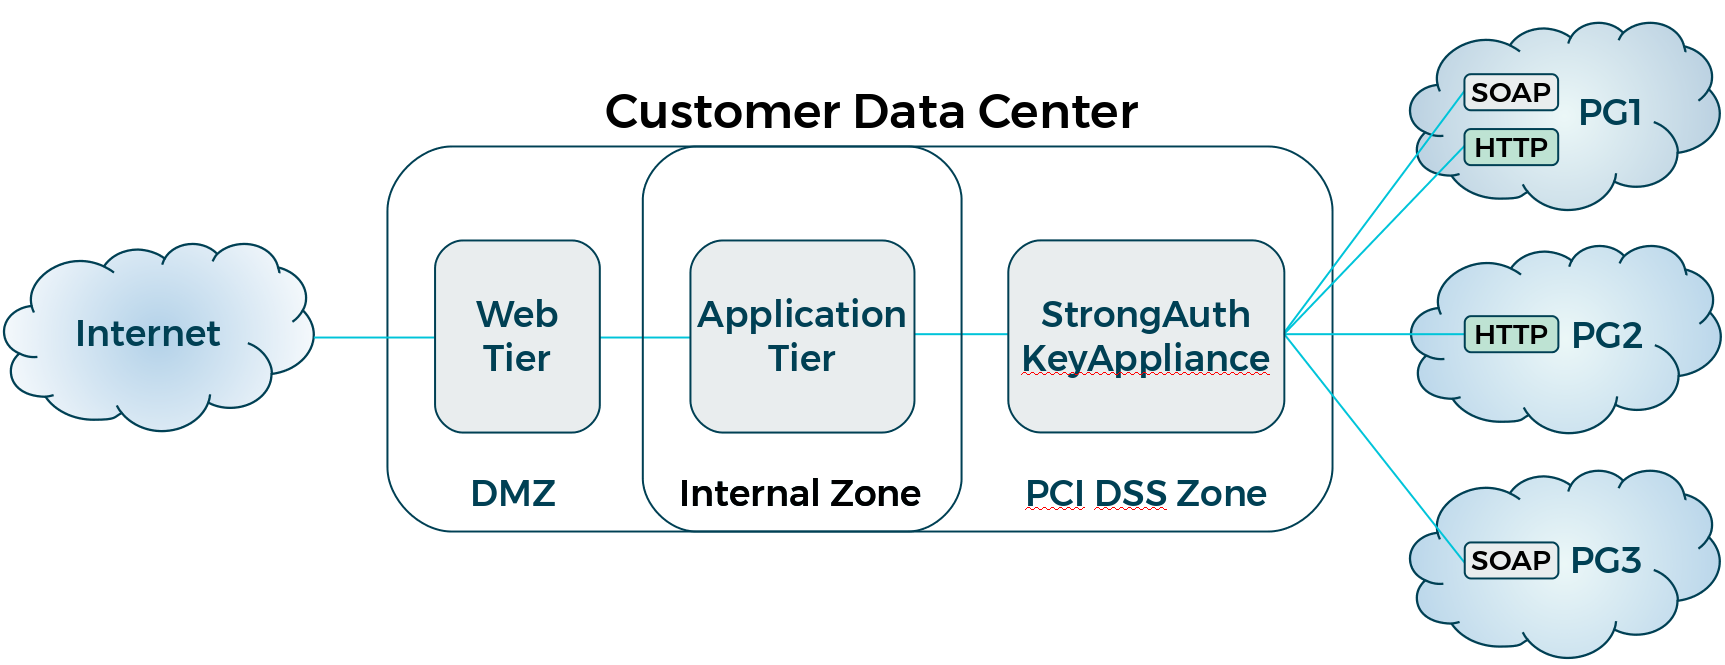
In this configuration, the site has the following:
A web tier in the demilitarized zone (DMZ) receiving customer transactions from the internet
An application tier with servers and databases representing business logic and data
A PCI zone containing SAKA
Three payment gateways: PG1, which offers both an HTTPS and SOAP interface to the transaction gateway; PG2, which only offers an HTTPS interface; and PG3, which only offers a SOAP interface
One may connect any number of payment gateways to SAKA as long as the gateways offer standard HTTPS or SOAP interfaces to their services.
When SAKA receives the request it verifies the credentials presented against its internal database or an optional LDAP directory server and determines their authorization to request the relay service by determining if they are a member of two groups—the RelayAuthorized group and the DecryptionAuthorized group. This is the only service that requires authorized requesters to be part of two groups. This is because the security of the appliance requires that tokens be decrypted and substituted for actual sensitive information and relayed to the payment gateway.
To use the relay web service, applications that normally communicate with the PG must be modified to communicate with SAKA—which requires seven (7) parameters to perform its task:
|
DID |
The unique encryption domain identifier. This is a numeric integer that logically represents the context in which data is encrypted and tokenized. Specify the DID to ensure the relay service can not only authenticate the request correctly, but also decrypt any tokens before relaying the transaction. |
|
username |
The username within the encryption domain that has authorization to call the web service. At most sites, this is a service credential used by the application communicating with SAKA. |
|
password |
The password of the username within the encryption domain to authenticate the credential of the requester. |
|
relayurl |
The URL of the payment gateway that receives transactions. The appliance checks to see if the supplied URL matches—completely or partially—URLs configured and authorized for use by the appliance for relaying transactions. For example, if https://test.authorize.net is configured as an authorized URL for this appliance, supplying the URL https://test.authorize.net/gateway/transact.dll in this parameter will allow the transaction to be relayed to the gateway (assuming all other checks pass). However, https://test.authorize.com/gateway/transact.dll will not. |
|
relayprotocol |
The web service only accepts HTTP- or SOAP-based relay requests; as such, this parameter must specify either HTTP or SOAP (uppercase) depending on the interface the PG offers. |
|
relayencoding |
While future versions of the web service will support additional encoding schemes, the appliance currently accepts only UTF-8 in this parameter. |
|
relaycontent |
Carries XML content conforming to the schema defined in |
Depending on the type of protocol specified in the relayprotocol parameter, the appliance builds a standard HTTPS POST message, or one encapsulating a SOAP request, and posts it to the specified URL. As part of relaying the transaction, the appliance can decrypt tokens specified in the relaycontent parameter and substitute decrypted content for them before posting it to the payment gateway's website.
The appliance waits for a response from the gateway and transmits the response back to the calling application without interpreting the response. All relay transactions are logged in the application server's logs (however, sensitive data is never logged).
Since the relay web service works on standard SOAP over HTTPS, any programming environment that supports these two protocols can consume the service. StrongKey supplies two sample Java clients that show how to consume the service using the HTTPS and the SOAP protocols.
HTTPS Interface
A few notes about the HTTPS interface for the relay web service:
The relay service only performs HTTP POSTs; GETs are not supported at this time.
The service allows for specifying any number of HTTP headers, HTTP parameters, and SAKA tokens that need decrypting and substituting in the relay request to the gateway.
All headers, parameters and tokens are specified in XML elements that must conform to the supplied
SKLESRelaySchema.xsd. If in doubt about the XML, test your sample XML withxmllint(on the Linux platform) against the XSD file. Fix any errors before sending the XML to the appliance.The appliance will not print any sensitive decrypted/detokenized information in the server log.
SOAP Interface
A few notes about the SOAP interface for the relay web service:
The SOAP message sent to SAKA for the relay request embeds another SOAP Envelope containing the message to be relayed to the payment gateway. This might be confusing initially, but is acceptable to the appliance. Just make sure that samples of XML created for testing pass validation tests using
xmllintagainst the XSD defined inSKLESRelaySchema.xsd.The relay service only performs HTTP POSTs; GETs are not supported at this time.
The service allows for specifying any number of HTTP headers. HTTP parameters are not supported in this interface.
The appliance will not print any sensitive decrypted/detokenized information in the server log.
KMS Web Service Operations
The Key Management Service (KMS) web service application supports an array of web services for managing ANSI X9.24-1:2009 DUKPT keys. It works by having client applications send requests to the KMS through a standard SOAP- or REST-based web services over HTTPS.
SOAP-based web service calls can be expected to return a CCReturnObject (see definition below). In the case of some errors, anticipate the return of either StrongKeyLiteExceptions or CCExceptions.
REST-based web service calls return HTTP Status Codes corresponding with the success or type of failure encountered. Successful operations will always return a 200 OK alongside either a JSON or XML response. A JSON will be returned unless the strongkeylite.cfg.property.ccsresponseformat property is overwritten on SAKA to specify that XML responses should be returned. Other valid Response Statuses specific to failure conditions include:
400 Bad Request
401 Unauthorized
404 Not Found
500 Internal Server Error
CCReturnObject
The following example defines the CCReturnObject type:
|
# |
CCReturnObject XML Content |
|---|---|
|
1 |
<xs:complexType name="CCReturnObject"> |
|
2 |
<xs:sequence> |
|
3 |
<xs:element name="did" type="xs:long" minOccurs="0"/> |
|
4 |
<xs:element name="messagekey" type="xs:string" minOccurs="0"/> |
|
5 |
<xs:element name="message" type="xs:string" minOccurs="0"/> |
|
6 |
<xs:element name="objectContent" type="xs:anyType" minOccurs="0"/> |
|
7 |
<xs:element name="objectType" type="xs:int" minOccurs="0"/> |
|
8 |
<xs:element name="srid" type="xs:long" minOccurs="0"/> |
|
9 |
</xs:sequence> |
|
10 |
</xs:complexType> |
The following table explains each line of the above XML file:
|
# |
CCReturnObject XML Content Explanation |
|---|---|
|
1 |
The start of the CCReturnObject element. |
|
2 |
The start of a sequence. |
|
3 |
The DID element—the identifier of the encryption domain that serviced this request. |
|
4 |
The messagekey element—a message code used by the appliance as a reference. Messages of the format 'SKL-MSG-NNNN' indication a success and message of the format 'SKL-ERR-NNNN' indication failure (where NNNN are numerals). |
|
5 |
The message element—a message which describes a success or failure condition. |
|
6 |
The objectContent element—a JSON or XML that contains the result of a successful web service operation. A JSON will be returned by default unless the encryption domain or the SAKA |
|
7 |
The objectType element—an int value that identifies the kind of object being returned. 1 = CC_DATA 2 = CC_DIGEST 3 = CC_ENCRYPTED_OBJECT 4 = CC_ENCRYPTED_SYMMETRIC_KEY 5 = CC_ENCRYPTED_SYMMETRIC_KEYS 6 = TOKEN 7 = DECRYPTED_XML 8 = REENCRYPTED_PIN 9 = KEY_CHECK_VALUE 10 = MAC_REQUEST 11 = MAC_RESPONSE |
|
8 |
The srid element—a unique request identifier for this transaction. |
|
9 |
The end of the sequence. |
|
10 |
The end of the CCReturnObject. |
CCKeyComponentType
The CCKeyComponentType element is used by the loadKeyComponent web service to transport a Key Component and all its metadata as a single object. The SOAP interface will pass this parameter to the web service as a structured object, whereas the REST interface will pass a JSON representation of that structured object.
The following example defines the CCKeyComponentType element using the SOAP interface.
|
# |
CCKeyComponentTypeXML Content |
|---|---|
|
1 |
<xs:complexType name="CCKeyComponentType"> |
|
2 |
<xs:sequence> |
|
3 |
<xs:element name="KeyName" type="xs:string" minOccurs="0"/> |
|
4 |
<xs:element name="KeyComponent" type="xs:string" minOccurs="0"/> |
|
5 |
<xs:element name="KeyCheckValue" type="xs:string" minOccurs="0"/> |
|
6 |
<xs:element name="KeyAlgorithm" type="xs:string" minOccurs="0"/> |
|
7 |
<xs:element name="KeySize" type="xs:string" minOccurs="0"/> |
|
8 |
<xs:element name="KValue" type="xs:int" minOccurs="0"/> |
|
9 |
<xs:element name="NValue" type="xs:int" minOccurs="0"/> |
|
10 |
</xs:sequence> |
|
11 |
</xs:complexType> |
The following table explains each line of the above XML file:
|
# |
CCKeyComponentTypeXML Content Explanation |
|---|---|
|
1 |
The start of the CCKeyComponentType element. |
|
2 |
The start of a sequence. |
|
3 |
The KeyName element—the identifier for the key that this Key Component belongs to. All Key Components in a set must have the same KeyName. |
|
4 |
The KeyComponent element—a hex-encoded string representation of this Key Component. |
|
5 |
The KeyCheckValue element—a hex-encoded string representation of the Key Check Value (KCV) for this Key Component. The KCV will be checked against the Key Component to verify the integrity of this Key Component. |
|
6 |
The KeyAlgorithm element—the algorithm of the key to which this Key Component belongs. Valid values are AES and TDES. |
|
7 |
The KeySize element—the size of the key to which this Key Component belongs. Only keys of length 128 are currently supported. |
|
8 |
The KValue element—a numerical identifier for this Key Component in the set of Key Components. Must be one of the int values 1, 2, or 3. |
|
9 |
The NValue element—a numerical representation of the total amount of Key Components in this set. Must be one of the int values 2 or 3. |
|
10 |
The end of the sequence. |
|
11 |
The end of the CCKeyComponentType element. |
The following shows an example CCKeyComponentType in JSON format (REST interface):
{
  "KeyName": "myBDK",
  "KeyComponent": "4010E7B1F6A91C40217A253E3D3131CA",
  "KeyAlgorithm": "AES",
  "KeyCheckValue": "A60EA8",
  "KeySize": "128",
  "KValue": 1,
  "NValue": 3
}
CCCryptographicMaterialType
The CCCryptographicMaterialType is used as a sub-element of CCEncryptedAnsiX9241KeyType. It is used to store different types of encoded cryptographic material (i.e., binary data).
The following example defines the CCCryptographicMaterialType type:
|
# |
CCCryptographicMaterialType XML Content |
|---|---|
|
1 |
<xsd:complexType name="CCCryptographicMaterialType"> |
|
2 |
<xsd:choice> |
|
3 |
<xs:element name="Base64Data" type="xs:string"/> |
|
4 |
<xs:element name="HexData" type="xs:string"/> |
|
5 |
</xsd:choice> |
|
6 |
</xsd:complexType> |
The following table explains each line of the above XML file:
|
# |
CCCryptographicMaterialTypeXML Content Explanation |
|---|---|
|
1 |
The start of the CCCryptographicMaterialType element. |
|
2 |
The start of a choice. |
|
3 |
The Base64Data element—cryptographic material encoded using Base64. |
|
4 |
The HexData element—cryptographic material encoded using hex. |
|
5 |
The end of the choice. |
|
6 |
The end of CCCryptographicMaterialType. |
CCEncryptedAnsiX9241KeyType
The CCEncryptedAnsiX9241KeyType is used by the storeAnsiX9241Key and replaceAnsiX9241Key web services to transport a key's metadata (and optionally an encrypted key) as a single object. The SOAP interface will pass this parameter to the web service as a structured object, whereas the REST interface will pass a JSON representation of that structured object.
When using the SOAP interface, the following example defines the CCEncryptedAnsiX9241KeyType type:
|
# |
CCEncryptedAnsiX9241KeyType XML Content |
|---|---|
|
1 |
<xs:complexType name="CCEncryptedAnsiX9241KeyType"> |
|
2 |
<xs:sequence> |
|
3 |
<xs:element name="SID" type="xs:int"/> |
|
4 |
<xs:element name="DID" type="xs:int"/> |
|
5 |
<xs:element name="AKID" type="xs:int"/> |
|
6 |
<xs:element name="SRID" type="xs:int"/> |
|
7 |
<xs:element name="BankID" type="xs:int"/> |
|
8 |
<xs:element name="TerminalID" type="xs:int"/> |
|
9 |
<xs:element name="TerminalType" type="xs:string"/> |
|
10 |
<xs:element name="KeyName" type="xs:string"/> |
|
11 |
<xs:element name="ParentToken" type="xs:string"/> |
|
12 |
<xs:element name="Token" type="xs:string"/> |
|
13 |
<xs:element name="EncryptedKey" type="xs:CCCryptographicMaterialType"/> |
|
14 |
<xs:element name="KeyType" type="xs:string"/> |
|
15 |
<xs:element name="KeyAlgorithm" type="xs:string"/> |
|
16 |
<xs:element name="KeyEncoding" type="xs:string"/> |
|
17 |
<xs:element name="KeySize" type="xs:string"/> |
|
18 |
<xs:element name="KCV" type="xs:string"/> |
|
19 |
<xs:element name="Notes" type="xs:string"/> |
|
20 |
</xs:sequence> |
|
21 |
</xs:complexType> |
The following table explains each line of the above XML file:
|
# |
CCEncryptedAnsiX9241KeyType XML Content Explanation |
|---|---|
|
1 |
The start of the CCEncryptedAnsiX9241KeyType element. |
|
2 |
The start of a sequence. |
|
3 |
The SID element—the server ID of the server that processed this request. This element is only used in the event the server returns this object to the calling application. When using this object in a web service call, this element should be NULL. |
|
4 |
The DID element—the domain ID of the server that processed this request. This element is only used in the event the server returns this object to the calling application. When using this object in a web service call, this element should be NULL. |
|
5 |
The AKID element—the ANSI Key ID assigned to the stored key. This element is only used in the event the server returns this object to the calling application. When using this object in a web service call, this element should be NULL. |
|
6 |
The SRID element—a unique request ID for this transaction. This element is only used in the event the server returns this object to the calling application. When using this object in a web service call, this element should be NULL. |
|
7 |
The BankID element—a numeric identifier for the bank with which this key is associated. |
|
8 |
The TerminalID element—an optional numerical identifier for the terminal with which this key is associated. |
|
9 |
The TerminalType element—an optional string identifier for the type of terminal to which this key belongs. |
|
10 |
The KeyName element—the name associated with this key. If ParentToken is null, this value will be used to recover the pre-load key components of this key. Otherwise, this value is primarily used for logging. |
|
11 |
The ParentToken element—the token identifier of the wrapping key used to encrypt this ANSI key. If this ANSI key is being assembled from pre-loaded key components, this element must be NULL. |
|
12 |
The Token element—the token identifier created for this stored key. This element is only used in the event the server returns this object to the calling application. When using this object in a web service call, this element should be NULL. |
|
13 |
The EncryptedKey element—a CCCryptographicMaterialType object that stores the encoded encrypted key bytes. If this ANSI key is being assembled from pre-loaded key components, this element must be NULL. |
|
14 |
The KeyType element—the type of key that is being stored. Valid values are BDK, MAC, LTMK, TMK, and TPK. |
|
15 |
The KeyAlgorithm element—the algorithm associated with this key. When this stored key is referenced by other web service calls, this algorithm will be used exclusively with this key. Valid values are AES and TDES. |
|
16 |
The KeyEncoding element—the type of encoding used in the EncryptedKey element. Valid values include Hex and Base64. If this ANSI key is being assembled from pre-loaded key components, this element must be NULL. |
|
17 |
The KeySize element—the size of the key being stored. Currently the only supported Keysize is 128. |
|
18 |
The KCV element—a hex-encoded string representation of the KCV for this Key Component. The KCV will be checked against the assembled/decrypted key to verify the integrity of this key. |
|
19 |
The Notes element—any notes to store alongside the key. |
|
20 |
The end of the sequence. |
|
21 |
The end of CCEncryptedAnsiX9241KeyType. |
The following shows an example CCEncryptedAnsiX9241KeyType in JSON format (REST interface):
{
  "BankID": 1,
  "TerminalID": 123,
  "TerminalType": "DEFAULT",
  "KeyName": "myTPK",
  "ParentToken": "1000000000000001",
  "EncryptedKey": "982D868704702DF9070922F1DFB260A8",
  "KeyType": "TPK",
  "KeyAlgorithm": "TDES",
  "KeyEncoding": "Hex",
  "KeySize": "128",
  "KCV": "6776FF",
  "Notes": "myNotes"
}
This is an example of storing a key wrapped by a previously stored key. If this request were storing a key from key components, the ParentToken, EncryptedKey, and KeyEncoding elements would be omitted. In that case, the KeyName element would be crucial to identify the stored Key Components used to assemble the key.
KMS Module loadKeyComponent Mechanics
The loadKeyComponent (LKC) operation receives a CCKeyComponentType object (along with other parameters to authenticate and authorize the transaction) to store a key component for use with calls to the loadBaseDerivationKey or storeAnsiX9241Key web services. This operation requires four parameters:
|
DID |
The unique encryption domain identifier. |
|
username |
The username (service credential) within the encryption domain with the authorization to call this web service. The credential requires the Key Component Operator (KMO) privilege. |
|
password |
The password of the username to authenticate the credential of the requester. |
|
keycomp |
The CCKeyComponentType object that contains the key component and metadata. |
When SAKA receives the request, it verifies the credentials presented in the web service operation against its internal database, or an optional LDAP directory server, and then determines their authorization to request the loadKeyComponent service by determining if they are a member of the KMOAuthorized group. If using LDAP, this group and its members must be created in the LDAP directory as a distinct task of the SAKA installation process; when using the SAKA internal database, this group is created automatically.
If the requester is authorized, SAKA parses out the contents of the CCKeyComponentType object. The KCV is used in conjunction with the Key Component to verify the integrity of the Key Component.
On success, the following values will be returned, either as a JSON or XML string; in the case of SOAP, the JSON or XML string is embedded in the objectContent attribute of the CCReturnObject object.
|
DID |
The unique encryption domain identifier for the domain that serviced this request. |
|
SRID |
A unique request identifier for this transaction. |
|
KeyName |
The KeyName of this loaded component. |
|
K |
The K value of this loaded component. |
|
N |
The N value of this loaded component. |
|
KCV |
The KCV of this loaded component. |
KMS Module loadBaseDerivationKey Mechanics
The loadBaseDerivationKey (LBK) operation takes a set of previously stored Key Components and assembles them into a BDK. This BDK is not persisted to the appliance and is used to process transactions in the CardCryptoService (CCS) Servlet. The loadBaseDerivationKey web service requires six parameters:
|
DID |
The unique encryption domain identifier. |
|
username |
The username (service credential) within the encryption domain with the authorization to call this web service. The credential requires the Key Component Custodian (KMO) privilege. |
|
password |
The password of the username to authenticate the credential of the requester. |
|
keyname |
Identifier for the assembled key. This must match the keyname provided for each of this key's Key Components submitted to the loadKeyComponent web service. |
|
kcv |
Hex-encoded string representing the KCV for the assembled key. |
|
mfr |
The numerical identifier of the manufacturer for which this BDK is assigned. Please see Chapter 5 for a detailed explanation of Manufacturer IDs. |
When SAKA receives the request, it verifies the credentials presented against its internal database—or an optional LDAP directory server—and determines their authorization to request the loadBaseDerivationKey service by verifying if they are a member of the KMCAuthorized group. If using LDAP, this group and its members must be created in the LDAP directory as a distinct task of the SAKA installation process; when using the SAKA internal database, this group is created automatically.
If the requester is authorized, SAKA proceeds to check for the key components of this key. If all the necessary key components are found, the BDK is assembled from these key components. The KCV provided in the web service call is compared to the KCV of this generated key. If they do not match, the integrity of the key cannot be confirmed and the request will fail. If the integrity of the key is confirmed, the key is ready for use with CCS web services.
NOTE: If the application server or the appliance is rebooted, the assembled key will be erased and must be reloaded into the appliance. If permanent storage is desired, refer to the storeAnsiX9241Key web service.
Once the BDK is successfully loaded, the following values will be returned, either as a JSON or XML string; in the case of SOAP, the JSON or XML string is embedded in the objectContent attribute of the CCReturnObject object:
|
DID |
The unique encryption domain identifier for the domain that serviced this request. |
|
SRID |
A unique request identifier for this transaction. |
|
KCV |
The KCV of this loaded component. |
KMS Module generateBaseDerivationKey Mechanics
The generateBaseDerivationKey (GBK) operation uses the cryptographic hardware module of the appliance to generate a new 128-bit key that can be used for a Base Derivation Key as defined by the ANSI X9.24-1 DUKPT standard. The web service operation requires four parameters:
|
DID |
The unique encryption domain identifier. |
|
username |
The username (service credential) within the encryption domain with the authorization to call this web service. The user requires the Key Management Custodian privilege to execute this operation. |
|
password |
The password of the username to authenticate the credential of the requester. |
|
mfr |
The numerical identifier of the manufacturer for which this BDK is assigned. In this web service, this value is used primarily for logging purposes. |
When SAKA receives the request, it verifies the credentials presented against its internal database—or an optional LDAP directory server—and determines their authorization to request the GBK service by verifying if they are a member of the KMCAuthorized group. If using LDAP, this group and its members must be created in the LDAP directory as a distinct task of the SAKA installation process; when using the internal database on SAKA, this group is created automatically.
If the requester is authorized, SAKA utilizes the True Random Number Generator (TRNG) from the appliance's cryptographic hardware module to generate a new 128-bit key. This key is divided into three key components. The key components are packaged in CCKeyComponentType objects along with their corresponding KCV and other metadata. Additionally, a fourth CCKeyComponentType object is created that does not store a key component, but contains the KCV of the assembled BDK.
Once the CCKeyComponentType objects are created, in the case of SOAP, an array of these objects will be returned. In the case of REST, a JSON representation of the array is returned:
|
CCKeyComponentTypeArray[0] |
Contains the first key component with KCV and metadata. |
|
CCKeyComponentTypeArray[1] |
Contains the second key component with KCV and metadata. |
|
CCKeyComponentTypeArray[2] |
Contains the third key component with KCV and metadata. |
|
CCKeyComponentTypeArray[3] |
Contains only the KCV of the assembled BDK (does not include the assembled BDK itself). |
An example JSON array response for KMS Module's GBK service:
[{
 "KeyName": "0",
 "KeyComponent": "F540DF52C1E3957D0B69BE23E443C003",
 "KeyCheckValue": "D35DF4",
 "KeyAlgorithm": "AES",
 "KeySize": "128",
 "K": 1,
 "N": 3
}, {
 "KeyName": "0",
 "KeyComponent": "EA60664815BF97F1692315842D331437",
 "KeyCheckValue": "6A3D7F",
 "KeyAlgorithm": "AES",
 "KeySize": "128",
 "K": 2,
 "N": 3
}, {
 "KeyName": "0",
 "KeyComponent": "554548549AFB786036FFF422D9DEBC54",
 "KeyCheckValue": "FB1843",
 "KeyAlgorithm": "AES",
 "KeySize": "128",
 "K": 3,
 "N": 3
}, {
 "KeyCheckValue": "4B0333"
}]
KMS Module generateInitialKey Mechanics
The generateInitialKey (GIK) operation uses a previously loaded BDK and the supplied device serial number (DSN) to generate and return an Initial Key (sometimes called the Initial PIN Encryption Key or IPEK). The manner in which the Initial Key is returned to the calling application is determined by the returntype option.
The GIK web service operation requires seven parameters:
|
DID |
The unique encryption domain identifier. |
|
username |
The username (service credential) within the encryption domain with the authorization to call this web service. The user requires the Key Management Custodian privilege to execute this operation. |
|
password |
The password of the username to authenticate the credential of the requester. |
|
mfr |
The numerical identifier of the manufacturer for which BDK will be used to derive the Initial Key. The BDK must have already been loaded by the loadBDK web service. |
|
DSN |
The DSN to use to generate a derived key. This must be either an 11-byte hex-encode string (43 bits of data) or 15-byte hex-encoded string (59 bits). Using the former, the server will automatically pad the DSN with the hex value “FFFF.” |
|
PublicKeyToken |
The token which identifies the public key that will be encrypting the Initial Key. Can be null when returntype equals KeyComponents. |
|
ReturnType |
The method in which to return the Initial Key. Currently the only accepted value is KeyComponents. |
When SAKA receives the request, it verifies the credentials presented against its internal database—or an optional LDAP directory server—and determines their authorization to request the generateInitialKey service by verifying if they are a member of the KMCAuthorized group. If using LDAP, this group and its members must be created in the LDAP directory as a distinct task of the SAKA installation process; when using the internal database on the SAKA, this group is created automatically.
If the requester is authorized, SAKA proceeds to recover the BDK for this operation based on the Manufacturer ID. Using the BDK and portions of the provided DSN, an initial key is derived. This key is broken up into three key components. These key components are packaged in CCKeyComponentType objects along with their KCV and other metadata. A fourth CCKeyComponentType object is created that does not contain a key component but contains the KCV of the Initial Key.
Once the CCKeyComponentType objects are created—using SOAP—an array of these objects will be returned. Using REST, a JSON representation of the array is returned:
|
CCKeyComponentTypeArray[0] |
Contains the first key component with KCV and metadata. |
|
CCKeyComponentTypeArray[1] |
Contains the second key component with KCV and metadata. |
|
CCKeyComponentTypeArray[2] |
Contains the third key component with KCV and metadata. |
|
CCKeyComponentTypeArray[3] |
Contains only the KCV of the assembled BDK (does not include the assembled BDK itself). |
An example JSON array response for KMS Module's generateInitialKey service:
[{
 "KeyName": "0",
 "KeyComponent": "F540DF52C1E3957D0B69BE23E443C003",
 "KeyCheckValue": "D35DF4",
 "KeyAlgorithm": "AES",
 "KeySize": "128",
 "K": 1,
 "N": 3
}, {
 "KeyName": "0",
 "KeyComponent": "EA60664815BF97F1692315842D331437",
 "KeyCheckValue": "6A3D7F",
 "KeyAlgorithm": "AES",
 "KeySize": "128",
 "K": 2,
 "N": 3
}, {
 "KeyName": "0",
 "KeyComponent": "554548549AFB786036FFF422D9DEBC54",
 "KeyCheckValue": "FB1843",
 "KeyAlgorithm": "AES",
 "KeySize": "128",
 "K": 3,
 "N": 3
}, {
	"KeyCheckValue": "4B0333"
}]
KMS Module storeAnsiX9241Key Mechanics
The storeAnsiX9241Key (SDK) operation is used for persistent, secure storage of ANSI X-924.1 keys in SAKA. The web service receives a CCEncryptedAnsiX9241KeyType object (along with other parameters to authenticate and authorize the transaction) containing all the metadata necessary to store the key.
There are two methods for storing a key on the appliance using the values from the CCEncryptedAnsiX9241KeyType. The first involves assembling the key from a set of key components that were previously loaded through the loadKeyComponent web service. The second method is to decrypt an encrypted key using a previously stored key as the wrapping key.
The web service automatically determines the attempted method of key storage, depending on whether the ParentToken value of the CCEncryptedAnsiX9241KeyType object is null or not. The SDK web service operation requires four parameters:
|
DID |
The unique encryption domain identifier. |
|
username |
The username (service credential) within the encryption domain with the authorization to call this web service. The user requires at minimum the Key Management Administrator and encryption privileges to execute this operation. If the ANSI key is a wrapped key, then the decryption privilege is also required to recover the wrapping key. |
|
password |
The password of the username to authenticate the credential of the requester. |
|
encansikey |
The CCEncryptedAnsiX9241KeyType object that contains the key component and metadata. |
When SAKA receives the request, it verifies the credentials presented against its internal database—or an optional LDAP directory server—and determines their authorization to request the storeAnsiX9241Key service by verifying if they are a member of the KMAAuthorized and EncryptionAuthorized groups. If using LDAP, this group and its members must be created in the LDAP directory as a distinct task of the SAKA installation process; when using the internal database on the SAKA, this group is created automatically.
If the requester is authorized, the SAKA proceeds to parse the CCEncryptedAnsiX9241KeyType object. Depending on what parameters are available, the code will branch into one of two paths:
If a ParentToken parameter is specified, the appliance will make an additional check to verify if the user is a member of the DecryptionAuthorized group. If authorized, the wrapping key will be recovered from secure storage for use in this transaction. The wrapping key is used to decrypt the provided EncryptedKey data.
If a ParentToken parameter is not specified, the appliance will search it's internal maps for Key Components associated with the key specified by the KeyName. If the necessary key components are found, the key is assembled from these components (and the components subsequently erased).
Once the appliance has assembled/decrypted the ANSI key, a KCV is calculated and compared with the provided KCV. If they do not match, the integrity of the key cannot be confirmed and the request will fail. If the integrity of the key is confirmed, the key is securely stored in the appliance.
Once the ANSI key is successfully stored, the following values will be returned, either as a JSON or XML string; in the case of SOAP, the JSON or XML string is embedded in the objectContent attribute of the CCReturnObject object:
|
DID |
The unique encryption domain identifier for the domain that serviced this request. |
|
SRID |
A unique request identifier for this transaction. |
|
Token |
The token reference to this encrypted ANSI key. |
|
KeyName |
The identifier used to reference this key in the request. |
KMS Module replaceAnsiX9241Key Mechanics
The replaceAnsiX9241Key (RDK) operation is used for persistent, secure storage of ANSI X-924.1 keys in SAKA. The web service receives a CCEncryptedAnsiX9241KeyType object (along with other parameters to authenticate and authorize the transaction) that contains all the metadata necessary to store the key. While behaving similarly to the storeAnsiX9241Key web service, this web service additionally marks another—previously stored—ANSI key as “retired,” so the newly stored ANSI key can replace it.
There are two methods for replacing a key on the appliance using the values from the CCEncryptedAnsiX9241KeyType element. The first involves assembling the key from a set of key components that were previously loaded through the loadKeyComponent web service. The second method is to decrypt an encrypted key using a previously stored key as the wrapping key.
The web service will automatically know which method of key replacement you are attempting based on whether the ParentToken value of the CCEncryptedAnsiX9241KeyType object is NULL or not.
The RDK web service operation requires four parameters:
|
DID |
The unique encryption domain identifier. |
|
username |
The username (service credential) within the encryption domain with the authorization to call this web service. The user requires the Key Management Administrator privilege and the encryption privilege at minimum to execute this operation. If the ANSI key is a wrapped key, then the decryption privilege is also required to recover the wrapping key. |
|
password |
The password of the username to authenticate the credential of the requester. |
|
encansikey |
The CCEncryptedAnsiX9241KeyType object that contains the key component and metadata. |
When SAKA receives the request, it verifies the credentials presented against its internal database—or an optional LDAP directory server—and determines their authorization to request the replaceAnsiX9241Key service by verifying if they are a member of the KMAAuthorized and EncryptionAuthorized groups. If using LDAP, this group and its members must be created in the LDAP directory as a distinct task of the SAKA installation process; when using the internal database on the SAKA, this group is created automatically.
If the requester is authorized, SAKA parses the CCEncryptedAnsiX9241KeyType object. Depending on what parameters are specified, the code will branch into one of two paths:
If a ParentToken is specified, the appliance will make an additional check to verify if the user is a member of the DecryptionAuthorized group. If authorized, the wrapping key will be recovered from secure storage for use in this transaction. The wrapping key is used to decrypt the provided EncryptedKey data.
If a ParentToken is not specified, the appliance will search it's internal maps for Key Components associated with the key specified by the KeyName. If the necessary key components are found, the key is assembled from these components (and the components are subsequently erased).
Once the appliance has assembled/decrypted the ANSI key, a KCV is calculated and compared with the provided KCV. If they do not match, the integrity of the key cannot be confirmed and the request will fail. If the integrity of the key is confirmed, the key is ready to be securely stored. Within a single transaction, the to-be-replaced token is marked as “retired.” The replacement key is then encrypted and stored by the appliance. If either action in this two-phase transaction fails, the entire transaction is rolled back.
Once the ANSI key is successfully stored, the following values will be returned, either as a JSON or XML string; in the case of SOAP, the JSON or XML string is embedded in the objectContent attribute of the CCReturnObject object:
|
DID |
The unique encryption domain identifier for the domain that serviced this request. |
|
SRID |
A unique request identifier for this transaction. |
|
Token |
The token reference to this encrypted ANSI key. |
|
KeyName |
The identifier used to reference this key in the request. |
KMS Module deleteAnsiX9241Key Mechanics
The deleteAnsiX9241Key (DLK) operation is used to delete an ANSI key previously stored on the appliance. The DLK web service operation requires five parameters:
|
DID |
The unique encryption domain identifier. |
|
username |
The username (service credential) within the encryption domain with the authorization to call this web service. The user requires the Key Management Administrator privilege and Deletion privilege to execute this operation. |
|
password |
The password of the username to authenticate the credential of the requester. |
|
bankid |
An optional bank identifier used to identify this ANSI key. Currently only used for logging purposes. |
|
KeyToken |
The token that references the ANSI key to be deleted. |
When SAKA receives the request, it verifies the credentials presented against its internal database—or an optional LDAP directory server—and determines their authorization to request the DLK service by verifying if they are a member of the KMCAuthorized and DeletionAuthorized groups. If using LDAP, this group and its members must be created in the LDAP directory as a distinct task of the SAKA installation process; when using the internal database on the SAKA, this group is created automatically.
If the requester is authorized, SAKA locates the key identified by the KeyToken parameter. Once identified, the record is deleted from the appliance's database. The following values will be returned, either as a JSON or XML string; in the case of SOAP, the JSON or XML string is embedded in the objectContent attribute of the CCReturnObject object:
|
DID |
The unique encryption domain identifier for the domain that serviced this request. |
|
SRID |
A unique request identifier for this transaction. |
|
BankID |
The bank ID used in this request. |
|
KeyToken |
The token reference deleted by this request. |
KMS Module updateAnsiX9241Key Mechanics
The updateAnsiX9241Key (UPK) operation is used to update the status and/or the notes associate with an ANSI key previously stored on the appliance. The UPK web service operation requires seven parameters:
|
DID |
The unique encryption domain identifier. |
|
username |
The username (service credential) within the encryption domain with the authorization to call this web service. The user requires the Key Management Administrator privilege to execute this operation. |
|
password |
The password of the username to authenticate the credential of the requester. |
|
bankid |
An optional bank identifier used to identify this ANSI key. Currently only used for logging purposes. |
|
KeyToken |
The token that references the ANSI key to be deleted. |
|
NewStatus |
The optional updated status for this ANSI key. Valid values for NewStatus are Active, Inactive, Suspended, and Retired. |
|
NewNotes |
The optional updated notes for this ANSI key. |
When SAKA receives the request, it verifies the credentials presented against its internal database—or an optional LDAP directory server—and determines their authorization to request the UPK service by verifying if they are a member of the KMCAuthorized group. If using LDAP, this group and its members must be created in the LDAP directory as a distinct task of the SAKA installation process; when using the internal database on the SAKA, this group is created automatically.
If the requester is authorized, SAKA locates the key identified by the KeyToken parameter. Once identified, the record for this key is updated in the appliance's database with the non-null values from the NewStatus and NewNotes parameters. The following values will be returned, either as a JSON or XML string; in the case of SOAP, the JSON or XML string is embedded in the objectContent attribute of the CCReturnObject object:
|
DID |
The unique encryption domain identifier for the domain that serviced this request. |
|
SRID |
A unique request identifier for this transaction. |
|
BankID |
The BankID used in this request. |
|
KeyToken |
The token reference deleted by this request. |
|
NewStatus |
The new status for this key. |
|
NewNotes |
The new notes for this key. |
KAM Batch Operations
The KAM supports the ability to perform cryptographic operations on large sets of plaintext data in batch mode, as opposed to sending each request in a unique web service call. As fast as SAKA is, batch mode operations—especially for decryption—are sped up significantly through the avoidance of many functions that are repeated for each web service call.
SAKA supports all four (4) types of cryptographic operations: encryption, decryption, deletion, and searching. There are no limits to the number of records that may be processed within each batch operation. However, each of the operations must meet the following prerequisites:
The input file for the batch operation must conform to the SKLESBatchInput (SBI) element of the SAKA XML Schema Definition (XSD), which is included on every appliance, and is shown later in this chapter.
The XML input file must be transferred to SAKA separately; StrongKey recommends the use of the Secure File Transfer Protocol (SFTP), but Network File System (NFS) and/or Server Message Block (SMB) protocols may also be used to transfer files to the appliance. Each encryption domain must have an operating system user defined with a home directory writable by the strongauth user to enable the batch operations. Note that the installation of a new appliance automatically creates the first encryption domain and a batch operation user called domain1 at the Linux operating system layer to enable the file transfers through SFTP. When additional encryption domains are made, batch operation users must be added manually to enable the file transfer capability.
The batch operation must be requested through a web service—the same web service that supports all other cryptographic operations. The Demo Client application described in the previous chapter—
sakaclient.jar—has sample code to show how the web services may be requested; this chapter uses the demo application in its examples below.The user requesting the batch operation must be authorized for the cryptographic operation.
After the batch operation is completed, SAKA creates the output as an XML file, conforming to the SKLESBatchOutput (SBO) element from the SAKA XML Schema Definition (XSD). The output must be transferred from the appliance similarly to how the input file was transferred. After the file is transferred by the batch operation user, it must be deleted explicitly, as some of the operations (encrypt, decrypt, and search) result in creating output files that contain sensitive data in an unencrypted form.
NOTE: SAKA deletes input files for the encryption and search operations immediately after completing the batch job; however, it does not delete the input files for the decryption and deletion operations since they only contain tokens.
SKLESBatchInput Element
Among the many elements used by the appliance, and which are defined in the SAKA XSD file (SAKA.xsd), is the SBI element; it defines the structure of the XML input file for batch operations. This element is used for all four (4) types of cryptographic operations—encryption, decryption, deletion, and search.
All sub-elements of the SBI element are mandatory. Failure to include values for all SBI sub-elements will prevent the batch job from executing. A sample of the input file for different transactions is shown below, followed by an explanation:
|
# |
SBI XML Content |
|---|---|
|
1 |
<?xml version="1.0" encoding="UTF-8" standalone="yes"?> |
|
2 |
<skles:SKLESBatchInput |
|
3 |
xmlns:skles='http://strongkeylite.strongauth.com/SKLES201009'> |
|
4 |
<skles:DomainId>1</skles:DomainId> |
|
5 |
<skles:JobId>X1234-20100920T211723</skles:JobId> |
|
6 |
<skles:Transaction>Encrypt</skles:Transaction> |
|
7 |
<skles:InputNumber>5</skles:InputNumber> |
|
8 |
<skles:InputValues> |
|
9 |
<skles:Input>1111222233330001</skles:Input> |
|
10 |
<skles:Input>1111222233330002</skles:Input> |
|
11 |
<skles:Input>1111222233330003</skles:Input> |
|
12 |
<skles:Input>1111222233330004</skles:Input> |
|
13 |
<skles:Input>1111222233330005</skles:Input> |
|
14 |
</skles:InputValues> |
|
15 |
</skles:SKLESBatchInput> |
The following table explains each line of the above XML file:
|
# |
SBI XML Content Explanation |
|---|---|
|
1 |
The start of the XML file. |
|
2 |
The start of the SBI element. Note that all elements in this example are qualified with the |
|
3 |
The namespace definition to which this schema instance conforms; in this case, |
|
4 |
The DomainID element—the value for this element is 1. This value is mandatory—all cryptographic operations in SAKA operate within encryption domains, and without a domain ID, the appliance would not know which domain to use for processing the batch file. A valid numerical domain identifier is necessary. |
|
5 |
The JobID element identifies a unique job name that the client application can use to identify its input/output XML files. The same JobID is written out in the output XML file by the appliance. In this example, the JobID is X1234-20100920T211723. There are no rules about what to use for a JobID, but it is helpful to have the source application name and the date-timestamp of the creation of the input file. |
|
6 |
The Transaction element identifies the type of cryptographic operation to perform on each input element in the file. In this example, the batch file is requesting the Encrypt transaction. Each input file may specify only a single operation; this operation will be performed on all input records that follow. The four valid values for this element are: Encrypt, Decrypt, Delete, and Search. |
|
7 |
The InputNumber element identifies the number of input records in this file. While this is helpful to human readers, the appliance processes exactly as many input records exist in the file regardless of what the InputNumber element states. |
|
8 |
The InputValues element signals the start of all input records. |
|
9–13 |
Each Input element has precisely one sensitive data value. This can be anything—up to a maximum of 1024 characters long. The appliance processes every single record as it reads them from the file. A missing or invalid value will cause the termination of the job on the appliance, leaving a partially processed output file. Thus it is important that the structure of the XML input file be verified against the SAKA schema before submitting the job to the appliance. |
|
14 |
The closing InputValues tag. |
|
15 |
The closing SBI tag. |
An example of the SBI element for a decryption operation is shown below:
|
# |
SBI Decrypt XML Example |
|---|---|
|
1 |
<?xml version="1.0" encoding="UTF-8" standalone="yes"?> |
|
2 |
<SKLESBatchInput |
|
3 |
xmlns='http://strongkeylite.strongauth.com/SKLES201009'> |
|
4 |
<DomainId>1</DomainId> |
|
5 |
<JobId>JOB123-20100920T111353</JobId> |
|
6 |
<Transaction>Decrypt</Transaction> |
|
7 |
<InputNumber>5</InputNumber> |
|
8 |
<InputValues> |
|
9 |
<Input>9999000000000786</Input> |
|
10 |
<Input>9999000000000787</Input> |
|
11 |
<Input>9999000000000788</Input> |
|
12 |
<Input>9999000000000789</Input> |
|
13 |
<Input>9999000000000790</Input> |
|
14 |
</InputValues> |
|
15 |
</SKLESBatchInput> |
The following table explains each line of the above XML that differs from the first example:
|
# |
SBI Decrypt XML Explanation |
|---|---|
|
2 |
The start of the SBI element. Elements in this example are unqualified because the default namespace definition in line 3 is associated with an empty prefix (nothing after the xmlns). |
|
6 |
The Transaction element identifies the Decrypt operation. |
|
9–13 |
Each Input element has precisely one token—the Pseudo Number (PSN)—that was originally assigned by the appliance when it was first encrypted. This token is required to locate the encrypted data in the appliance; decrypt it and write it to the output file. |
The XML files for Delete and Search operations are identical to the two presented here. They only differ in the Transaction element and the type of data presented in the Input elements; deletion operations take tokens as their input value, while search operations require the original plaintext data.
SKLESBatchOutput Element
Upon completion of a batch operation, if there are no errors, SAKA creates an XML file that conforms to the SBO element. This element, also defined in the SAKA.xsd file, is identical for the output of any type of cryptographic operation. A sample SBO file is presented below:
|
# |
SBO XML Example |
|---|---|
|
1 |
<?xml version="1.0" encoding="UTF-8" standalone="yes"?> |
|
2 |
<SKLESBatchOutput |
|
3 |
xmlns='http://strongkeylite.strongauth.com/SKLES201009'> |
|
4 |
<DomainId>1</DomainId> |
|
5 |
<JobId>X1234-20100520T211723</JobId> |
|
6 |
<Transaction>Encrypt</Transaction> |
|
7 |
<InputNumber>5</InputNumber> |
|
8 |
<OutputValues> |
|
9 |
<Output> |
|
10 |
<Input>1111222233330001</Input> |
|
11 |
<Result>9999000000001002</Result> |
|
12 |
</Output> |
|
13 |
<Output> |
|
14 |
<Input>1111222233330002</Input> |
|
15 |
<Result>9999000000001003</Result> |
|
16 |
</Output> |
|
17 |
<Output> |
|
18 |
<Input>1111222233330003</Input> |
|
19 |
<Result>9999000000001004</Result> |
|
20 |
</Output> |
|
21 |
<Output> |
|
22 |
<Input>1111222233330004</Input> |
|
23 |
<Result>9999000000001005</Result> |
|
24 |
</Output> |
|
25 |
<Output> |
|
26 |
<Input>1111222233330005</Input> |
|
27 |
<Result>9999000000001006</Result> |
|
28 |
</Output> |
|
29 |
</OutputValues> |
|
30 |
<OutputNumber>5</OutputNumber> |
|
31 |
</SKLESBatchOutput> |
The following table explains each line of the above XML file:
|
# |
SBO File after Encryption |
|---|---|
|
1 |
The start of the XML file. |
|
2 |
The start of the SKLESBatchOutput element. Note that all elements in this example are NOT qualified with the “SKLES” prefix. |
|
3 |
The namespace definition that this schema instance conforms to; in this case |
|
4 |
The DomainID element indicating the domain that processed these records—the value for this example is the number 1. |
|
5 |
The JobID element identifies the job name supplied by the client application in the input file. It can be used to identify this output XML file if the same application receives many XML output files from SAKA. |
|
6 |
The Transaction element identifies the type of cryptographic operation that was performed on each input element the appliance processed. In this example, the file indicates that the Encryption transaction was performed. |
|
7 |
The InputNumber element identifies the number of input records the appliance was told was in the input file. This may not match with what the appliance actually processes. |
|
8 |
The OutputValues element signals the start of all output records processed by the appliance. |
|
9–12 13–16 17–20 21–24 25–28 |
Each Output element has precisely two sub elements: the first is the original sensitive data (denoted by the Input tag) the appliance saw in the input file; and the second is the result of the cryptographic operation on the input element; this is denoted by the Result tag and the token value embedded inside this sub element. In the event the appliance runs into an error, depending on the error, there may be a helpful explanation in the Result sub element, or an empty element. In extreme cases, the output file may be interrupted and have nothing in it. |
|
29 |
The closing OutputValues tag. |
|
30 |
The OutputNumber element indicating the exact number of records processed by the appliance in this batch operation; this may or may not match the InputNumber element earlier in the file. |
|
31 |
The closing SBO tag. |
An example of the SBO element for a Decryption operation is identical to the SBO file for the Encrypt operation, except that the Input and Result values are reversed—i.e., the Input element has the token, vile the Result element has the original plaintext data.
The SBO files for the Delete and Search operations have different types of Result output. The Delete example is shown below:
|
# |
SBO File after Batch Deletion |
|---|---|
|
1 |
<?xml version="1.0" encoding="UTF-8" standalone="yes"?> |
|
2 |
<SKLESBatchOutput |
|
3 |
xmlns='http://strongkeylite.strongauth.com/SKLES201009'> |
|
4 |
<DomainId>1</DomainId> |
|
5 |
<JobId>DELETE-20100520T211723</JobId> |
|
6 |
<Transaction>Delete</Transaction> |
|
7 |
<InputNumber>4</InputNumber> |
|
8 |
<OutputValues> |
|
9 |
<Output> |
|
10 |
<Input>9999000000002986</Input> |
|
11 |
<Result>True</Result> |
|
12 |
</Output> |
|
13 |
<Output> |
|
14 |
<Input>9999000000002987</Input> |
|
15 |
<Result>True</Result> |
|
16 |
</Output> |
|
17 |
<Output> |
|
18 |
<Input>9999000000004988</Input> |
|
19 |
<Result>SKL-ERR-1011: Token not found</Result> |
|
20 |
</Output> |
|
21 |
<Output> |
|
22 |
<Input>9999000000007989</Input> |
|
23 |
<Result>SKL-ERR-1011: Token not found</Result> |
|
24 |
</Output> |
|
25 |
</OutputValues> |
|
26 |
<OutputNumber>4</OutputNumber> |
|
27 |
</SKLESBatchOutput> |
|
28 |
<?xml version="1.0" encoding="UTF-8" standalone="yes"?> |
|
29 |
<SKLESBatchOutput |
|
30 |
xmlns='http://strongkeylite.strongauth.com/SKLES201009'> |
The following table explains each line of the above XML file:
|
# |
SBO XML Explanation |
|---|---|
|
6 |
The Transaction element identifies the Delete operation. |
|
9–12 |
This Output element shows that the token—9999000000002986 in this case—was deleted because the Result element indicates “True.” |
|
13–16 |
This Output element also indicates that the record was deleted from the appliance. |
|
17–20 |
This Output element indicates an error—the error code and message indicate the provided token number was not found on the appliance, so nothing was deleted. |
|
21–24 |
This Output element also indicates the same error as the previous one. |
The SBO file for the Search example is shown below:
|
# |
SBO File after Batch Search |
|---|---|
|
1 |
<?xml version="1.0" encoding="UTF-8" standalone="yes"?> |
|
2 |
<SKLESBatchOutput |
|
3 |
xmlns='http://strongkeylite.strongauth.com/SKLES201009'> |
|
4 |
<DomainId>1</DomainId> |
|
5 |
<JobId>SEARCH-20100520T112723</JobId> |
|
6 |
<Transaction>Search</Transaction> |
|
7 |
<InputNumber>3</InputNumber> |
|
8 |
<OutputValues> |
|
9 |
<Output> |
|
10 |
<Input>1111222233330001</Input> |
|
11 |
<Result>9999000000003007</Result> |
|
12 |
</Output> |
|
13 |
<Output> |
|
14 |
<Input>1111222233330002</Input> |
|
15 |
<Result>9999000000003008</Result> |
|
16 |
</Output> |
|
17 |
<Output> |
|
18 |
<Input>1111222533330003</Input> |
|
19 |
<Result></Result> |
|
20 |
</Output> |
|
21 |
</OutputValues> |
|
22 |
<OutputNumber>3</OutputNumber> |
|
23 |
</SKLESBatchOutput> |
The following table explains each line of the above XML file:
|
# |
|
|---|---|
|
6 |
The Transaction element identifies the Search operation. |
|
9–12 |
This Output element shows that the input value—1111222233330001 in this case—was found on the appliance and its token value is in the Result element as 9999000000003007. |
|
13–16 |
This Output element also indicates that the input value was found on the appliance and has a token value of 9999000000003008. |
|
17–20 |
This Output element indicates that the token number provided was not found on the appliance, hence nothing was returned in the Result element. |
Generating the SBI XML file
While it is expected that most applications communicating with SAKA will be modified to generate the SBI XML input file directly, there will be some period where it will be necessary to perform the batch operations expediently without having to wait for internal applications to be reprogrammed.
To help during the transition process, the appliance's strongkeyliteClient.jar application includes an option called GenerateBatchInput in the application to take an ASCII text file, with a single record per line in the file, free of any comments or ornamentation, and convert it into an XML file conforming to the SBI schema.
Typing the following command provides some help on the usage of GenerateBatchInput:
java -cp sakaclient.jar GenerateBatchInput
When run, it results in the following output:

|
Parameter |
Explanation |
|---|---|
|
<input-file-name> |
The full file-name of the plain ASCII input file containing the lines of text to be converted to SBI in an XML file. |
|
<output-file-name> |
The full file-name of the XML file that will contain the resulting XML. It is strongly recommended that convention for these filenames is established so there are no over-write errors. StrongKey recommends the following: the domain ID, followed by a hyphen, followed by the source application name or requester, followed by a hyphen, followed by the date-timestamp. An example would be |
|
<DID> |
The unique encryption domain identifier in which this batch job will be processed. |
|
<job-name> |
A helpful job-name that can be embedded inside the XML file, so the resulting output can be processed by the client application meaningfully. This name can be an identifier string that has meaning in the application environment. |
|
<Encrypt|Decrypt|Delete|Search> |
One of the four cryptographic operations requested for this XML file. |
|
<number-of-records> |
The number of lines in the plain ASCII text file. While this is not meant to be a hard number that will prevent the appliance from processing the XML file if the actual number is more or less than this number, it is a helpful guide to humans who may be reviewing the XML file. |
|
[SAKA.xsdlocation-name] |
An optional parameter specifying the full path location of the In that case, copying |
In the current directory where the strongkeyliteClient.jar file exists, if a plain ASCII text file exists—plain-input.txt—including the following lines of text...
1111222200000001
1111222200000002
1111222200000003
1111222200000004
1111222200000005
1111222200000006
1111222200000007
1111222200000008
1111222200000009
1111222200000010
...the following command will convert it to an XML file in the SBI format...
java -cp sakaclient.jar GenerateBatchInput plain-input.txt 1-ABCD-20100920T163300.xml
	1 ABCD-PAN-Conversion Encrypt 10
...and resulting in the following XML file:
<?xml version="1.0" encoding="UTF-8" standalone="yes"?>
<SKLESBatchInput xmlns="http://strongkeylite.strongauth.com/SKLES201009">
    <DomainId>1</DomainId>
    <JobId>ABCD-PAN-Conversion</JobId>
    <Transaction>Encrypt</Transaction>
    <InputNumber>10</InputNumber>
    <InputValues>
        <Input>1111222200000001</Input>
        <Input>1111222200000002</Input>
        <Input>1111222200000003</Input>
        <Input>1111222200000004</Input>
        <Input>1111222200000005</Input>
        <Input>1111222200000006</Input>
        <Input>1111222200000007</Input>
        <Input>1111222200000008</Input>
        <Input>1111222200000009</Input>
        <Input>1111222200000010</Input>
    </InputValues>
</SKLESBatchInput>
The following figure shows the use of the optional SAKA-location-name parameter since this was executed on a PC where the SAKA.xsd file was not automatically available:
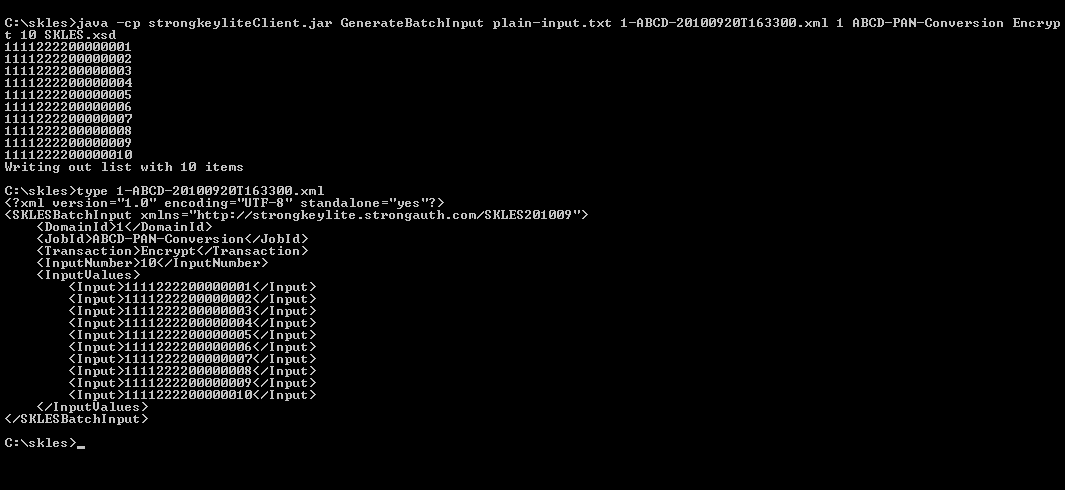
There are no limits to the number of records that may be included in an SBI element of the XML file; however, very large numbers of records may require that the Java executable program be provided more “heap memory” for its execution by supplying an “-Xms” and/or “-Xmx” option, as follows:
java -Xms2048m -Xmx4096m -cp sakaclient.jar GenerateBatchInput plain-input.txt 1-ABCD-20100920T163300.xml 1 ABCD-PAN-Conversion Encrypt 1000000 SAKA.xsd
Indicating that this generation process use 2GB of heap-memory initially when creating the Java Virtual Machine (JVM) to execute the program, and use a maximum of 4GB during the execution, if needed.
The resulting XML file may now be transferred to the appliance for batch processing.
Transferring XML Files to and from the Appliance
To execute the batch operation to the appliance, the XML input file must be transferred to the appliance, into a specific directory. Until the file reaches the specified location, the appliance will be incapable of performing the execution.
Transferring the XML input file requires access to the appliance though one of three supported file-transfer protocols on the appliance: SFTP, NFS, or SMB. This chapter explains how to transfer files using SFTP; NFS, and SMB are beyond the scope of this document, but can be discussed with StrongKey separately, if desired.
Every encryption domain must have a user defined at the Linux operating system layer (generically called Batch-Requester in this document) to be able to transfer the XML files into and out of the appliances. The first encryption domain (DID 1) creates during the installation process, but each additional encryption domain requires that the user be created manually.
The Batch-Requester has a Linux username like “domainN” where “N” is the domain identifier. So, the operating system username for the first encryption domain will be domain1, while that of the second encryption domain will be domain2 and so on.
Each Batch-Requester has a home directory under /usr/local/strongauth/batchrequests where the directory is owned by the strongauth user, but with read-write privileges for the domainN user, too. The home directory for domain1 will be /usr/local/strongauth/batchrequests/domain1.
Under the /usr/local/strongauth/batchrequests/domain1 directory are two subdirectories: in and out. All XML input files must be transferred into the in subdirectory, while all processed XML output files must be transferred from the out subdirectory.
Assuming a domain identifier of 1, using the domain1 credential and the password given by the SAKA Domain Administrator, transfer the file to /usr/local/strongauth/batchrequests/domain1/in. This is shown in the following figure. Once the file is there, the job can be submitted for execution.
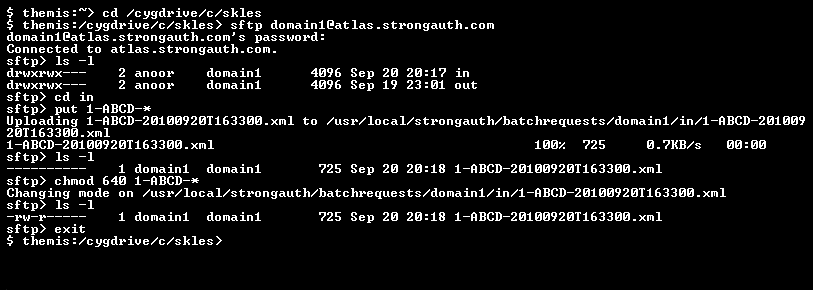
Submitting Batch Operations
To submit a batch operation to the appliance, the requester—who may be a human being or an application—must submit the XML input file and a web service request to the appliance. The last section discussed how to transfer the input XML file to the appliance.
Submitting the web service request to the appliance is no different from submitting any other SAKA web service request: it requires four parameters, as follows:
|
DID |
The unique encryption domain identifier. |
|
username |
The username (service credential) within the encryption domain with the authorization to call this web service. The credential requires the Key Component Operator (KMO) privilege. |
|
password |
The password of the username to authenticate the credential of the requester. |
|
filename |
The filename of the XML input file that was transferred to the appliance before the web service request is made. The filename must not include any path qualifiers—just the name of the file. |
An example of submitting a batch encryption request using the sakaclient.jar client program is shown below:
java -jar sakaclient.jar https://demo2.strongauth.com:8181 1 encryptonly Abcd1234! BE 1-ABCD-20100920T163300.xml
Upon successfully sending the batch web service request, the sakaclient.jar program displays the following output:

The output file produced from the batch execution has the following name format: the domain identifier, followed by the unique batch request ID assigned to this job, followed by -Output.xml. The example above indicates that this was the 18th batch request job submitted to domain ID 1, hence the output file has a name of 1-18-Output.xml.
Using SFTP (or NFS or SMB if it is configured), the requester can now pick up the processed output file.
NOTE: While the appliance will automatically delete input XML files for encryption and search operations (it keeps the input XML files for the decrypt and delete operations since they do not have any sensitive data in them), the output files MUST be deleted after transferring them if they were submitted for any operation other than the Delete operation. This is because all other operations result in output files that will have the unencrypted sensitive data in them. Not transferring and deleting these files immediately after the web service call has completed will increase the risk of plaintext being exposed.
All the other batch operations use the identical four parameters: DID, username, password, and input filename. The only difference is inside the XML input file which identifies the cryptographic operation that must be performed.
KAM DemoClients
To test SAKA web services, the appliance comes with a Java-based client application that can be used to test the web service operations of the SAKA server. The Java client—called sakaclient.jar—can be used to call web service operations on a DEMO appliance on the internet—demo.strongauth.com—or on the SAKA cluster within a network.
The DEMO SAKA uses the identical software as appliances delivered to customers. This allows application development teams to verify their code without having to wait for a SAKA implementation internally. Once verified against the DEMO SAKA, the identical code will work against the internal SAKA implementation without changing a single line of code. The only differences would be the URL of the host and the parameters passing at runtime. (We recommend parameterizing the URL of the appliances being called; this will make it easier to point applications to SAKA during deployment to production).
The client application is a simple Java application that calls the web service on SAKA to perform one of many operations; it simulates what the applications must do to call the EncryptionService on the SAKA server. While the client application will certainly be different, based on site-specific business functions it implements and the programming language and application model it uses, ultimately it must perform the same web service functions as the test client application bundled in SAKA. Because the client application focuses only on testing the implementation of the SAKA service, it is ideal for ensuring the correctness of a specific site’s implementation.
The currently supported perations of the DEMO client are:
Encrypt simulated credit card numbers.
Decrypt the ciphertext for previously encrypted credit card numbers.
Encrypt and decrypt a credit card number within a single transaction.
Delete a credit card number from the cluster.
Search for a credit card number on the cluster.
Return bytes of entropy from the SAKA Cryptomodule.
Submit a job to encrypt credit card numbers, in batch mode.
Submit a job to decrypt credit card numbers, in batch mode.
Submit a job to delete credit card numbers, in batch mode.
Submit a job to search for credit card numbers, in batch mode.
Relay a payment transaction to
authorize.netusing HTTP POST (requires the site’s own account and access keys toauthorize.netto perform this test).
The client application distinguishes between these operations to allow sites to test different levels of authorization for the web services:
Users who are authorized to only encrypt.
Users who are authorized to only decrypt.
Users who are authorized to encrypt and decrypt.
Users who are authorized to only delete.
Users who are authorized to only search.
Users who are authorized to only relay transaction to a payment gateway.
Users who are authorized to perform all operations.
Users who are NOT authorized to perform any operation.
Installing SAKA Clients
Two files must be copied onto a remote computer to install the demo client:
The
sakaclient.jarfileThe TLS server certificates of the SAKA servers
These files may be copied from the SAKA server to the remote computer on a USB flash drive, or they may be downloaded directly to the remote computer using a browser.
USB Copy from SAKA
The following instructions show how to copy using a USB flash drive:
Login to SAKA with the strongauth account.
Start up the Graphical User Interface (GUI) with the
startxcommand.Plug a USB flash drive into the SAKA server. A File Manager window should open within a few seconds, showing the files on the USB flash drive (if any).
Using the File Manager, copy the
<FQDN>.derfile (where FQDN is the fully qualified domain name of the SAKA server) from theSTRONGAUTH_HOME/certsdirectory to the flash drive.Using the File Manager, also copy the
sakaclient.jarfile,sakagclient.jarfile, and the lib directory from theSTRONGAUTH_HOME/topazdirectory to the flash drive.From the File Manager of the USB flash drive, unmount the drive from the SAKA server.
Remove the USB flash drive.
Copy the
<FQDN>.derfile, .JAR files, and lib folder to a folder on the remote computer running Windows. For this discussion, assume the files have been copied to a folder calledsakaunder the user’s home directory on the Windows PC.This successfully concludes the section on how to copy a SAKA TLS certificate and the
sakaclient.jarfile to the local PC using the USB flash drive.
Downloading the Certificate
The following instructions show how to copy the files using the Firefox browser. The Firefox browser can be downloaded from www.firefox.com, if necessary.
NOTE: While it is possible to perform these “certificate-trust” steps using another browser, such as Internet Explorer, Chrome, or Safari, StrongKey has not documented these detailed steps in this document. Those familiar with connecting to a site with an unknown TLS certificate and then viewing and saving the TLS certificate to a computer are welcome to use any browser to perform these steps. There is no difference in the TLS certificate no matter which browser downloads the certificate.
The images below show the required files being downloaded from https://demo2.strongauth.com:8181/ or https://demo3.strongauth.com:8181/. Just follow the instructions, substituting the demo2.strongkey.com or demo3.strongkey.com site name with the FQDN of the SAKA server:
NOTE: demo2 and demo3 represent a cluster of two SAKA nodes. They are configured in the DMZ of StrongKey's domain and replicate to each other over a local area network. To use the Demo client to test against StrongKey's demo appliances, either URL should work for the examples provided below. The internal cluster is likely to have the same or more SAKA nodes, and may or may not support all web services, depending on what has been configured for use.
From a PC, using the Firefox browser, type in the URL of the SAKA server in the address bar; the URL must specify the https protocol and port 8181. For example, if the primary SAKA server is
saka01inyourdomain.com, the URL would behttps://saka01.yourdomain.com:8181/index.html. The following screen displays in the browser:
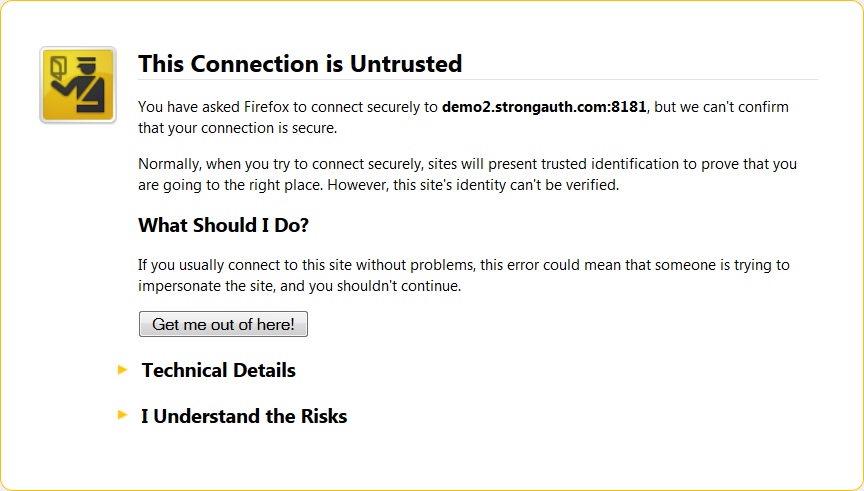
Click I Understand the Risks. The following image displays:
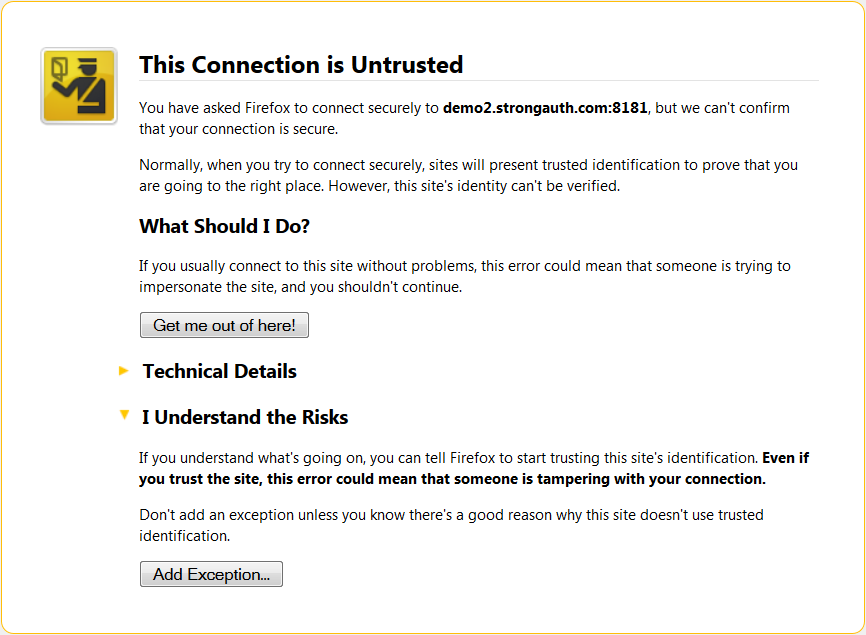
Select the Add Exception... button. The Add Security Exception dialog displays.
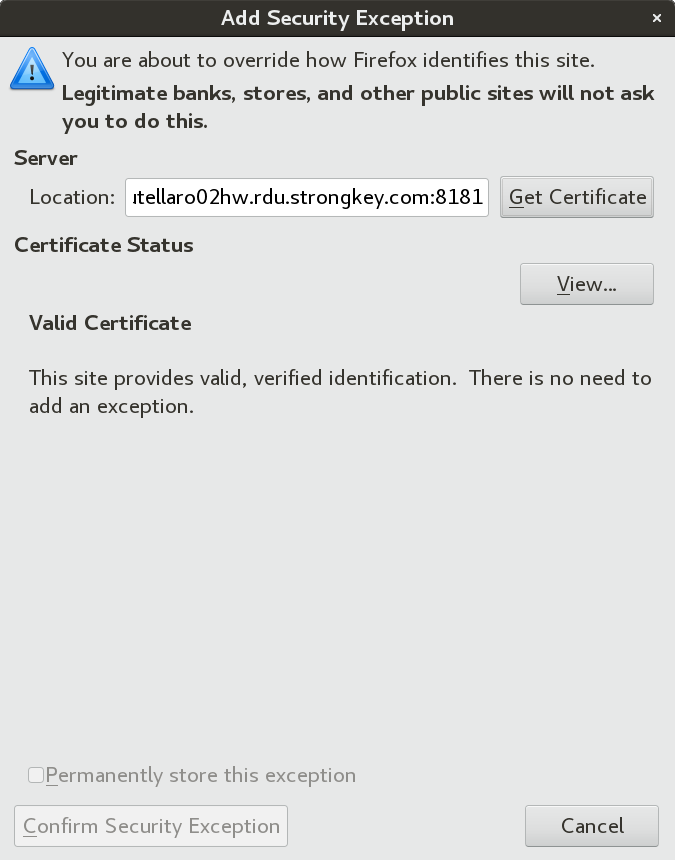
In the Location field, type the URL of the certificate and click Get Certificate. The View... button lights up.
To view the certificate, click View…. The Certificate Viewer dialog displays.
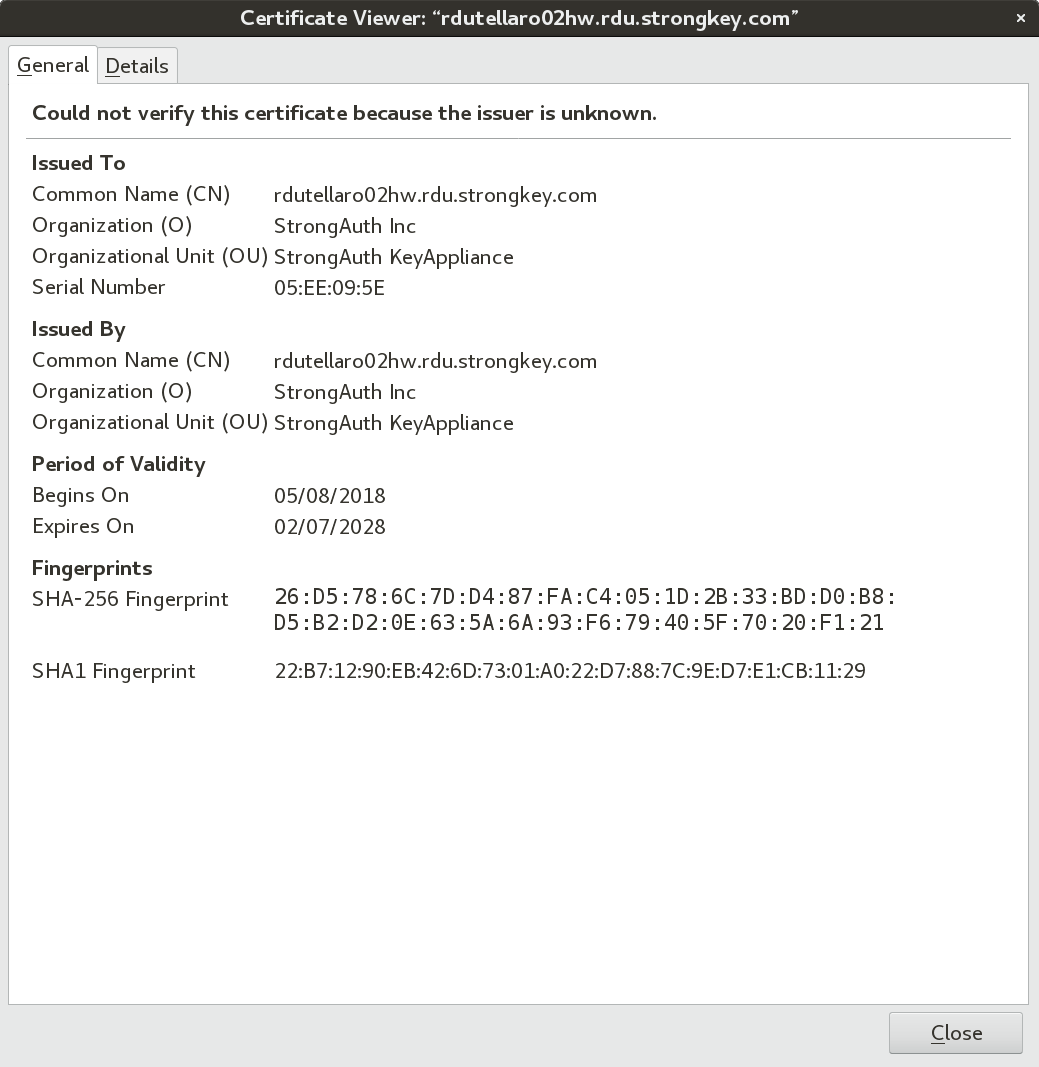
Click the Details tab.
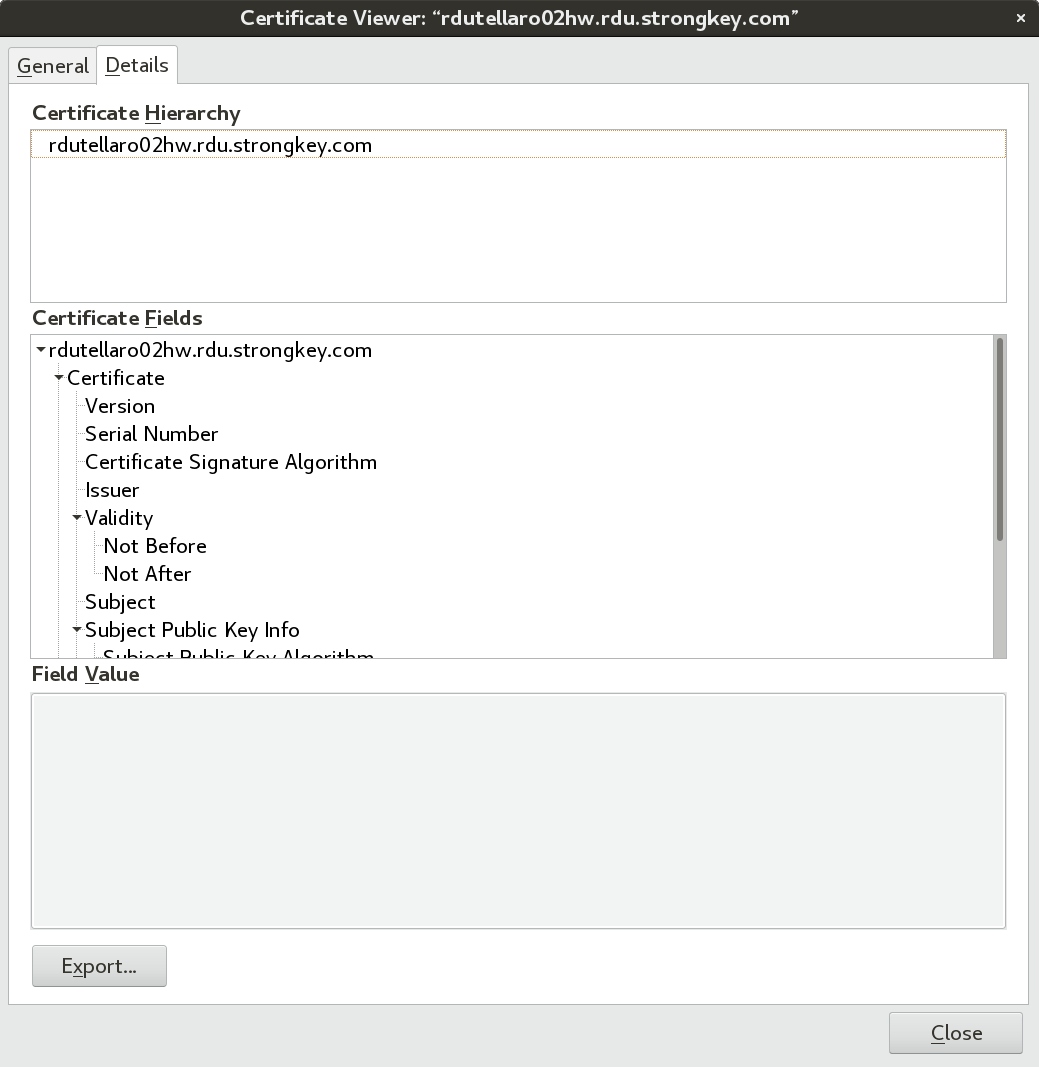
Click Export… Then add a .pem extension to the filename. Select the directory where the Client Demo files will be installed, then click Save.
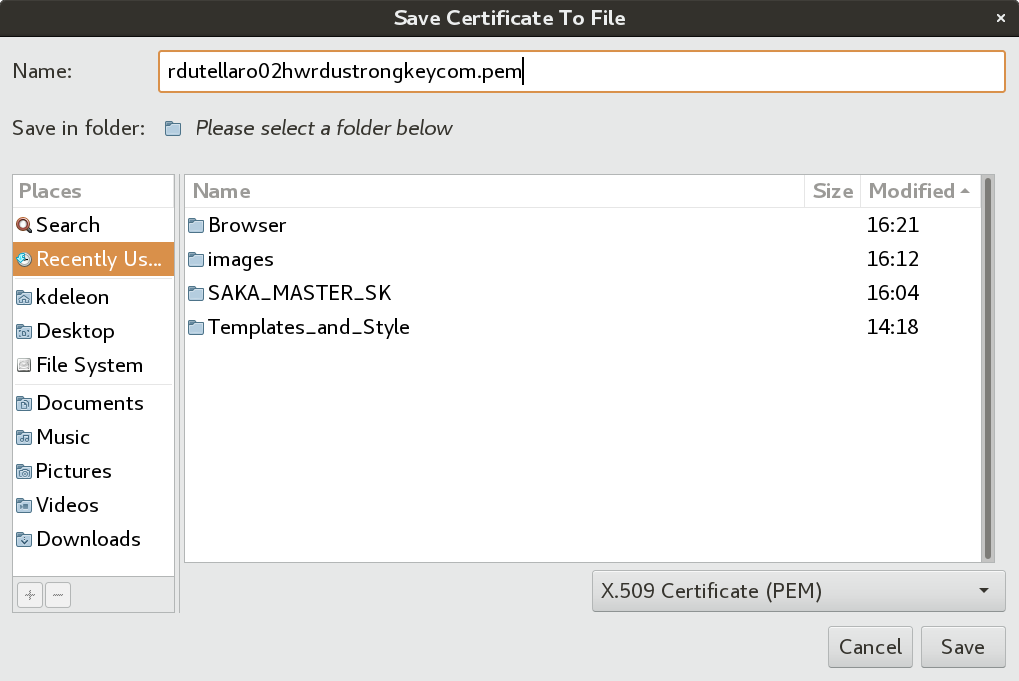
Select the Close button on the Certificate Viewer dialog.
This successfully concludes the section on how to copy the SAKA TLS certificate and the sakaclient.jar file to a local PC using the Firefox browser.
Importing the Certificate into the JVM
To import the SAKA digital certificates into the JVM environment and to run the test client application, execute the following steps.
On a Windows PC, open a Command Prompt as Administrator.
Change directory to the
C:\Program Files\Java\jdk1.8.0_66\binfolder.Type the following command on a single line:
keytool.exe -importcert -keystore ..\jre\lib\security\cacerts -storepass changeit -alias saka -file <location-of-file>\<FQDN>.der
A prompt displays to trust the digital certificate during the import process.
Verify that the certificate was imported correctly with the following command.
keytool -list -keystore ..\jre\lib\security\cacerts -storepass changeit -alias saka
The listed certificate and its MD5 hash appear in the response.
sakaclient.jar Operations
The sakaclient.jar file supports the following options:
Displaying Help Options
Type the following commands to verify that the client application is executable.
java -jar sakagclient.jar
	java -cp sakagclient.jar GCMMain
By default the sakgclient shows a helpful prompt of the operations it can perform and the parameters it expects for each operation.
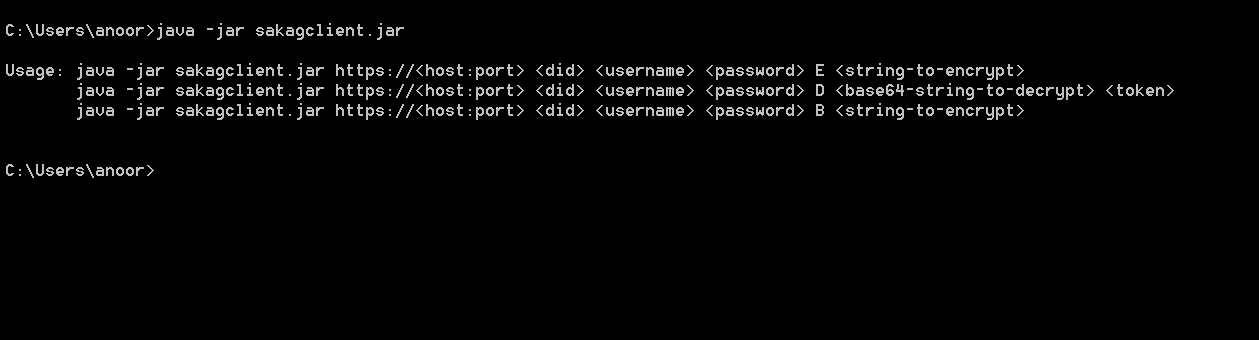
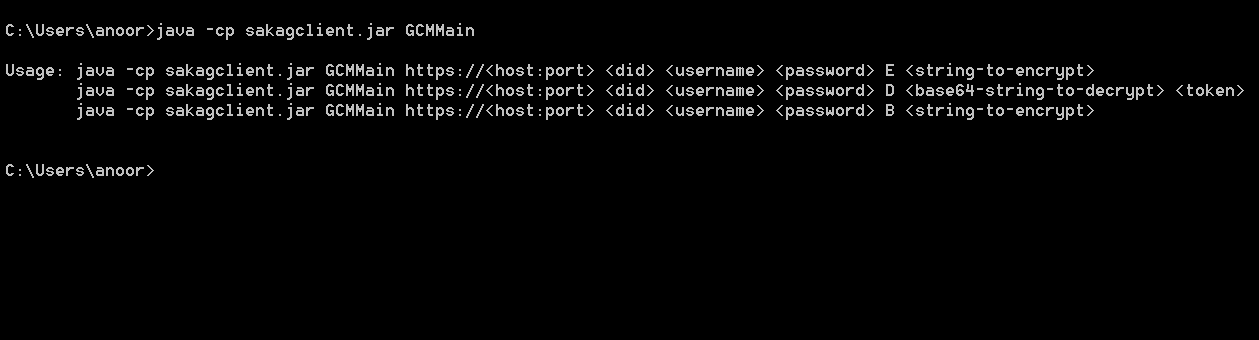
An explanation of the parameters to the demo client application follows:
|
Parameter |
Explanation |
|
|---|---|---|
|
https://<host:port> |
Use |
|
|
<did> |
The unique encryption domain identifier. This was provided separately by StrongKey as a unique domain for testing. |
|
|
<username> |
The username within the encryption domain with authorization to call the web service. These usernames were provided separately for testing. |
|
|
<password> |
The password of the username within the encryption domain that has authorization to call the web service. These passwords were provided separately for testing. |
|
|
Supported Operations |
||
|
E |
Encryption |
Encryption of 16-digit PANs where only the last 8 digits of the PAN must be specified on the command line; the first 8 digits are programmed into the client application as a convenience for quick testing. |
|
D |
Decryption |
Decryption of a token. |
|
B |
Both encryption and decryption |
Encryption and decryption of 16-digit PANs where only the last 8 digits of the PAN must be specified on the command line; the first 8 digits are coded into the client application as a convenience for quick testing. |
|
<string-to-encrypt> |
A UTF-8 string of arbitrary length. If the string has blank spaces or special punctuation marks, enclose the string in double quotes and place a backslash in front of the special punctuation mark to escape it from being processed by the Linux shell (if using Linux to test this tool). |
|
|
<token> |
For decryption, the client expects the token that was returned by KAM when encrypting the string. |
|
Encryption (CBC Mode)
To encrypt a test string, type in the following commands separately. In this example the URL is https://demo.strongkey.com, the domain ID is the numeral 1, the username is all and the password is Abcd1234!. The string to be encrypted is within double quotes:
java -jar sakagclient.jar https://demo.strongkey.com 1 all Abcd1234!
E “You must be the change you want to see in the world.  M. K. Gandhi”
java -jar sakagclient.jar https://demo.strongkey.com 1 all Abcd1234!
B “You must be the change you want to see in the world.  M. K. Gandhi”
The top half of the window pictured below shows the sequence of activities performed by sakagclient: a new AES encryption key was generated by the client (shown as a Base64-encoded string on the first line) and escrowed on the KAM, which returned the token 1000000000101315. Using the token as the initialization vector (IV) for the CBC mode of operation, sakagclient encrypts the string within double quotes and displays the Base64-encoded ciphertext on the last line of the output.
The bottom half of the window pictured below shows a variation of the same command, but this time the command has specified the B option, which encrypts the supplied string, then immediately decrypts the ciphertext in the same operation and compares the decrypted plaintext with the original to determine if they are the same.
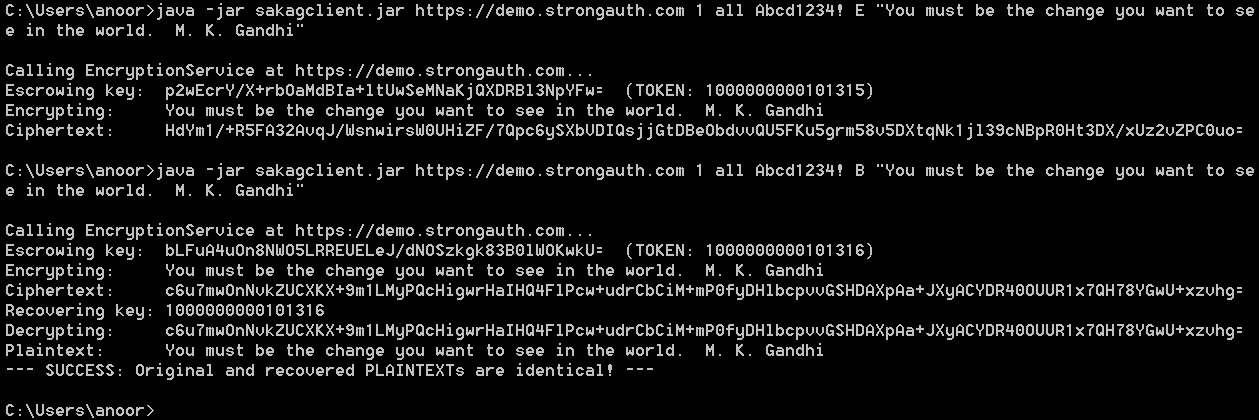
The second command also generates a new AES key and escrows it—resulting in a new token 1000000000101316—then recovers the escrowed key from the KAM and decrypts the ciphertext to compare with the original. As the output shows, the original and decrypted plaintext are identical.
The KAM has the ability to escrow cryptographic keys in this manner—TDES, AES, RSA, ECDSA—almost any cryptographic (or binary) object that can be Base64-encoded to a UTF-8 string of length less than 10,000 characters can be encrypted and stored on the SAKA server as a secure vault. SAKA has been successfully used to store more than 50 million objects in production use at customer sites.
An error message resembling the following implies the SAKA server's TLS certificate has not imported successfully into the JVM.
Exception in thread "main" javax.xml.ws.WebServiceException:
Failed to access the WSDL at:
https://demo.strongauth.com/strongkeyliteWAR/EncryptionService?wsdl.
It failed with:
sun.security.validator.ValidatorException: PKIX path building failed:
sun.security.provider.certpath.SunCertPathBuilderException:
unable to find valid certification path to requested target.
at com.sun.xml.internal.ws.wsdl.parser.RuntimeWSDLParser.tryWithMex
(RuntimeWSDLParser.java:151) at com.sun.xml.internal.ws.wsdl.parser.RuntimeWSDLParser.parse
(RuntimeWSDLParser.java:133) at com.sun.xml.internal.ws.client.WSServiceDelegate.parseWSDL
(WSServiceDelegate.java:254) at com.sun.xml.internal.ws.client.WSServiceDelegate.<init>
(WSServiceDelegate.java:217) at com.sun.xml.internal.ws.client.WSServiceDelegate.<init>
(WSServiceDelegate.java:165) at com.sun.xml.internal.ws.spi.ProviderImpl.createServiceDelegate
(ProviderImpl.java:93) at javax.xml.ws.Service.<init>
(Service.java:56) at com.strongauth.strongkeylite.web.EncryptionService.<init>
(EncryptionService.java:79) at strongkyeliteClient.Main.main
(Main.java:109)
If the certificate seems to have successfully imported into the JVM, and can see it when listed within KeyTool, then the Command Tool is likely pointing to a different JVM in its Path setting. Make sure the Command Tool is using the JVM with the imported certificates in its cacerts file. Either change the Path setting permanently through the Control Panel, or change it temporarily in the Command Tool itself.
Alternatively, call the correct JVM by specifying the full pathname of the Java executable without changing the Path.
An error resembling the following implies that a JAR library—bcprov-jdk15on-1.54.jar—is not in the lib subdirectory where sakagclient exists.
Make sure there is a subdirectory called lib in the same folder where the sakagclient.jar file exists, and that BouncyCastle JCE Provider 1.54 exists in the lib subdirectory. Then attempt the command again.
Exception in thread "main" java.lang.NoClassDefFoundError: org/bouncycastle/util/encoders/Base64
	at GCMMain.decryptText(GCMMain.java:324)
	at GCMMain.main(GCMMain.java:237)
Caused by: java.lang.ClassNotFoundException: org.bouncycastle.util.encoders.Base64
	at java.net.URLClassLoader.findClass(URLClassLoader.java:381)
	at java.lang.ClassLoader.loadClass(ClassLoader.java:424)
	at sun.misc.Launcher$AppClassLoader.loadClass(Launcher.java:331)
	at java.lang.ClassLoader.loadClass(ClassLoader.java:357)
	... 2 more
Decryption (CBC Mode)
To test decryption, call sakagclient with the D option and use the ciphertext from the encryption transaction (from the transaction similar to the top half of the diagram in Section 3.2 of this chapter) on the local computer—it is sure to be different from the ciphertext shown in this document) as well as the token from the encryption test as parameters. Make sure to copy the ciphertext exactly as it shows in the output of the encryption command:
java -jar sakagclient.jar https://demo.strongauth.com 1 all Abcd1234!
D HdYm1/+R5FA32AvqJ/WsnwirsW0UHiZF/7Qpc6ySXbVDIQsjjGtDBeObdvvQU5FKu5grm58v5DXtqNk1jl39cNBpR0Ht3DX/xUz2vZPC0uo=
1000000000101315
The operation may take a little while because cryptographic keys may need to be loaded from the internal database and decrypted before the actual encrypted object can be decrypted. However, once the keys are decrypted, they are cached for a short duration (15 minutes); repeating the same decryption operation immediately produces an immediate response. The following picture shows the successful return of the original string (“You must be the change you want to see in the world. M. K. Gandhi”)
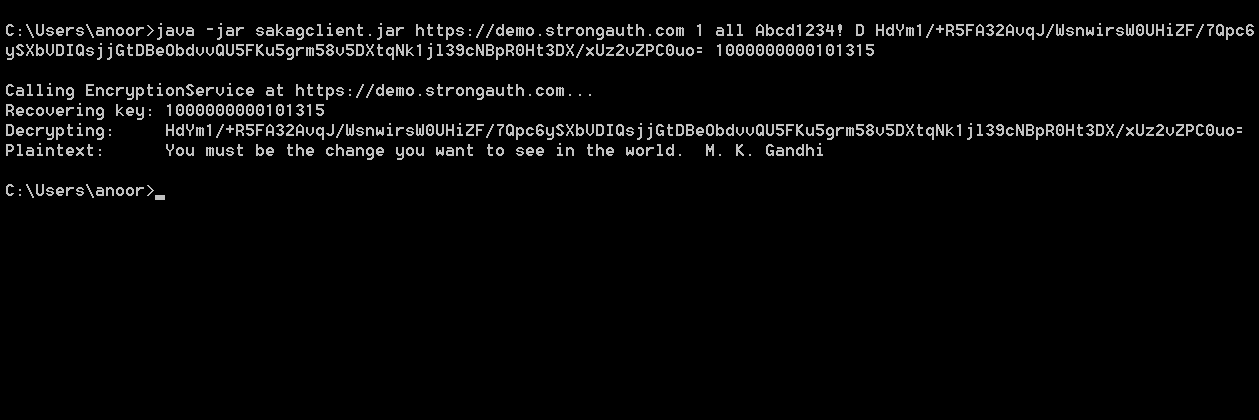
NOTE: The first web service request for encryption or decryption within a user's session will see a long delay because of the following factors:
The latency of the internet
The verification of the user's authorization (which causes the decryption of a hierarchy of keys in the hardware module to verify the user's password)
The decryption of the symmetric key before it is available for use
The actual encryption/decryption of the PAN data
A key-caching feature of SAKA (15 minutes by default) enables subsequent operations to see significant improvements in performance. However, at the end of the default caching period, the keys are flushed from memory and the first cryptographic operation after the flush will see a similar delay as keys are decrypted and loaded into cache memory. The caching window can be configured for individual business needs.
From a performance point of view, the current generation of SAKA, using a TPM, delivers approximately 200–220 web service operations per second (WSOPS) when multi-threaded client applications make requests. In a clustered environment where all nodes in the cluster may service client applications, the overall WSOPS will be higher than for an individual SAKA, but will be difficult to predict in advance without understanding the topology of a given network and affected applications.
Encryption (GCM Mode)
To test the GCM of authenticated encryption, type in the following command:
java -cp sakagclient.jar GCMMain https://demo.strongkey.com 1 all Abcd1234!
E “You must be the change you want to see in the world.  M. K. Gandhi”
java -cp sakagclient.jar GCMMain https://demo.strongkey.com 1 all Abcd1234!
E “You must be the change you want to see in the world.  M. K. Gandhi”
This is, essentially, asking the sakagclient to encrypt the string specified on the command line using the GCM mode of operation. The result of this execution is shown in the top half of the figure below.
In this execution, sakagclient first calls KAM to retrieve some entropy from the TRNG on the SAKA (shown in the retrieved seed line). It then generates a new AES key, escrows it on the KAM and gets a token (1000000000101319). Using the last 96 bits of the token for the Additional Authenticated Data (AAD), sakagclient then encrypts the supplied string in the GCM mode of operation to display the resulting ciphertext.
In the bottom half of the following figure, the same string is encrypted and decrypted by specifying the B (both) option. It performs the same operations as for the encrypt operation, but goes on to recover the original cryptographic key by recovering it from KAM, decrypting the ciphertext and comparing the original plaintext with the decrypted value.
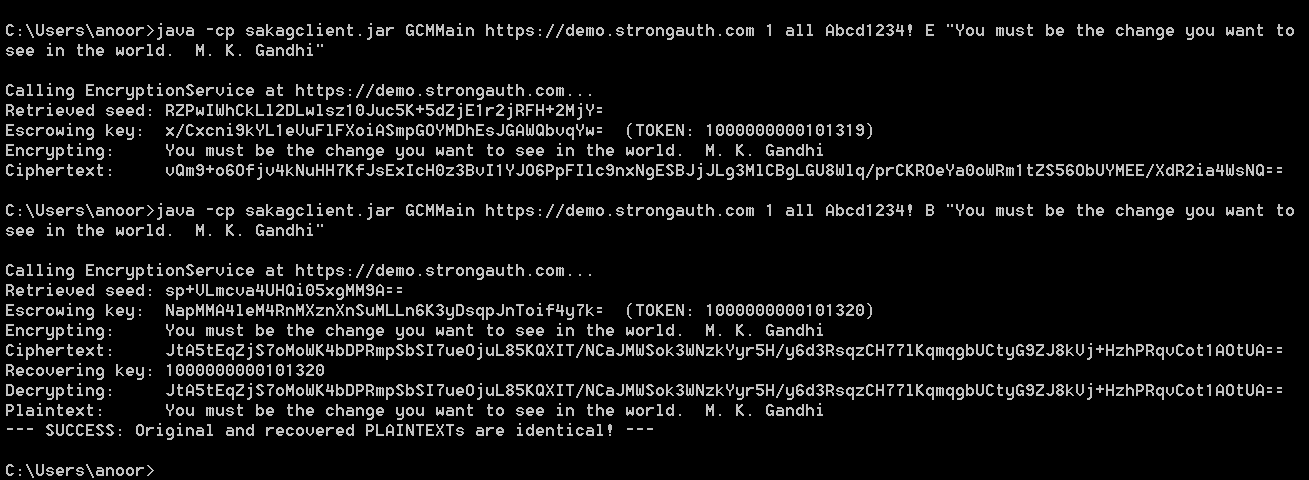
Decryption (GCM Mode)
To test decryption, call sakagclient with the D option and use the ciphertext from the encryption transaction (from the transaction similar to those shown in Section 9.3.2—it is sure to be different from the ciphertext shown in this document) and the token from the encryption test as parameters. Make sure to copy the ciphertext exactly at it shows in the output of the encryption command.
java -cp sakagclient.jar GCMMain https://demo.strongauth.com 1 all Abcd1234!
D vQm9+o6Ofjv4kNuHH7KfJsExIcH0z3BvI1YJO6PpFIlc9nxNgESBJjJLg3MlCBgLGU8Wlq/prCKROeYa0oWRm1tZS56ObUYMEE/XdR2ia4WsNQ==
1000000000101319
A result displays similar to the following:
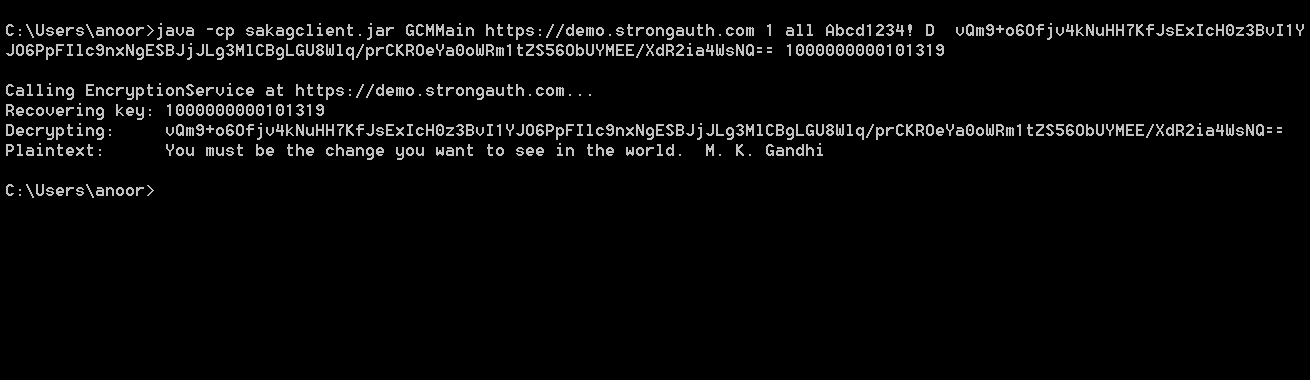
In this manner, the sakagclient can be used to test various web services of the SAKA KAM.
KAM KCSetPINTool
For cryptographic services to be available on SAKA, the cryptographic hardware module on the appliance must be activated. The cryptographic module—either the Trusted Platform Module (on the Model-T) or the Hardware Security Module (on the Model-H)—holds the “root” key of the key hierarchy that protects all cryptographic keys on the appliance. However, the hardware module can only be activated by Key Custodians (KCs) with their Personal Identification Numbers (PINs)—which they established during the installation of the appliances. Only when the hardware module is activated, does the “root” key become available, which in turn, enables cryptographic services to become available to business applications.
NOTE: SAKA security is entirely predicated on the “root” key. However, on the Model-T, the Storage Root Key (SRK) cannot leave the hardware module—this is part of the design specification for the TPM, as specified by the Trusted Computing Group (TCG). Once created upon initialization, the SRK can only be activated for use or destroyed during re-initialization. On the Model-H, the “root” key is generated inside the HSM, and can leave the HSM only under the protection of another encryption key in a controlled process.
In the event of a restart of the SAKA, since it is unfeasible for KCs to be available in remote server-rooms where the SAKA is typically deployed, SAKA includes a client application—the Key Custodian SetPIN Tool (KCSPTool)—that allows KCs to activate the hardware module from remote locations. All that is required is for the KCs to have a connection to SAKA from their computers and the USB flash drive that contains their credential (which was created when SAKA was initially set up).
While it is recommended that KC connections be controlled through an access-control list of a router or switch to prevent denial-of-service (DoS) attacks, the connection need not be secured for confidentiality since SAKA accepts KC commands and responses only over a secure transport protocol—Transport Layer Security.
The installation process of SAKA instances would have resulted in the KCs being given the KCSPTool on some media they would use to install on their computers. Since the KCSPTool is a Java application, it can run on any platform where a Java Virtual Machine (JVM) is available. It is necessary for the KCs to have a supported version of the JVM on their computer to use the tool. See 3—Architecture for the supported version of the JVM for your appliance.
On a Windows PC, the KCs would use a Command Tool script (a batch file) to start the KCSPTool. On a Linux computer, this would be shell script. The script file can be associated with an icon on the KC's desktop to make it convenient for the KC to use the tool.
NOTE: It is strongly recommended that KCs never copy their credential file from the USB flash drive to their computer for convenience. While it might be tempting, leaving the file on the computer could leave the file vulnerable as it might be copied off by an attacker, who might then try to determine the KC's PIN by subjecting the file to a dictionary attack or a rainbow table attack. Sites may not only want to enforce this through a company policy, but also through automated tools that delete such credential files when found on the hard disk of a KC's computer. Ultimately, the site must rely on the responsibility of the KC to preserve the security of their credential—policies and automated tools can only go so far.
When the KCSPTool starts it displays the following screen:
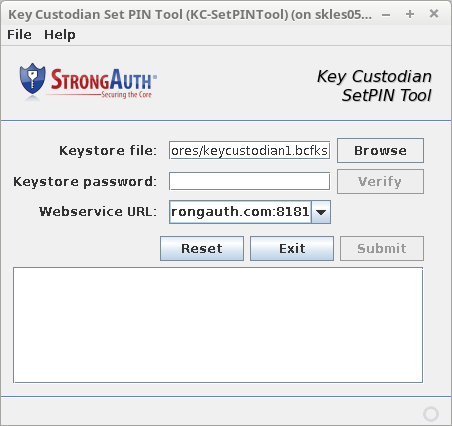
|
Keystore File |
This field identifies the location of the credential file—a Java keystore file containing the KC's 256-bit EC key pair and digital certificate. Activation commands to the appliance must be digitally signed by the KC before they are accepted by SAKA. KCs may use the Browse button to locate the file on the USB flash drive |
|
Keystore Password |
The KC keystore credential is protected with a password selected by the KC at the time SAKA was initially installed. The KC must supply this password in this field to use the EC key to digitally sign the activation command. To prevent mistakes from being transmitted to the server, when the KC types in a password in this field, the Verify button next to it becomes activated. KCs should get into the habit of selecting this button to confirm their password permits access to the credential file before selecting the Submit button. The pain of trouble-shooting invalid commands to the SAKA can be avoided by this simple step. |
|
Webservice URL |
Every SAKA listens to KC commands at a specific URL. This is established at the time of the installation of the SAKA. The KC should specify this URL in this field. SAKA always uses the TLS protocol, so the URL must begin with “https.” |
|
Reset |
Resets all values to the defaults on the tool's panel. |
|
Exit |
Exits the KCSPTool. |
|
Submit |
This button is disabled by default, but if all appropriate fields are filled on the form, the button becomes enabled. Selecting it submits the activation command to the SAKA server. This may take a little while as it must perform the following steps:
Once completed, the KC is provided feedback on whether or not the command succeeded. |
Setting KC Preferences
Since each KC is assigned to a specific role with a specific credential file, the KCSPTool provides a preferences panel to save frequently used parameters so they don't have to be typed in repeatedly. However, the password is never saved and must always be typed.
The Preferences panel can be viewed by selecting File → Preferences from the menu. Once selected, it displays the following panel:
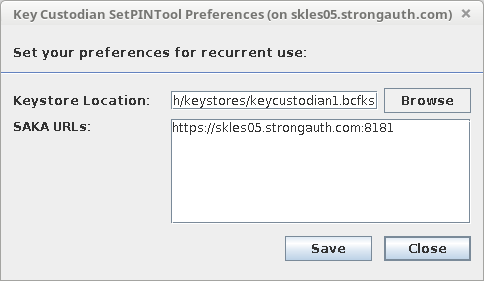
The form's fields echo the main display of the KCSPTool. The only difference is the SAKA URLs text area which allows the KC to type in several URLs of different SAKA servers for which they may be a custodian. While most sites may only have one primary SAKA server—and thus only one URL in this text box—some sites may have multiple SAKA servers for which KCs are responsible. Typing in the URLs of the different appliances allows them to select the one they wish to activate from the drop-down on the main panel.
Once the KC has made his/her choices, selecting the Save button saves the preferences.
Changing KC Passwords
Changing the password to a KC keystore may be necessary when changing ownership of the keystore, as part of a company's security policy, or just as a good practice. The KCSP provides the ability to change the password of any KC keystore though the Change Password panel.
To change the password on a KC keystore, follow this process:
Insert the KC's SAKA USB flash drive into the computer.
Select File → Change Password from menu. The following dialog displays:
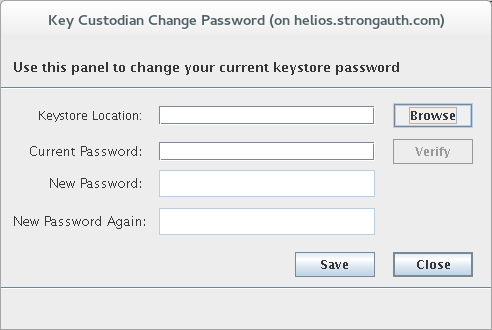
Browse to and select the keystore to populate the Keystore Location field.
Enter the Current Password for this keystore. Click the Verify button to confirm the password.
If the password is confirmed successfully, the two bottom fields will become usable. Enter the desired New Password and again in the New Password Again field. Once finished, press the Enter key within the New Password Again field and the tool will confirm whether both passwords match. If successful, the Save button will be enabled.
Click the Save button to apply the new password to the keystore.
Setting the KC PIN on the SAKA Server
To activate the cryptographic hardware module, each KC must perform the following steps. They may do this individually on their own computers, but until all KCs have activated the module, the cryptographic web services do not become available to applications.
The KC inserts their SAKA USB flash drive into the computer.
After starting KCSPTool, the KC verifies the displayed choices on the panel and makes appropriate changes, if any.
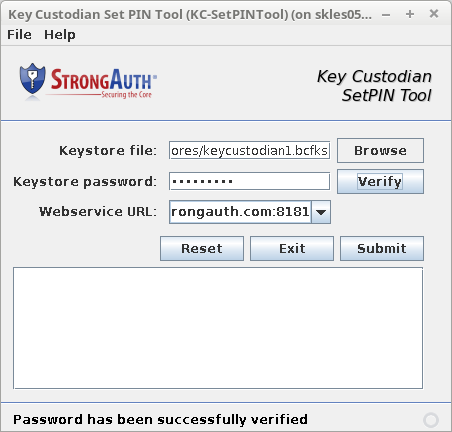
The KC then types the password and clicks Verify.
NOTE: If the password is incorrect, a message appears, stating, “The password does not verify; correct it and try again.” Make changes to the password and click Verify again.
Once the password is verified correctly, click Submit. A successful transaction results in the message, “Successfully set PIN on server.” The results pane displays how many PINs have been set, what the minimum required number is, and which KCs have set PINs.
NOTE: If the server is unavailable, a message appears, stating, “Failed to access the WSDL at [Web Service URL].” Make changes to the Webservice URL and try again.
The KC can now exit the tool. Once all KCs have similarly activated the cryptographic module with their credentials, SAKA is now ready to receive and respond to web service requests from applications.
KAM DACTool
The Domain Administration Console Tool (DACTool) is a graphical user interface (GUI)-based tool to manage the encryption domains within a SAKA installation. It is meant to be used by SAKA domain administrators to perform the following tasks:
Deactivate and activate an encryption domain
Add, modify, and delete users from the SAKA internal database
Schedule or run standard jobs on SAKA
Modify the configuration of an encryption domain
Set a domain administrator's (DA) preferences when using DACTool
DACTool is a Java-based Rich Client Application (RCA). This means it is not a web-based application and must be installed on the machine where it will execute. Since it is installed on the SAKA server, it is always accessible on the appliance itself, but it can be installed and configured to work on any platform where a supported Java Virtual Machine (JVM) is available. It is best viewed on a screen with 1920×1200 resolution.
To start DACTool on the SAKA server:
Login to the appliance from the console as strongauth.
Start the XWindows environment by typing in startx from the command-prompt.
Execute
/usr/local/strongauth/bin/DACTool.shshell script from a command-tool window. This will open the Main Panel of the DACTool.
DACTool menus are as follows:
|
Icon |
Menu Item |
Functions |
|---|---|---|
|
|
Systems |
Displays the list of SAKA servers that have been configured in the DACTool and allows the DA to connect to or disconnect from a specific SAKA server. |
|
|
Domains |
Allows the DA to view and/or edit information about an encryption domain. |
|
|
Users |
Allows the DA to view, add, or edit information about users configured in the internal SAKA database for an encryption domain. If SAKA is configured to work with an LDAP directory server, this button serves no purpose—all user administration must occur on the LDAP directory server where the users are defined |
|
|
Jobs |
Allows the DA to schedule and run pre-programmed jobs to perform routine tasks on the appliance. |
|
|
Configuration |
Allows the DA to configure an encryption domain to comply with site policies. |
|
|
Preferences |
Sets the preferences for DACTool. |
|
|
Help |
Displays help on how to use DACTool. |
Changing DA Passwords
Changing the password to a DA keystore may be necessary when changing ownership of the keystore, as part of a company's security policy, or just as a good practice. DACTool provides the ability to change the password of any DA keystore though the Change Password panel.
To change the password on a DA keystore, follow this process:
The DA inserts their SAKA USB flash drive into their computer. Click File → Change Password from the menu. The following dialog displays:
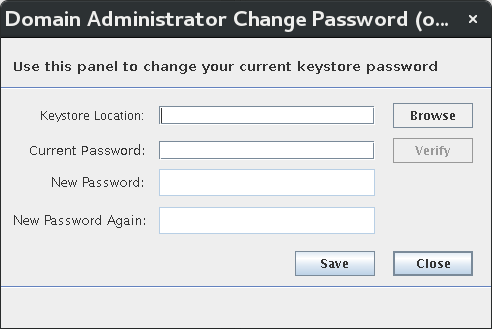
In the Keystore Location field, Browse to the location of the keystore.
Enter the Current Password for this keystore. Click Verify to confirm the password.
If the password is confirmed successfully, the two bottom fields will become usable. Enter the desired New Password and again in the New Password Again field. Once finished, press the Enter key within the New Password Again field and the tool will confirm whether both passwords match. If successful, the Save button will be enabled.
Click the Save button to apply the new password to the keystore.
Preferences 
The values specified in the Preferences panel prevent the DA repeatedly typing values on every connection to SAKA.
The Preferences panel is made visible by clicking Preferences → Set Preferences from the menu, or by clicking the Preferences icon on the Main Panel.
The Preferences panel is shown in the figure below. A table follows explaining the fields on the panel.
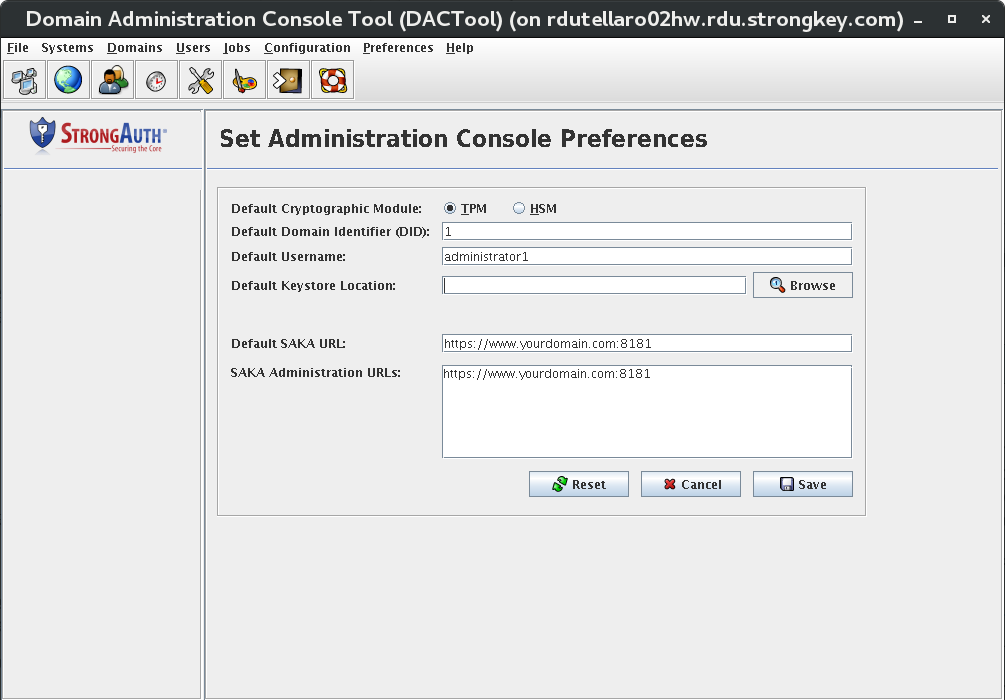
|
Default Cryptographic Module |
This radio button tells DACTool which cryptographic hardware module is used on the appliance. This is necessary for DACTool to use the appropriate cryptographic algorithms when digitally signing the authorization nonce (number used once) for verification by the appliance before executing the command. The two choices for this field are:
Select the option that matches the cryptographic hardware module on your SAKA server. Most sites will choose TPM as this is the default cryptographic module on most SAKA installations. |
|
Default Domain Identifier (DID) |
The unique numeric identifier of the default encryption domain to which the DA will connect when using the DACTool. Most sites will use the numeral 1 as this will be the first encryption domain on most SAKA installations. |
|
Default Username |
The username of the DA within the encryption domain to which they will connect. Since the first DA within any domain is administrator1, this is suggested as the default. However, subsequent administrators who have been assigned a unique username should type it here. |
|
Default Keystore Location |
Each DA administering an encryption domain is required to have a unique digital certificate issued out from SAKA. The digital certificate is associated with a pair of cryptographic keys stored within a BouncyCastle FIPS Keystore (BCFKS) file called a keystore. The keystore is typically generated and stored on the Yellow USB flash drive, to be removed from the machine when not in use. Using the Browse.. button, select the actual location of your keystore where your cryptographic keys and digital certificate are stored. |
|
Default SAKA URL |
While DACTool can be used to manage many SAKA servers, with only a few exceptions, DAs need only connect to one SAKA server when administering it. This field allows you to specify the URL of the SAKA server within your infrastructure. The URL must always use the HTTPS protocol and specify the fully qualified domain name (FQDN) of the SAKA server. It must also specify the port number on which the SAKA application is listening at that host. The default port number is 8181. |
|
SAKA Administration URLs |
This text area allows for multiple URLs of many SAKA servers. When connecting to SAKA through the Systems panel, all URLs configured in this field become visible there. Type in the URLs of the various SAKA servers in your clustered environment. Only one appliance's URLs need be typed in here since most configuration changes made through DACTool on the Primary appliance are replicated to all other appliances in the cluster. |
After the appropriate values are entered in the Preferences panel, click the Save button. This creates a hidden directory in your home directory called .strongkeyliteDAConsole which contains a file called appProperties. Preferences are stored in this file.
To delete all preferences, delete the entire .strongkeyliteDAConsole (notice the period in front of the directory name) subdirectory and its contents. A new subdirectory and files are always created when DACTool is run.
Clicking the Reset button on this panel resets the values to the original values when you came to this panel. If you have saved any preference values, the saved values now become your original values.
Clicking Cancel returns DACTool to the Main Panel without making any changes to any Preferences. If any preference values were saved while on this screen, clicking Cancel will not revert your Preferences to the original values.
Systems 
Before a DA can perform any function with the SAKA server, they must connect to the server; the DA must have the USB flash drive with their digital certificate (in the BCFKS file) on it, containing their PrivateKey.
When the DA attempts to connect to the SAKA server with the DACTool, the tool requests a nonce—a random number used only once—anonymously. The server generates a random nonce from its True Random Number Generator (TRNG) and sends it to DACTool. DACTool, upon receiving it, prompts the DA for the password to the BCFKS file. Upon getting the correct password, DACTool uses the PrivateKey to digitally sign the nonce before sending the connection request to the SAKA server. If the digital signature on the nonce is verified correctly by the server and the random nonce is accurate, the SAKA server establishes a connection. The DA may now perform administrations commands on the SAKA server.
Whether a DACTool command succeeds or fails, SAKA always sends a new randomly generated nonce in the response. Every new administration command sent by the DACTool must include the new nonce—digitally signed—to the SAKA server. The signed nonce is always verified before the command is executed.
To open the Systems panel, click Systems → View Systems on the menu or click the Systems icon on the Main Panel. The following dialog opens:
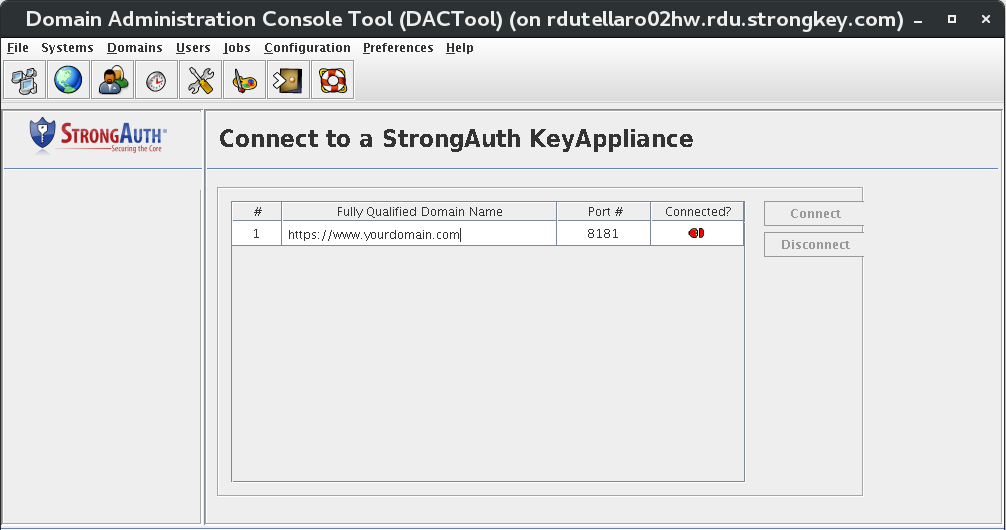
The panel shows a table with all configured appliances in a table. The table shows the FQDN of the server, the port number where the Administration Service is listening, and an icon—either in red or green color—to indicate if the DACTool is currently connected to SAKA or not. In the above figure, it shows one SAKA server listening on port 8181—the same port where the Encryption Service is typically accessible—and red connection icons indicating that the DACTool is not connected to any one of them.
There are two buttons—Connect and Disconnect—that are initially disabled. Upon selecting a specific SAKA server, one of the two buttons will become enabled. If DACTool does not have a connection to a SAKA server, it will enable the Connect button; if DACTool is already connected to it—indicated by a green connection icon—the Disconnect button becomes enabled.
When the Connect button is selected, the tool displays the Connection Parameters panel, shown below. If the DA has saved any preferences earlier, they will be displayed here; otherwise, the application's default values will be displayed. The DA may specify values in the Connection Parameters panel before making the connection.
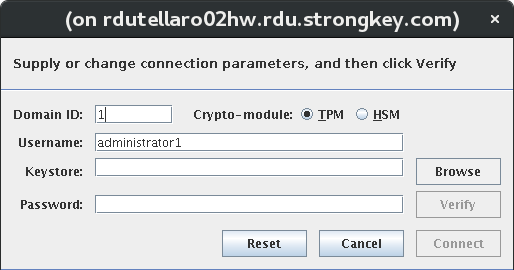
|
Domain ID |
The unique numeric identifier of the default encryption domain to which the DA will connect when using DACTool. |
|
Crypto-module |
This radio button tells the DACTool which cryptographic hardware module is used on the appliance. This is necessary for DACTool to use the appropriate cryptographic algorithms when digitally signing the authorization nonce (number used once) for verification by the appliance before executing the command. The two choices for this field are:
Select the option that matches the cryptographic hardware module on your SAKA server. TPM is the default cryptographic module on most SAKA installations. |
|
Username |
The username of the domain administrator within the encryption domain to which they will connect. |
|
Keystore |
The location of your BCFKS keystore file where your cryptographic keys and digital certificate are stored. Without this keystore, it is impossible to connect to the SAKA server's administration service. |
|
Password |
The BCFKS keystore file is encrypted using Password-Based Encryption (PBE). Passwords are never stored or saved on the system. |
|
Verify |
Upon typing the password to the BCFKS keystore, the Verify button becomes enabled. Before DACTool establishes a connection with the SAKA server, verify the correct password has been used to access the PrivateKey in the BCFKS file. Without the right password, digitally signing the nonce becomes impossible. If the password is incorrect, the panel will display an appropriate message and the Connect button remains disabled. However, if the password correctly decrypts the BCFKS file, the Connect button becomes enabled. |
|
Reset |
Resets the panel values to the defaults. |
|
Cancel |
Cancels the connection to the SAKA host and returns to the Systems panel. |
|
Connect |
This button becomes enabled only when the BCFKS keystore password is verified. Upon selecting it, DACTool retrieves the current nonce it possesses, digitally signs it with the PrivateKey from the BCFKS keystore, and sends a connection request to the SAKA server. |
After typing the password to the keystore, click Verify.
NOTE:If the password is incorrect, a message appears, stating, “Password does not verify keystore.” Make changes to the password and click Verify again.
Upon supplying the correct values in the Connection Parameters panel and confirming the keystore password is correct, click the Connect button. DACTool attempts to connect to the selected SAKA server and provides one of two possible responses.
If the SAKA services are not running, or if they are but the Key Custodians of the SAKA have not activated the cryptographic hardware module on the server since the server was restarted, the following error message displays on the status bar of DACTool:
Could not get a nonce from server—the SAKA service may not be running or the Key Custodians may not have activated the crypto-module.
If such an error message is displayed, the DA cannot do anything with the SAKA server until the services have been started and the Key Custodians activate the cryptographic hardware module. (See Chapter 10 for more details).
If the services are running and the Key Custodians have activated the cryptographic module, the connection icon will turn green and a message displays, “Successfully connected to the SAKA server.” The Disconnect button also becomes enabled.
All administrative tasks on this encryption domain on the SAKA are now available until it the Disconnect button is clicked or DACTool is closed.
Domains 
All cryptographic services performed by the SAKA servers are organized by SAKA encryption domains (SED). An SED is a logical entity that has a unique identifier, a name, its own key management policies, keys, users, and data. SAKA can host as many SEDs as the machine's physical capacity permits (it can theoretically manage (264‒1) encryption domains—but practically, most appliances will have just a few encryption domains on them—service providers that perform payment services, etc. may have a few hundred or even thousands of domains—one per customer).
When SAKA is newly installed, there is only one SED created on the machine as part of the installation process. This SED has a domain identifier (DID) value of 1. Most sites are likely to have just this one SED on the machine, and as such, the default values in the DA Preferences panel and the Domains panel are appropriate.
Click the Domains icon or Domains → View Domain on the menu. The following displays:
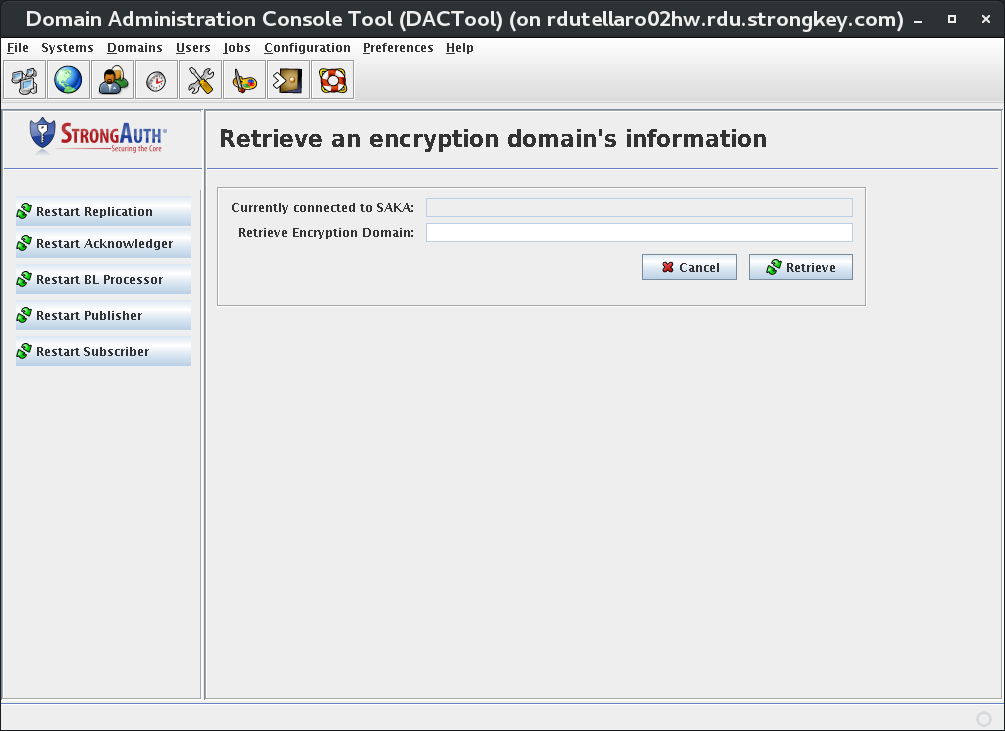
The Retrieve an encryption domain's information panel displays two fields—neither of which are modifiable—and two buttons:
|
Currently connected to SAKA |
The URL of the SAKA server to which DACTool is currently connected. This field remains blank if there is no current connection. |
|
Retrieve Encryption Domain |
The unique identifier of the encryption domain to which DACTool is currently connected. This field remains blank if there is no current connection. |
|
Cancel |
Cancels the operation and return you to the Home panel. |
|
Retrieve |
Retrieves information about the encryption domain and provides an opportunity to view and edit information about it. |
If the fields on this panel are not blank, upon selecting the Retrieve button, after a few seconds, a panel like the following is displayed (your domain information will differ):
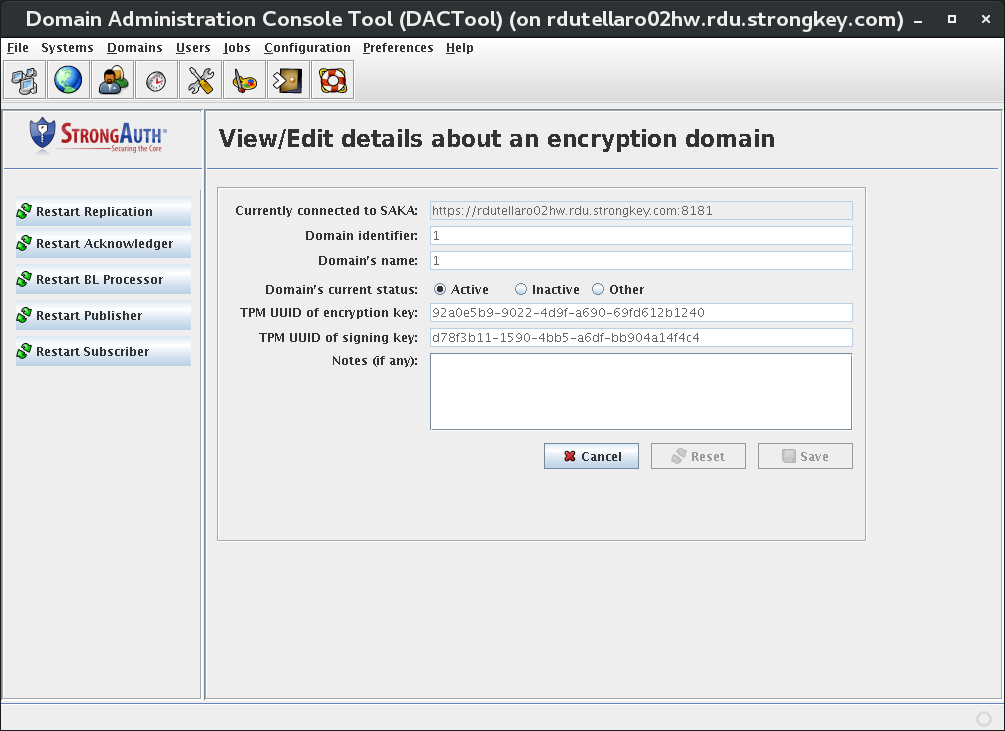
NOTE: The blue buttons at left are used to dynamically restart the replication services which normally would require a full application restart to accomplish. Replication services consist of several ports and threads; this includes the Acknowledger thread (for receiving replication acknowledgment messages), the BackLog Proccessor (for re-sending old/stale replication objects if they are not acknowledged after a certain period after the replication record was created), the Publisher (for broadcasting replication messages the first time after they are created), and the Subscriber (for listening for incoming replication messages). Restart Replication restarts all the above-mentioned sub services at once.
View or make adjustments to the fields, which are defined here:
|
Currently connected to SAKA |
The URL of the SAKA instance to which DACTool is currently connected. |
|
Domain identifier |
The unique identifier of the encryption domain to which DACTool is currently connected. This value can never be modified. |
|
Domain's name |
The “friendly” name of the encryption domain. This name can only be established when the domain is first created and never modified. |
|
Domain's current status |
The current status of this encryption domain:
Domain status can be modified by business and security policies. |
|
TPM UUID of encryption key |
For SAKA servers using the TPM cryptographic module, this field displays the universally unique identifier of the key object representing the EC encryption keys of this domain. This key object encrypts all symmetric encryption keys of this encryption domain. This value can never be modified. |
|
TPM UUID of signing key |
For SAKAs that use the TPM cryptographic module, this field will display the universally unique identifier of the key object that represents the EC signing keys of this domain. This key is used to digitally sign the digital certificates of the Domain Administrators of this domain. This value can never be modified. |
|
Notes (if any) |
User-defined comments with a maximum length of 512 alphanumeric characters. |
|
Cancel |
Cancels the operation and returns to the Home panel. |
|
Reset |
Resets all values to those retrieved from the database, as long as modifications since then have not been saved. Once saved, the saved values will become the new originals. |
|
Save |
This button is disabled by default, but if any modifiable values are changed on the screen, the button becomes enabled. Selecting it saves modified values to the database. |
Click Save if any changes were made.
Adding a New Domain
The question arises: if DACTool only edits and views an encryption domain's information, how does one add a new encryption domain to SAKA? A business may have many reasons for creating a new domain. Some of the reasons are:
To address a new regulation requiring different policies for encryption and/or key management
To serve a different department—such as Human Resources for encrypting Social Security Numbers or pension-related financial data
To serve a different subsidiary's compliance requirements
To separate the encryption and storage of credit card numbers based on card issuer
SAKA is capable of hosting as many encryption domains as the physical capacity of the machine permits. So, how does one create a new domain?
The process of creating a new domain, while fairly simple, has one important prerequisite: the unique EC cryptographic keys of the new domain must be securely migrated from the Primary SAKA server to the Secondary under the protection of the Migration and Storage Key (MASK). This process is essential to ensure that encryption keys and data of the new domain are available on the Secondary server in the event of a disaster affecting the Primary server.
While a new encryption domain can be created on any node of the cluster, we recommend performing this task on the Primary.
Generating and Storing Keys
The first portion of adding a new domain generates EC cryptographic keys on the Primary server for the new domain and stores metadata about the new domain in the SAKA database. It also initiates the key migration process for the new domain's cryptographic keys.
Login as strongauth on the primary SAKA server.
Start up two shell windows.
In Window2, change to
/usr/local/strongauth/glassfish/domains/domain1/logs.shell> cd /usr/local/strongauth/glassfish/domains/domain1/logs
or use the shell aliasaslg:shell> aslg
In Window2, run the
tail -fcommand on theserver.logfile so you can watch the output of the server application as it scrolls by.shell> tail -f server.log
or use the shell-aliastsl:shell> tsl
In Window1, change directory to
/usr/local/strongauth/bin.shell> cd ~/bin
In Window1, execute the
New-Domain-Setup-Wizard.sh.shell> ./New-Domain-Setup-Wizard.sh
Follow the steps of the wizard, ensuring there are no errors in Window1 or Window2. If there are errors, contact StrongKey at support@strongkey.com and discontinue the new domain process.
In Window1, execute
create-SKCE-Domain.shto setup this domain for the CEM. Specify the domain number (DID) of this new domain and a password you would like to use to secure the CEM service credentials:shell> ./create-SKCE-Users.sh <DID> <password>
Migrating Keys
The process completes key migration on the Secondary SAKA server for the new domain setup initiated in the previous step.
Login as strongauth on the secondary SAKA server.
Start up two shell windows.
In Window2, change the
/usr/local/strongauth/glassfish/domains/domain1/logsdirectory.shell> cd /usr/local/strongauth/glassfish/domains/domain1/logs
or use the shell-aliasaslg:shell> aslg
In Window2, run the
tail -fcommand on theserver.logfile so you can watch the output of the server application as it scrolls by.shell> tail -f server.log
or use the shell-aliastsl:shell> tsl
In Window1, change directory to
/usr/local/strongauth/bin.shell> cd ~/bin
In Window1, execute the
Secondary-SAKA-Replication-Final.sh.shell> ./Secondary-SAKA-Replication-Final.sh
Follow the steps of the wizard, ensuring there are no errors in Window1 or Window2. If there are errors, contact StrongKey at support@strongkey.com and discontinue the new domain process.
In Window1, execute
New-SKCE-Domain.shto setup service credentials for the CEM. Specify the DID of this new domain and a password you would like to use to secure the CEM service credentials. These values must be the same as those supplied on the Primary SAKA server:shell> ./New-SKCE-Domain.sh <DID> <password>
Repeat steps 1–8 for all other Secondary SAKA servers in the cluster.
The new domain is now ready for configuration via DACTool. The DA must now choose to which domain to connect on the Systems panel. All administration functions described in this chapter continue to perform normally on the new domain.
Users
There are three types of users in every SED: administrative users (also called Domain Administrators or DAs), ping users, and normal users.
Domain Administrators
DAs always have administrative privileges within the SED, but with the exception of the first DA of an SED, they may or may not have encryption and decryption privileges over the data within an SED.
When a new SED is created—either at installation time or subsequently—each SED is created by default with a new DA username of administrator1. The password for this DA is chosen at creation time by the individual executing the domain creation wizard. This DA (administrator1) not only has administrative privileges over the new SED, but also cryptographic service privileges. Using the EncryptionService web services the primary DA can encrypt and decrypt any object within the SED over which they have administrative privileges.
To prevent DAs from having such encryption and decryption privileges over the SED while giving them administrative privileges, create additional DA credentials within the SED using the DACTool and restrict the new DAs' privileges. The credential of administrator1 should be locked away in a secure location so it cannot be used, except as a backup credential during disaster recovery.
Every DA must have a digital certificate with its corresponding EC keys to strongly authenticate to SAKA for executing administrative commands. The certificate and keys are typically stored on a USB flash drive so they may be portable and can be kept off the machines likely to be used by the DA.
NOTE: SAKA comes with five (5) color-coded USB flash drives; the yellow token is designated for the DA. Sites are free to use any flash drive, as long as they maintain control over its contents.
The SED's first DA keys and certificate are generated on this token during the creation of the new domain; subsequent DA keys and/or certificates can either be generated using DACTool or supplied to DACTool if they are generated/created using another tool (such as keytool, OpenSSL, Mozilla, etc.).
Pinguser
The pinguser is a special SAKA user with the username pinguser. This user has only a single—and extremely limited—privilege: to be able to decrypt the single first encrypted record in the encryption domain and report the plaintext data associated with it. This user exists to allow Operations staff to detect if the web service is fully operational at the application layer without having access to any of the plaintext sensitive data in the encryption domain.
The first encrypted record in any encryption domain on the appliance is something called the well-known-PAN. In SAKA version 1.0 it is a test record containing the first ten prime numbers followed by a zero: 1235711131719230. In SAKA 2.0 each node of the cluster has its own default well-known PAN: 1111000000001111 for server ID #1, 2222000000002222 on server ID #2, 3333000000003333 on server ID #3, and so on. These well-known PANs are created by the New Domain Wizard when a new encryption domain is created. Since this is the first transaction sent to the new domain on the appliance—assuming the default configuration and values are being used—the web service returns the well-known token 1000000000000001 on server ID #1, 2000000000000001 on server ID #2, and so on.
NOTE: SAKA 2.0 provides the ability to return tokens that conform to the Luhn algorithm (https://en.wikipedia.org/wiki/Luhn_algorithm). In this case, the tokens will be discontinuous; please see 14—KAM Configuration, Section 2 for details.
The username (pinguser) and the tokens requested for decryption within each encryption domain (1000000000000001, 2000000000000001, etc.) are hard-coded into the SAKA application. Hence, when creating the pinguser credential using DACTool, the username must precisely state pinguser. Each encryption domain is expected to have only one such pinguser credential.
Normal Users
Normal users are those who only have encryption, decryption, delete and search privileges—or a combination of these privileges.
Normal users are created and defined the same way as DAs. However, a site has the choice of defining their normal users in one of three locations:
The internal SAKA database—in which case all users and their privileges are local to the SAKA server and are managed using DACTool.
Microsoft's Active Directory (AD)—in which case all normal users are defined and managed in AD using Microsoft-provided tools (see 14—KAM Configuration, Section 3.1 in this manual); however, all DAs are defined and managed in the internal SAKA database.
Any other Lightweight Directory Access Protocol (LDAP)-based directory server—in which case all normal users are defined and managed in the LDAP directory using the directory-provided tools (see Integrating with Another Directory Server—an open-source LDAP directory server—in Chapter 14 of this manual); however, all DAs are defined and managed within the internal SAKA database.
It is also possible to configure SAKA to use two mechanisms to authenticate and authorize cryptographic service requesters—the local database and either AD or another LDAP directory server. SAKA must be configured with both options and told which repository to look up first when verifying a requester's credential for supplying cryptographic services.
NOTE: It is not possible to configure SAKA to use AD and another LDAP directory simultaneously for verifying credentials or to use all three mechanisms to verify credentials—the internal database, AD, and another LDAP directory.
Selecting the Users icon on the DACTool toolbar, the side-bar provides two options: to add a new user and to view existing users within the internal SAKA database. SAKA cannot show SAKA users defined in Microsoft's AD or another LDAP directory server.
Add New User
Adding a new normal user to the SAKA internal database requires creating a unique username for the user, assigning a password to them, and assigning either the encryption, decryption, deletion, search or a combination of these privileges to the user. When creating the pinguser, you must assign it only the decryption privilege.
Adding a Domain Administrator requires creating a unique username for the DA, assigning a password to the DA, assigning them the SAKA DA privilege and specifying the digital certificate of the new DA so their digital signature can be verified for authentication and administrative actions.
NOTE: It is recommended for security reasons, that with the exception of the first Domain Administrator—which is created as part of the SAKA setup—that DAs not be assigned any cryptographic privileges to encrypt, decrypt or delete sensitive data. This allows separate administrative privileges from cryptographic privileges for control purposes.
After additional DAs have been created, the first DA's credential may be locked up and maintained—with its PIN in a sealed, tamper-evident envelope—as a safety measure in a remote location: either a bank safe or in the custody of a non-technical custodian.
To add a new user to SAKA, click Add New User on the side-panel or Users → Add User on the menu. The following panel displays, allowing addition of a new user—DA or Normal—to the internal SAKA database.
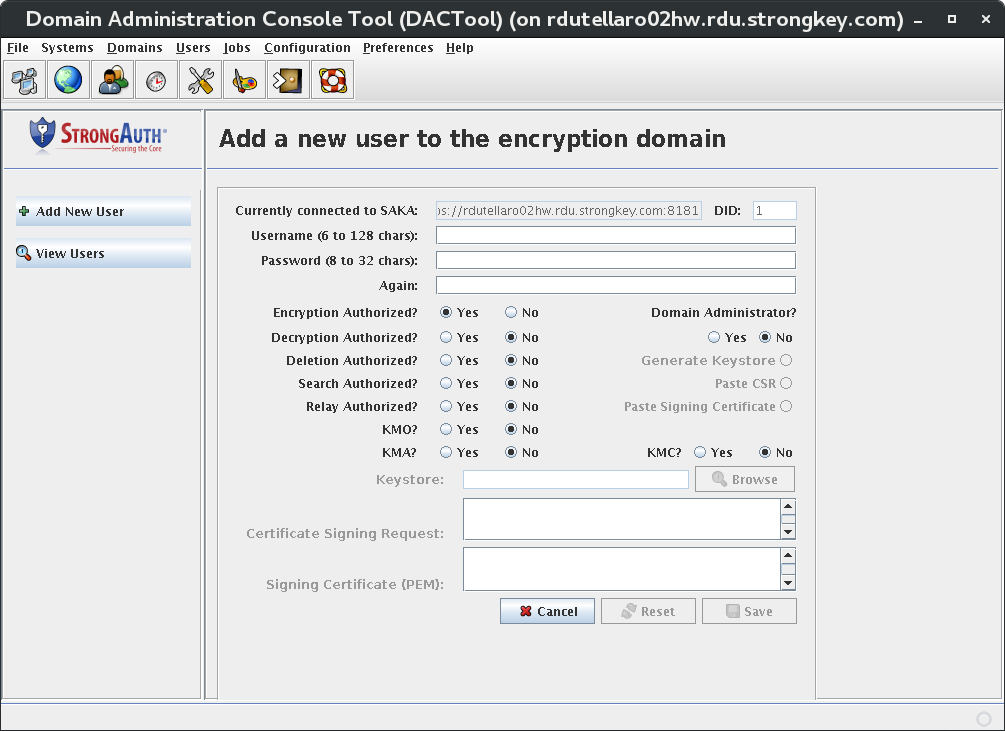
|
Currently connected to SAKA |
The SAKA URL to which DACTool is currently connected. |
|
Domain Identifier (DID) |
The unique identifier of the encryption domain to which DACTool is currently connected. |
|
Username |
The username of the new user who is being granted privileges to this SED. While the system can use any username, it is better to use some standard convention to make management easier. Here are a few suggestions:
If a username already exists in the SAKA database, an error message will be returned indicating a duplicate value already exists. |
|
Password |
A password for the new user. The password must be a minimum of 8 characters with a combination of alphabet, numerals, and at least one special character. |
|
Again |
A field for repeating the new user's password to verify it. |
|
Encryption Authorized |
These radio buttons determine whether the new user is authorized to request encryption web services. By default it is set to Yes. However, it can be changed to No, if desired. |
|
Decryption Authorized |
This radio button group determines whether the new user is authorized to request decryption web services. By default it is No. However, it can be changed to Yes, if desired. |
|
Deletion Authorized |
This radio button group determines whether the new user is authorized to request deletion web services. By default it is set to No. However, it can be changed to Yes, if desired. |
|
Search Authorized |
This radio button group determines whether the new user is authorized to request search web services. By default it is set to No. However, it can be changed to Yes, if desired. |
|
Relay Authorized |
This radio button group determines whether the new user is authorized to request relay web services. By default it is set to No. However, it can be changed to Yes, if desired. |
|
SAKA Domain Administrator? |
This radio button group determines whether the new user is to be designated as a DA for this SED. By default, it is No. If the choice is set to Yes, three other radio buttons become enabled. |
|
Generate Keystore |
This radio button indicates that DACTool must generate a new EC cryptographic key pair for the new DA, and also must create a digital certificate signed by the Signing Key of this SED. If this radio button is selected, the Keystore field becomes enabled to specify the location of the BCFKS keystore. |
|
Paste CSR |
This radio button indicates that DACTool must accept a Certificate Signing Request (CSR) generated elsewhere for the new DA, and also must create a digital certificate signed by the Signing Key of this SED. No cryptographic keys are generated by DACTool for this option. If this radio button is selected, the Certificate Signing Request field is enabled to accept the CSR text. |
|
Paste Signing Certificate |
This radio button indicates that DACTool must accept a digital certificate issued elsewhere for the new DA. No keys are generated and no certificate is issued out of DACTool for this option. If this radio button is selected, the Signing Certificate (PEM) field becomes enabled to accept the digital certificate text. |
|
Keystore |
If the Generate Keystore radio button is selected for a new DA's credential, this field must specify the location where the BCFKS keystore will be created by DACTool with the new DA's cryptographic key pair and digital certificate. Only the directory of the keystore must be provided. DACTool automatically creates a unique B filename for the new DA. The Browse button may be used to locate the directory where the new keystore must be created. |
|
Certificate Signing Request |
If the Paste CSR radio button is selected for a new DA's credential, this field must specify the Privacy Enhanced Mail (PEM)-encoded certificate signing request for the new DA. |
|
Signing Certificate (PEM) |
If the Signing Certificate (PEM) radio button is chosen for a new DA credential, this field must specify the PEM-encoded digital certificate for the new DA. |
|
Cancel |
Cancels the operation and returns to the Home panel. |
|
Reset |
Resets the form to default values. |
|
Save |
Disabled by default. If all appropriate fields are filled in on the form, the button becomes enabled. Selecting it writes the new credential to the internal database. |
Adding a new user is as simple as supplying the parameters to the fields in the form and selecting the Save button. DACTool determines if the two passwords typed in are identical and match the rules for passwords—use the Enter key on your keyboard to activate the logic—it doesn't work when you use the Tab key or the mouse pointer to move from field to field.
The following screen shows a successfully added new user:
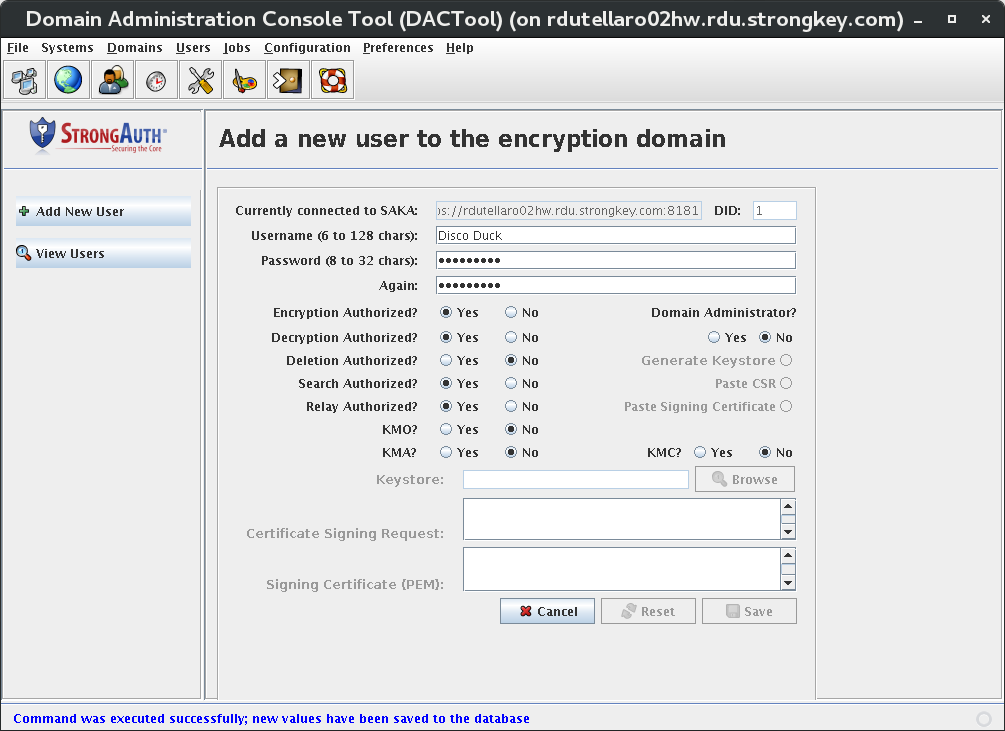
When adding a new DA to SAKA, select the Yes radio button to the SAKA Domain Administrator? Option. When you do so, the grayed-out radio buttons on the right side of the form become active.
Unless you are familiar with public key cryptography or have a Public Key Infrastructure (PKI) in your environment, select Generate Keystore. This option allows creation of a new 256-bit EC key pair and digital certificate (issued by SAKA), and save them in a Java Keystore file at a custom location.
When the Generate Keystore radio button is selected, the Keystore text field and the Browse button become active. Either specify the full path and filename of the new keystore in the text field or, using the Browse button, select a location and then specify the keystore filename. Use a format that identifies the DID and the DA's username in the filename, such as 1-administrator2.bcfks or 3-johndoe.bcfks, where the numeral represents the DID, and the name represents the DA's username. The .bcfks file extension indicates that this is a BCFKS file containing the new credentials of the DA.
It is also recommended that, for security reasons, DAs should NOT have any privileges to perform any cryptographic functions such as encrypt, decrypt, etc. They should only be permitted to perform administrative functions such as adding/removing users, changing passwords, configuring the appliance, etc.
View Users
Selecting Users → View Users on the menu or the View Users item on the side panel brings up the following panel. This form contains several filters for searching the internal database for existing users.
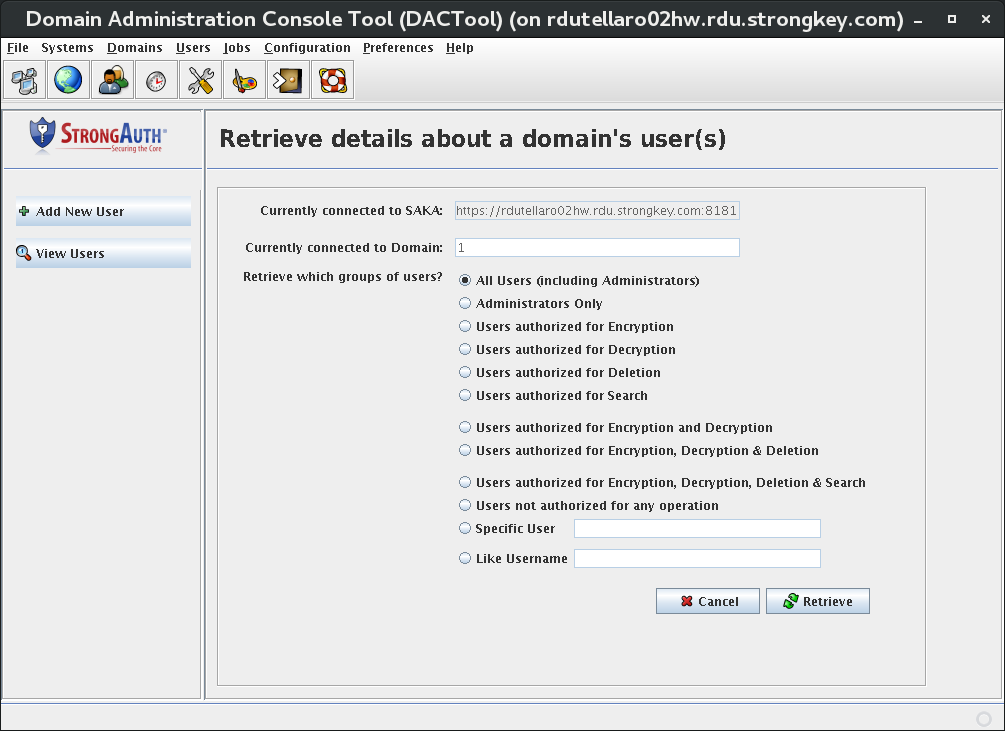
|
Currently connected to SAKA |
The URL of the SAKA to which DACTool is currently connected. |
|
Currently connected to Domain |
The unique identifier of the encryption domain to which DACTool is currently connected. |
|
Retrieve which groups of users? |
Specifies the filters on which to search the internal SAKA database.
|
|
Cancel |
Cancels the operation and returns to the Home panel. |
|
Retrieve |
Disabled by default, but if an appropriate radio button is selected (and text-fields are filled in where necessary), this button becomes enabled. When selected, it submits the query to SAKA to retrieve the users, if any are found. |
Clicking Retrieve results in a list similar to the following figure. A description of the fields follows.
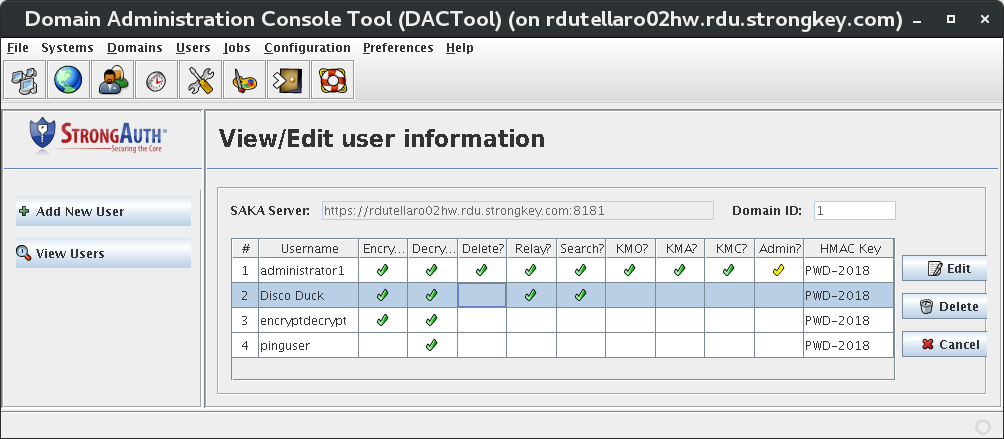
|
# |
Serial number of the record. |
|
Username |
Name of the user in alphabetical order. |
|
Encrypt? |
A green check mark indicates that the user is authorized to request encryption web services from SAKA; a blank in this column indicates that the user does not have this privilege. |
|
Decrypt? |
A green check mark indicates that the user is authorized to request decryption web services from SAKA; a blank in this column indicates that the user does not have this privilege. |
|
Delete? |
A green check mark indicates that the user is authorized to request deletion web services from SAKA; a blank in this column indicates that the user does not have this privilege. |
|
Relay? |
A green check mark indicates that the user is authorized to request relay web services from SAKA; a blank in this column indicates that the user does not have this privilege. |
|
Search? |
A green check mark indicates that the user is authorized to request search web services from SAKA; a blank in this column indicates that the user does not have this privilege. |
|
KMO? |
A green check mark indicates that the user is authorize to request web services which require KMO privileges from the SAKA; a blank in this column indicates that the user does not have this privilege. |
|
KMA? |
A green check mark indicates that the user is authorize to request web services which require KMA privileges from the SAKA; a blank in this column indicates that the user does not have this privilege. |
|
KMC? |
A green check mark indicates that the user is authorize to request web services which require KMC privileges from the SAKA; a blank in this column indicates that the user does not have this privilege. |
|
Administrator? |
A yellow check mark indicates that the user is a Domain Administrator, authorized to administer this SED; a blank in this column indicates that the user does not have this privilege. |
|
HMAC Key |
Every user's password is processed with a symmetric encryption key to create a hashed message authentication code (HMAC). This is a one-way cryptographic operation that cannot be reversed, but can be verified with the same password, key, and algorithm. This column indicates which specific key was used by SAKA to generate the user's HMAC. |
|
Edit |
Opens a dialog to edit user information. |
|
Delete |
Deletes a user's record. |
|
Cancel |
Cancels and returns to the Home panel. |
The only exception to the display format shown above is if a Specific User is chosen. Since DACTool knows only one user will result, it opens the View/Edit user information dialog, as shown here:

Using this form, the password and encryption/decryption/deletion privileges of this user may be changed.
To change a user's password, just delete the obfuscated characters from the two fields and type the new password—using at least one alphabet character, one numeral, one special character, and a minimum of 8 characters.
The behavior of these fields is identical to that described in Section 11.1—Changing DA Passwords.
NOTE: It is not possible to change the privileges of administrator1 from this panel. Only his/her password can be changed by another DA. If a DA's password is changed on this screen, the DA must also change the password on their BCFKS keystore to match the password in the internal database.
When a list of users are displayed in the table in DACTool, selecting a user—except administrator1—enables the Edit and Delete buttons. Clicking Edit opens a dialog as if Specific User had been chosen. If the user is a DA, you can take away their administration privileges. However, you cannot give someone DA privileges on this panel; you must add them as a new user with DA privileges.
Deleting a User
Except for administrator1—selecting the Delete button allows permanent deletion of users from the internal database. However, only if the credential will never be needed again. Users may be temporarily disabled by taking away their encryption and decryption privileges and/or changing their password.
If you choose to delete a user, you will be presented with a confirmation dialog, such as the following:
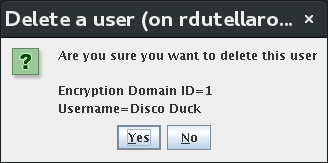
Selecting Yes on this dialog will delete the user and update the visible records in the DACTool table.
Jobs 
Scheduled Jobs
To open the Scheduled Jobs ialog, click Jobs → Scheduled Jobs on the menu or the Scheduled Jobs icon displays the following panel on DACTool:
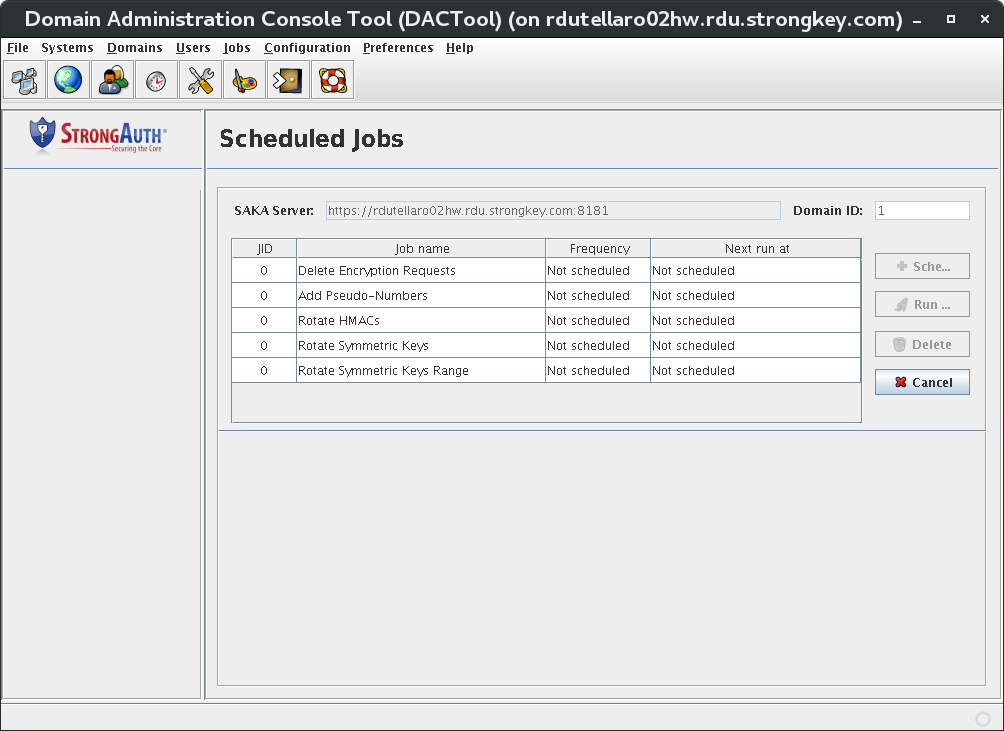
The panel displays a table with the following columns They are:
|
JID |
The Job Identifier. |
|
Job name |
The name of the job. |
|
Frequency |
How often the job runs: Daily, Weekly, or Monthly. |
|
Next run at |
Date and time the job will next launch. |
SAKA includes five jobs that assist with different aspects of key management. Four of the five jobs can be scheduled to run at a fixed frequency, or executed just once on demand. One job can only be executed once, on demand, and cannot be scheduled for frequent execution. The jobs are:
Delete Encryption Requests—allows a site to delete encryption request records from the internal database—along with all related ciphertext (encrypted data)—at periodic intervals if policy and/or business processes require it. Once deleted, the plaintext (unencrypted data) is never available again. The job is disabled by default and must be enabled through its configuration parameter before it can be scheduled to run. If the job is disabled in the configuration section, scheduling it on this panel will not execute the job. A report is generated each time the job is executed and stored in the
STRONGKEYLITE_HOME/logdirectory.Add Pseudo-Numbers—this job allows a site to switch from HMAC tokens to Pseudo-Numbers (PSN) (also known as tokens). An HMAC is a unique value generated by SAKA in combination with a symmetric cryptographic key and an algorithm for a sensitive data item. The HMAC cannot be reversed to arrive at the original value, but can be verified—given the original value, the cryptographic key, and the algorithm—by regenerating the HMAC again and comparing the preserved HMAC with the regenerated one. While fixed in length, HMACs do not resemble data such as credit card numbers or social security numbers. SAKA can be configured to generate numerical tokens that resemble the original data—but are not harmful if disclosed. If a site began using HMACs, but chose to switch to tokens at some point, this job will generate unique tokens for all existing records in its internal database. As the job is executed, a report is generated and stored in the
STRONGKEYLITE_HOME/logdirectory.Rotate HMACs—this job allows a site to rotate HMAC keys and re-generate new HMACs for existing records in the internal database when the HMAC keys change. Some regulations—such as the PCI DSS—require that symmetric encryption keys be changed at least once a year. While SAKA allows minimized risk of key compromise by using a new symmetric encryption key as frequently as every day, the regulation nonetheless requires a key rotation. While the symmetric encryption key can change automatically at customizable intervals, the HMAC key is configured to be used for a full year before it is rotated. However, in order to ensure that the rollover of the HMAC key does not bog down SAKA performance, this job allows the site DA to run the job at a time that is convenient to the site. The key rolls over at midnight of the new calendar year, every year. It is strongly recommended that this job is executed fairly soon—within the first week of the new year—after the key rolls over, lest the system get too critical for this maintenance activity at a busier time of the month/year. When the job is executed, a report is generated and stored in the
STRONGKEYLITE_HOME/logdirectory.Rotate Symmetric Keys—this job allows a site to rotate symmetric encryption keys and re-encrypt sensitive data automatically without the interruption of cryptographic services for client applications. This job is configured to run by default, but it must be scheduled by a site once SAKA is installed. Depending on whether the site's key duration policy is Daily, Weekly, Monthly, or Annually, this job can be scheduled to execute at the same frequency to ensure that keys that are a year old are rotated (for PCI DSS compliance). Sites needing a more aggressive key rotation policy can configure a key rotation schedule appropriate to their needs.
Rotate Symmetric Keys Range—this job allows a site to rotate symmetric encryption keys and re-encrypt sensitive data for a range of records, instead of for all records that might meet the default filter (cryptographic keys that are a year old). If configured, the job runs automatically without interrupting cryptographic services for client applications.
This job is useful after the first time a site imports existing records into SAKA. As an example, if the site has 10 million records and they are all imported in one batch job, it is likely that all records will have been encrypted by a single or at most two symmetric data encryption keys (actual time will depend on whether the site has deployed the standard or the high performance machine). While this is very useful from a performance point of view (because there are only one or two keys to use for decryption), this not only becomes a security risk—the more ciphertext existing for a single key, the more useful information a cryptanalyst might gain towards deciphering data—but can be a performance sink during the annual key rotation mandated by PCI DSS: millions of records will have to get re-encrypted within the 24–48 hour period.
Instead, if the 10 million records were encrypted by 350 symmetric keys, at most 29,000 objects are encrypted by any given key, and the key rotation can be spread out over 350 days, ensuring that the re-encryption job finishes in 5–10 minutes each day.
Four buttons are visible on one side of the panel. While they may appear enabled upon first entry to this panel, some buttons become disabled when a specific job is selected from the list. These buttons are:
|
Schedule |
Used to schedule a recurring job in SAKA. However, because the Add Pseudo-Numbers job is expected to be executed just once, the Schedule button never enables when this job is highlighted. |
|
Run Once |
Allows a site to execute a job on demand. While a job may have been scheduled to run at a particular frequency, a site may require the execution of a job on demand for business reasons. |
|
Delete |
Cancels a previously scheduled job. |
|
Cancel |
Returns to the DACTool Home page without doing anything. |
Scheduling a Job
To schedule a job, select the job in the table. A message about what the job does displays itself in the status bar of the screen. If the Schedule button remains enabled, select the button. A scheduling form displays itself at the bottom of the panel for specifying how frequently you want the job to be executed—Once, Daily, Weekly, or Monthly—and when the first run of the job should be executed. The form is shown below:
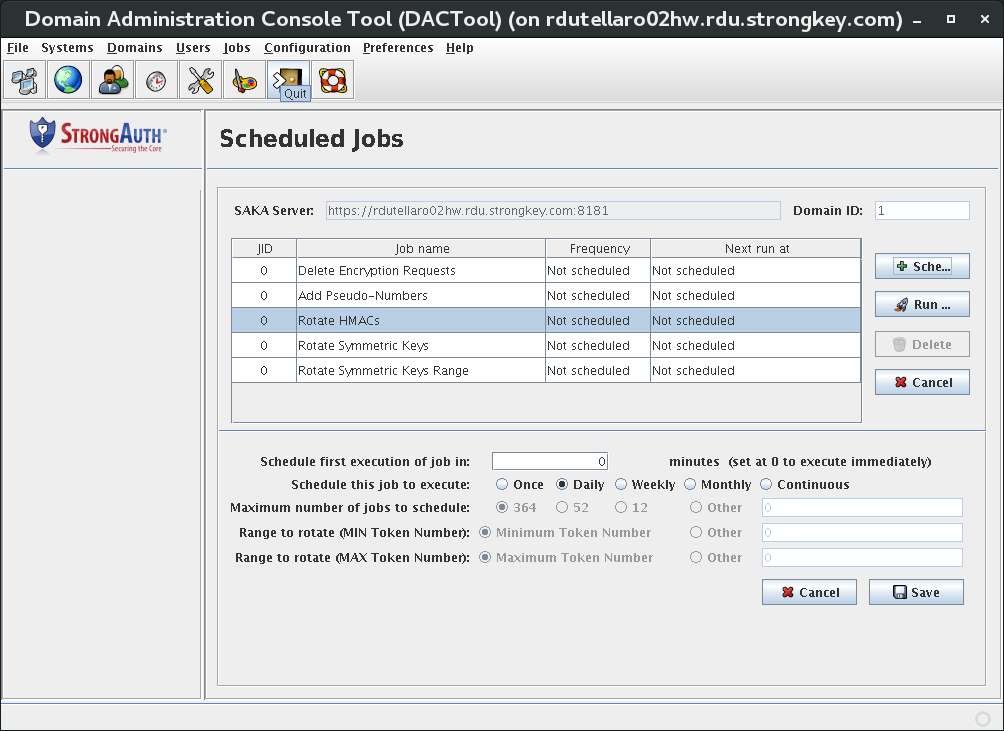
Upon supplying the form values and clicking Save, a confirmation dialog displays.
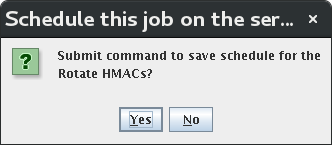
To cancel the scheduling of this job, click No at this point and return back to the DACTool. Upon clicking Yes, the scheduling is submitted to the SAKA server. After completing the transaction, the table in DACTool is updated to reflect the newly scheduled job.
Canceling a Scheduled Job
To cancel a previously scheduled job, select from the table the job that was already scheduled, and the Delete button become enabled. Upon clicking the Delete button, you are presented with a dialog to confirm the deletion of the job schedule, as follows:
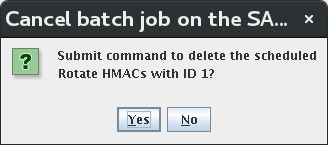
If you want to cancel the transaction, you can click No at this point and return back to DACTool. Upon clicking Yes, the cancellation is submitted to the SAKA server. After completing the transaction, the table in DACTool is updated.
Configuration 
Selecting the Configuration icon on the DACTool toolbar displays a blank panel, but it provides two options on the side panel that are reflected in the main drop-down choices: View Mutable Configuration and View Immutable Configuration. Every editable configuration property—with default and permissible values—is described in Chapter 14.
This section of the manual discusses how to navigate this part of DACTool.
The Mutable Configuration can be modified to a site's policy or configuration.
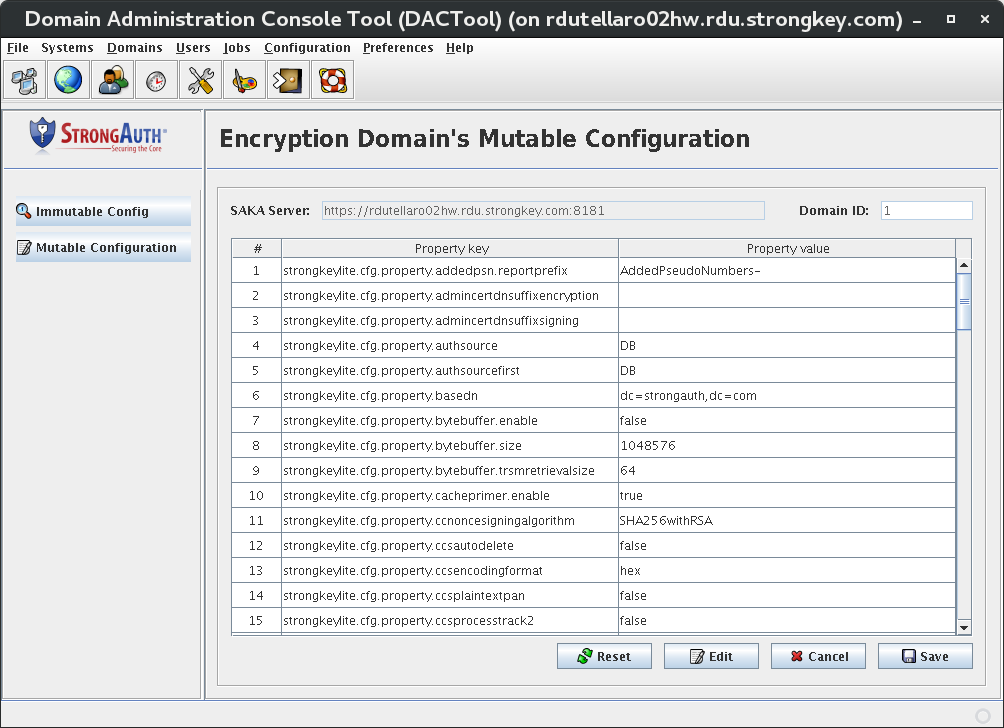
To edit a Mutable Configuration property, perform the following steps:
Select the configuration item you want to modify. Click Edit.
The following dialog displays. The fields are described below.

Modify the configuration value to your desired value.Domain ID
Domain Identifier for the SED.
Property
The name of the property in question.
Value
The value assigned to the property.
Notes
User-defined comments of 512 characters or less.
Hint
A description of the property.
Click OK to return to the Mutable Configuration screen. The configuration value will show your updated value.
Click Save to write the new configuration to the database. The new values go into effect immediately with no need to restart SAKA or the application server. The Reset, Edit, and Save buttons become disabled on a successful save operation. They become enabled again when a configuration parameter is selected or the Configuration panel is re-launched.
The Immutable Configuration cannot be modified via DACTool. It is available to view, but may not be modified, as doing so will prevent SAKA from working as designed. The Immutable Configuration screen appears similar to the Mutable Configuration, except the entire panel is grayed out so that none of the properties are modifiable. The only button option is Cancel, which takes you back to the DACTool Home page.
NOTE: Knowledgeable developers and systems administrators may realize that these are just Java properties and can be modified. Modifying an immutable property will void the warranty on the product and void the support contract.
KAM Key Migration Tool
During the SAKA domain creation process a key is created called the encryption domain Key (EDK). While everything else specific to a domain is automatically replicated, this key must be manually migrated to each appliance in the cluster for that appliance to encrypt and decrypt records in the domain. This key migration is ordinarily handled by the new domain creation process for all nodes in the cluster. There are, however, some cases where an EDK must be migrated after the domain creation process has taken place.
One such scenario is if a new appliance is being added to the cluster. During this process, the EDKs from each of the existing domains must be migrated to the TPM in the new appliance. Another potential scenario is if the motherboard is replaced on an existing appliance in the cluster; in this case, the appliance will lose its TPM and the EDKs will need to be remigrated to this appliance.
The new domain process uses a streamlined EDK migration wizard that only works for all the TPMs existing at the time of the domain creation. When an EDK must be migrated after the domain has already been created, it is done using the Key Migration (KM) Tool. KMTool is designed to take an EDK from any appliance and migrate it to another appliance in the cluster. KMTool uses a similar process to the wizards and provides the same degree of security and control as the wizards in the key migration process.
Prerequisites
KMTool enforces strict controls for the migration of an EDK. All three Key Custodians (KCs) and the Domain Administrator (DA) must provide their credentials to KMTool before an EDK can be exported from or imported to a SAKA.
Additionally, the design of KMTool requires it to be executed locally on the SAKA server. This means that the keystores for the KCs and DA must be accessible to the file system of the SAKA running KMTool. This can be done either by having all KCs and the DA physically available at the location of the SAKA or by copying the KC and DA keystore files over the network onto the SAKA server temporarily. Before copying keystores from a KC keystore, be sure to consult your company's security policy and get the proper approvals.
Besides the security requirement of running KMTool, the Migration Authority Storage Key (MASK) of the SAKA receiving the migrated EDK must be available. This file is created during the Secondary Setup Wizard process, which must be performed prior to using KMTool. Finally, the appliances involved in the migration must have already been activated using the Key Custodian SetPIN Tool.
If you are exporting a migration key, start KMTool on saka01—any SAKA that has the EDK. If you are importing a migration key, start KMTool on saka02—the SAKA that will be receiving the EDK. Execute the /usr/local/strongauth/bin/KMTool.sh shell script from a terminal window. This will display the following window:
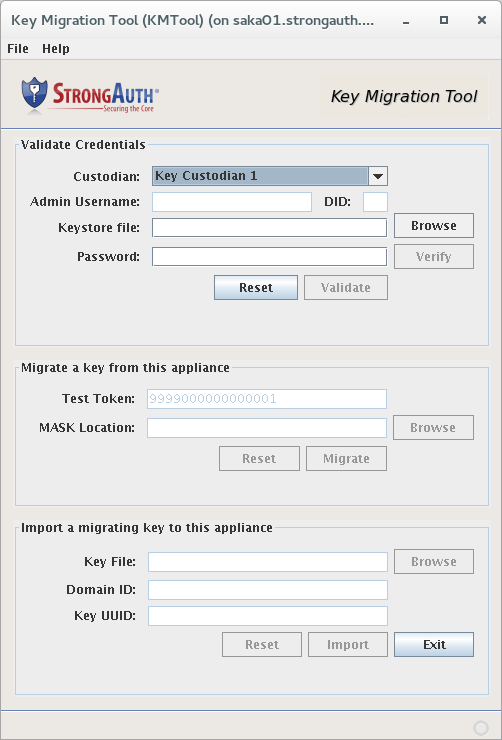
Validating Credentials
The three Key Custodians and the Domain Administrator must now authenticate themselves to the appliance in the Validate Credentials panel of the KMTool. For each role—Key Custodian 1, Key Custodian 2, Key Custodian 3, and Domain Administrator—follow these steps:
Select the appropriate Custodian role from the drop-down menu.
If your role is the Domain Administrator, provide your Admin Username (the default administrator username is administrator1) and the DID of your domain.
If the KC is physically located in front of the appliance, the KC inserts their USB token into the appliance.
Click Browse and select the appropriate KC credential file—it will have a filename that matches their role.
The KC types in their password to the credential file in the Password field.
Click Verify to ensure that the password unlocks the credential file correctly. If the password is correct, a message will appear on the bottom of the tool, as shown here:
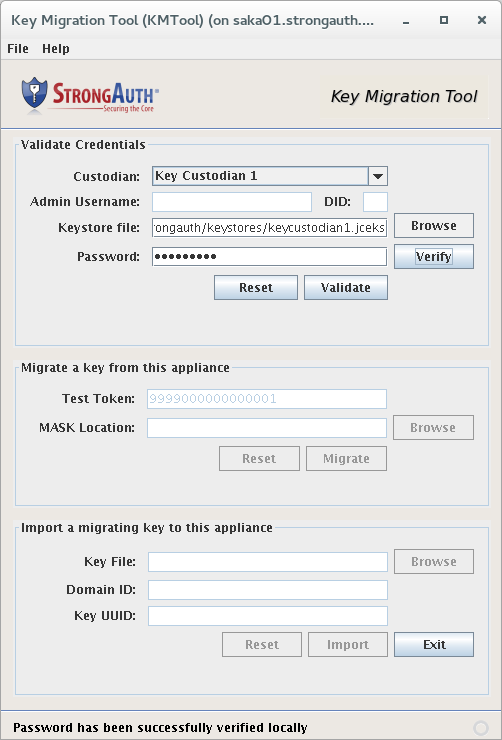
If the password verification is successful, click Validate to send the credential to the appliance for validation. If the process works correctly, a success message will appear on the bottom of the screen: “Successfully validated [role]'s credential on server.” Once the DA and all KCs have successfully validated their credentials, KMTool will unlock the second and third panels.
Migrating a Key from this Appliance
The second panel of KMTool is the Migrate a key from this appliance panel. This panel allows you to specify a MASK file from saka02 and create migration keyfile.
Complete the fields as described below.
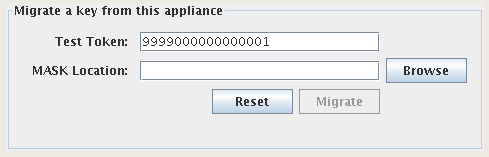
Test Token
A unique Pseudo-Number (Token) created on the Primary appliance, to be used for a decryption test on the new appliance. The standard “well-known token” is 9999000000000001 and was created during the installation wizard. This value is currently not used during the key migration process and can be safely left as default.
Mask Location
Location of the MASK file of the saka02 appliance. In a production environment, this file is on the black flash drive but can also be found on saka02 in the
/usr/local/strongauth/strongkeylite/etc directory.When finished, click Migrate. This action generates a migration keyfile (in the same directory as saka02's MASK file) with a filename that has the following format:
<source-appliance-FQDN>-<target-appliance-FQDN>-<domain Id>-migkey.xml
...where FQDN is the fully qualified domain name of the appliance. In this example, the filename is:saka01.strongauth.com-saka02.strongauth.com-1-migkey.xml
If the migration key is generated successfully, KMTool will produce the following message: “Migrated Encryption Domain #1's master-key to [target-appliance-FQDN].”
NOTE: Additional EDKs can be migrated from other domains before closing KMTool. To migrate another EDK, validate the DA from the extra domain (don't forget to change the DIDfield). After validating the domain, click Migrate again to generate another migration key for this extra domain. This process can be repeated for each other domain.
Import a Migrating Key to this Appliance
Once you have a migration key from saka01, that EDK can be imported into saka01. After starting KMTool on saka02 appliance, all Key Custodians and the Domain Administrator must validate their credentials with KMTool.
After all KCs and the DA are validated, the Import a migrating key to this appliance panel will be unlocked. This panel allows you to specify a migration keyfile from saka01 and import it into saka02:
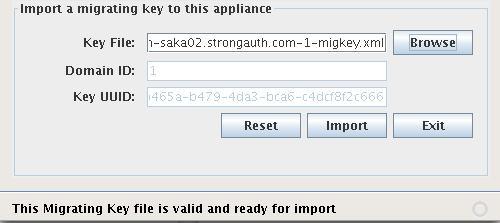
|
Key File |
The filename of the migrating key generated on the saka01 appliance. |
|
Domain ID |
The encryption domain identifier for which the key has to be migrated; this is automatically filled out by the tool. |
|
Key UUID |
The UUID created while generating the key; this is automatically filled out by the tool and helps verify the unique ID of the migrating EDK. |
In the previous section, we created a migration key name saka01.strongauth.com-saka02.strongauth.com-1-migkey.xml. Yours will be named differently depending on the names of your appliances and to and from which domains you are migrating.
Browse to and select a keyfile.
-
After selecting the file, click Import to import this key into saka02. If the process works correctly, you will see a message indicating success: “Successfully imported migrating key to this SAKA.”
NOTE: Additional EDKs can be imported from other domains before closing KMTool. To import another EDK, validate the DA from the extra domain (don't forget to change the DID field). After validating the domain, click Import again to import another migration key for this extra domain. This process can be repeated for each other domain.
Click Exit to close KMTool.
This concludes the key migration process and you can exit KMTool. The saka02 appliance is now capable of decrypting objects encrypted by other appliances within the trusted cluster.
KAM KMS ConsoleTool
The SAKA has many web services for processing transaction using ANSI X-924.1 keys. But before those keys can be used, they must loaded into the appliance. SAKA supports two methods for loading Base Derivation Keys (BDKs)—one for temporary storage and one for persistent storage. Additionally, SAKA can store Local Terminal Master Keys (LTMKs), Terminal Master Keys (TMKs), and Terminal PIN Keys (TPKs) using persistent storage.
SAKA includes a client application—the Key Management Server Console Tool (KMSConsoleTool)—that allows KCs to load ANSI keys into temporary or permanent storage from remote locations. KCs just need a connection to SAKA from their computers and their Key Component and Key Check Value (KCV) from the ANSI Key.
While it is recommended that KC connections be controlled through an access control list of a router or switch to prevent denial-of-service attacks, the connection need not be secured for confidentiality since SAKA accepts KC commands and responses only over a secure transport protocol—Transport Layer Security.
The installation process of the SAKAs would have resulted in the KCs being given the KMSConsoleTool on some media that they would use to install on their computers. Since the KMSConsoleTool is a Java application, it can run on any platform where a Java Virtual Machine (JVM) is available. It is, however, necessary for the KCs to have a supported version of the JVM on their computer to use the tool. See Chapter 1 for the supported version of the JVM for your appliance.
On a Windows PC, the KCs would use a Command Tool script (a batch file) to start the KMSConsoleTool. On a Linux computer, this would be a shell script. The script file can be associated with an icon on the KC's desktop to make it convenient for the KC to use the tool.
When the KMSConsoleTool is started, it presents the following screen:

Complete the fields as described in the table below.
|
Load Key Component/Load BDK/Store ANSI X9241 Key |
The KMS Console performs three main key management tasks:
These radio buttons specify which task the KMSConsoleTool should perform. |
|
Key Size |
The size of the key to be stored in the SAKA. |
|
Key Algorithm |
The algorithm associated with the key being stored. When this stored key is referenced by other web service calls, this algorithm will be used exclusively with this key. |
|
Key Type |
The type of key that is being stored in the SAKA. |
|
Key Name |
A user-defined name to associate with this key or Key Component being loaded into the appliance. When loading multiple Key Components from a set, all Key Components must have the same key name. |
|
Encrypted Key |
The hex-encoded, wrapped ANSI key to be stored in the SAKA. |
|
Key Component |
The hex-encoded Key Component to be loaded into the appliance. |
|
Show |
Allows the user to view the Key Component being typed (normally hidden by default). This allows a Key Component custodian to check whether they have made any typos. Care must be taken to ensure only the Key Component custodian is able to view the plaintext Key Component. |
|
Key Check Value |
A hex-encoded string representation of a KCV. When loading a Key Component, this KCV belongs to that Key Component. When loading a BDK or storing an ANSI key, this KCV belongs to the assembled/decrypted key. |
|
K |
A numerical identifier for this Key Component in the set of Key Components. |
|
N |
The total amount of Key Components in this set. |
|
Manufacturer |
When loading a BDK, the manufacturer associated with this BDK. |
|
Bank ID |
A numeric identifier for with which bank this key is associated. |
|
Terminal ID |
An optional numerical identifier for with which terminal this key is associated. |
|
Terminal Type |
An optional string identifier for to which type of terminal this key belongs. |
|
Notes |
User-defined notes to be stored alongside the key. |
|
Parent Token |
The token identifier of the wrapping key used to encrypt this ANSI key. |
|
DID |
The unique encryption domain identifier. |
|
Username |
The username (service credential) within the encryption domain with the authorization to call this web service. |
|
Password |
The password of the username to authenticate the requeter's credential. |
|
Webservice URL |
Every SAKA listens to KMS commands at a specific URL. This is established at installation of the SAKA. The KC should specify this URL in this field. SAKA always uses the TLS protocol, so the URL must begin with https. |
|
Reset |
This button resets all values to the defaults on the tool's panel. |
|
Exit |
Exits the KMSConsoleTool. |
|
Submit |
Disabled by default. If all appropriate fields are filled in on the form, the button is enabled. Selecting it submits the activation command to KMS. Once completed, feedback is provided on whether the command succeeded. |
Loading Key Components
Start by loading a set of Key Components into the appliance.
After starting the KMSConsoleTool, verify the Load Key Component radio button is selected.
Specify a Key Name between 1 and 128 alphanumeric characters long. This Key Name will be used to associate multiple Key Components with a specific key, but serves no further purpose once the assembled key is loaded.
Provide the first Key Component, its corrosponding Key Check Value, and set the K value to 1. If your key only has two components, change the N value to 2.
Fill in the requested SAKA user information (DID, Username, Password). The user must have Key Management Operator (KMO) privilege to authenticate to this web service.
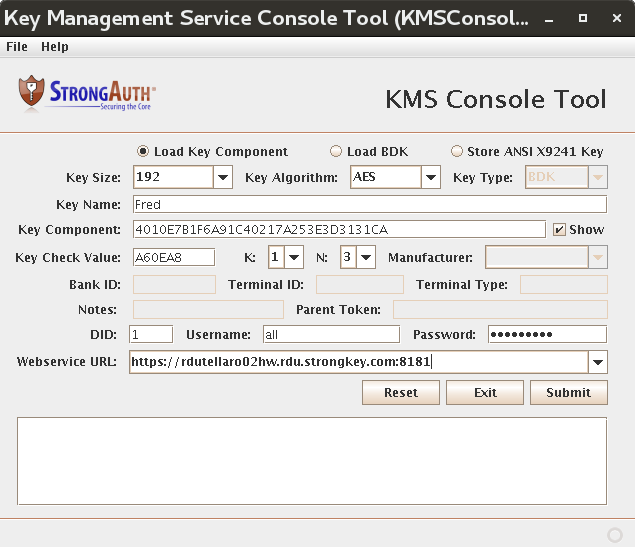
After the required fields are filled, the Submit button becomes enabled. Click Submit. Results and corresponding returned messages are listed here:
The Key Component could not be validated by the Key Check Value
Storage of KeyComponent FAILED: SKL-ERR-6000: Failed to validate key-component with KCV:40…
The SAKA information is incorrect or has insufficient permissions
Client received SOAP fault from server: SKL-ERR-1029: Request failed...
Success
Successfully loaded key component on server.
If the Key Component was successfully loaded, the next Key Component from this set should be loaded. Provide the second Key Component, its KCV, and set K to 2.
Click Submit. If the Key Component loaded, “Successfully loaded key component on server,” will appear on the bottom left.
If your key has three components, then a third Key Component must be loaded. Provide the third Key Component, its KCV, and set K to 3.
Click Submit. If the Key Component loaded, “Successfully loaded key component on server,” will appear on the bottom left.
Loading a BDK
Before a BDK can be loaded into SAKA, its Key Components must first be loaded. Check the Loading Key Components section for instructions on loading a Key Component.
After components for this BDK have been loaded, click the Load BDK radio button.
Provide the name of the key used when loading the components, the KCV of the assembled BDK, the manufacturer to associate with this BDK, and the necessary SAKA information (DID, Username, Password). The user must have Key Management Custodian (KMC) privilege in order to authenticate to this web service. The dialog changes to look as such:
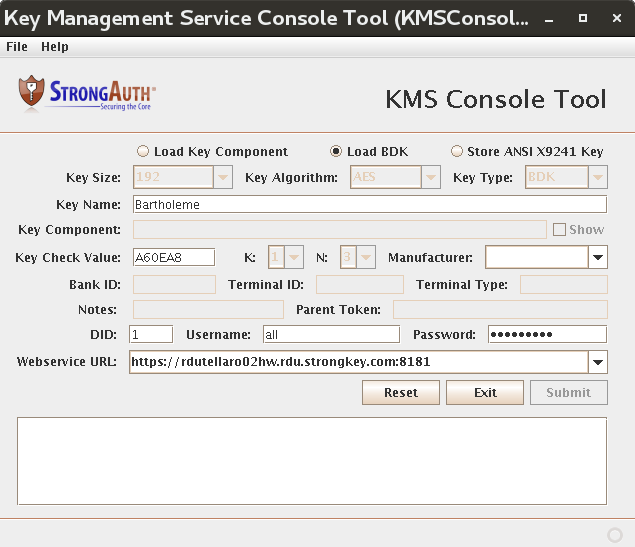
When all required fields have been filled, the Submit button becomes enabled.
Click Submit. If creating and storing the BDK succeeded, the message appears, “Successfully loaded BDK on server.”
Storing ANSI X-924.1 Keys from Key Components
Before a BDK or LTMK can be stored on SAKA, its Key Components must first be loaded. Check the Loading Key Components section for instructions on loading a Key Component.
After the Key Components have been loaded, select Store ANSI X9241 Key mode.
Select the Key Algorithm and Key Type for this key. In the following example, we will be loading a Triple DES (TDES) LTMK.
Provide the name of the key used when loading the components, the KCV for the key that is to be stored, a Bank ID to associate with this key, and the necessary SAKA information (DID, Username, Password). The user must have KMC privilege and Encryption privilege in order to authenticate to this web service.
Optionally, supply a Terminal ID to associate with this key, a Terminal Type to associate with this key, and any Notes you want to associate with this key.
When all required fields have been filled, the Submit button becomes enabled.
Click Submit. If successful, a message appears: “Successfully stored ANSI X9241 Key.”
Record the token returned in the output. SAKA uses this value to identify this LTMK.
NOTE: If you do not record the value now, you will have to store the LTMK all over again to use it for later operations.
Storing ANSI X-924.1 Keys from Wrapped Keys
Once an LMTK is stored, it is possible to start storing TMKs under it. For more information on storing an LMTK, see the previous section. A wrapped TMK can be unwrapped and stored using the following steps:
After the LTMK has been stored, select the Store ANSI X9241 Key radio button.
Change the Key Algorithm and Key Type for this key. The following is an example of loading a TDES TMK.
Provide the wrapped TMK (hex-encoded) in the Encrypted Key field; the KCV for the TMK; the Bank ID to associate with the TMK, the token reference of the LTMK received when you previously stored the LTMK in the Parent Token field, and the necessary SAKA information (DID, Username, Password). The user must have KMC privilege, Decryption privilege, and Encryption privilege to authenticate to this web service.
Optionally, supply a Terminal ID to associate with this key, a Terminal Type to associate with this key, and any Notes to associate with this key.
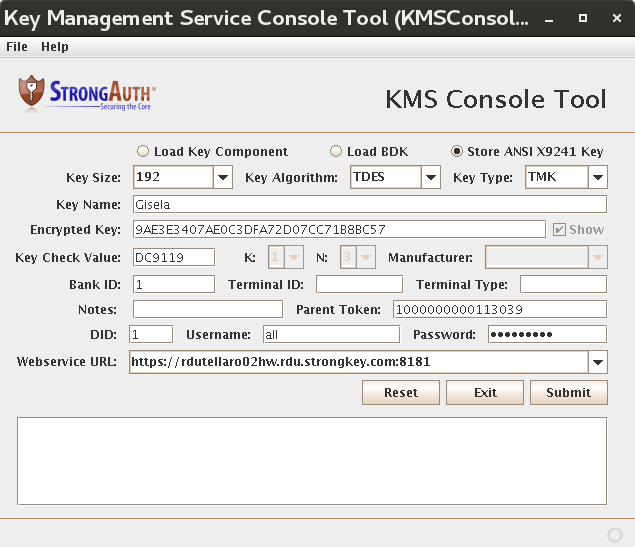
When all required fields have been filled, the Submit button becomes enabled.
Click Submit. If successful, a message appears: “Successfully stored ANSI X9241 Key.”
Record the token returned in the output. SAKA uses this value to identify this LTMK.
NOTE: If you do not record the value now, you will have to store the LTMK all over again to use it for later operations.
Following the same steps used in this section, a TPK can be loaded under the TMK by selecting the TPK Key Type and replacing the Parent Token with the token returned when the TMK was successfully stored. The user privileges and all other mechanics remain the same between loading a TMK or TPK.
KAM Configuration
The SAKA software comes with many customizable properties that do not need to be changed for most sites. However, some properties must be customized for each site, and sites may want to customize some based on their security policies. The following table presents a list of all the properties used by this release of SAKA.
Configuration properties are divided into either Immutable or Mutable properties. Immutable properties, as their definition implies, may not be changed at any time as this will impact SAKA operations. Mutable properties, however, may be modified as needed to meet business, operational, technical, and/or security requirements.
NOTE: It must be emphasized that an immutable property value must never be modified, as this will break the SAKA application and void your support. There is also the danger of permanently corrupting your data if an immutable property is modified and the SAKA provides encryption and/or decryption services to client applications.
All SAKA server properties are bundled in the resources folder of the strongkeyliteEJB module in the SAKA application. This file provides the central configuration for the system. Properties used by client applications—such as the SAKA Domain Administration Console Tool (DACTool) or the SAKA Key Custodian SetPIN Tool applications—are bundled within the client applications and should not be modified at all.
SAKA server properties can be modified in one of two ways:
By modifying the properties file—
strongkeylite-configuration.properties—in theSTRONGKEYLITE_HOME/etcdirectory. Changes made to this file override the configuration properties bundled in the application module, and thus, apply to all encryption domains in SAKA. An editor (gedit, nano or vi) may be used to edit this file; the application server (or SAKA) must be restarted for the changed properties in this file to take effect.By using the DACTool and modifying the configuration properties though the graphical console. Changes made in the DACTool are persisted in the SAKA internal database and apply only to the encryption domain where the modification is made. The application server or the SAKA does not require a restart for these changed properties to take effect. They are effective immediately after they are saved to the internal database.
Immutable Configuration
All properties are in the format key=value where the key is of the form strongkeylite.cfg.property.<some-property-name>.
|
Property |
strongkeylite.cfg.maxlen.10charstring |
|
Explanation |
The size of a 10-character string within the application. As the name indicates, the string cannot be more than 10 characters. |
|
Immutable Value |
10 |
|
Property |
strongkeylite.cfg.maxlen.1024charstring |
|
Explanation |
The size of a 1024-character string within the application. As the name indicates, the string cannot be more than 1024 characters. |
|
Immutable Value |
1024 |
|
Property |
strongkeylite.cfg.maxlen.128charstring |
|
Explanation |
The size of a 128-character string within the application. As the name indicates, the string cannot be more than 128 characters. |
|
Immutable Value |
128 |
|
Property |
strongkeylite.cfg.maxlen.12285charstring |
|
Explanation |
The size of a 12285-character string within the application. As the name indicates, the string cannot be more than 12285 characters. |
|
Immutable Value |
12285 |
|
Property |
strongkeylite.cfg.maxlen.13336charstring |
|
Explanation |
The size of a 13336-character string within the application. As the name indicates, the string cannot be more than 13336 characters. |
|
Immutable Value |
13336 |
|
Property |
strongkeylite.cfg.maxlen.16384charstring |
|
Explanation |
The size of a 16384-character string within the application. As the name indicates, the string cannot be more than 16384 characters. |
|
Immutable Value |
16384 |
|
Property |
strongkeylite.cfg.maxlen.16charstring |
|
Explanation |
The size of a 16-character string within the application. As the name indicates, the string cannot be more than 16 characters. |
|
Immutable Value |
16 |
|
Property |
strongkeylite.cfg.maxlen.17792charstring |
|
Explanation |
The size of a 17792-character string within the application. As the name indicates, the string cannot be more than 17792 characters. |
|
Immutable Value |
17792 |
|
Property |
strongkeylite.cfg.maxlen.2048charstring |
|
Explanation |
The size of a 2048-character string within the application. As the name indicates, the string cannot be more than 2048 characters. |
|
Immutable Value |
2048 |
|
Property |
strongkeylite.cfg.maxlen.2080charstring |
|
Explanation |
The size of a 2080-character string within the application. As the name indicates, the string cannot be more than 2080 characters. |
|
Immutable Value |
2080 |
|
Property |
strongkeylite.cfg.maxlen.256charstring |
|
Explanation |
The size of a 256-character string within the application. As the name indicates, the string cannot be more than 256 characters. |
|
Immutable Value |
256 |
|
Property |
strongkeylite.cfg.maxlen.32768charstring |
|
Explanation |
The size of a 32768-character string within the application. As the name indicates, the string cannot be more than 32768 characters. |
|
Immutable Value |
32768 |
|
Property |
strongkeylite.cfg.maxlen.32charstring |
|
Explanation |
The size of a 32-character string within the application. As the name indicates, the string cannot be more than 32 characters. |
|
Immutable Value |
32 |
|
Property |
strongkeylite.cfg.maxlen.4charstring |
|
Explanation |
The size of a 4-character string within the application. As the name indicates, the string cannot be more than 4characters. |
|
Immutable Value |
4 |
|
Property |
strongkeylite.cfg.maxlen.4096charstring |
|
Explanation |
The size of a 4096-character string within the application. As the name indicates, the string cannot be more than 4096 characters. |
|
Immutable Value |
4096 |
|
Property |
strongkeylite.cfg.maxlen.5charstring |
|
Explanation |
The size of a 5-character string within the application. As the name indicates, the string cannot be more than 5 characters. |
|
Immutable Value |
5 |
|
Property |
strongkeylite.cfg.maxlen.512charstring |
|
Explanation |
The size of a 512-character string within the application. As the name indicates, the string cannot be more than 512 characters. |
|
Immutable Value |
512 |
|
Property |
strongkeylite.cfg.maxlen.6charstring |
|
Explanation |
The size of a 6-character string within the application. As the name indicates, the string cannot be more than 6 characters. |
|
Immutable Value |
6 |
|
Property |
strongkeylite.cfg.maxlen.64charstring |
|
Explanation |
The size of a 64-character string within the application. As the name indicates, the string cannot be more than 64 characters. |
|
Immutable Value |
64 |
|
Property |
strongkeylite.cfg.maxlen.65535charstring |
|
Explanation |
The size of a 65535-character string within the application. As the name indicates, the string cannot be more than 65535 characters. |
|
Immutable Value |
65535 |
|
Property |
strongkeylite.cfg.maxlen.7charstring |
|
Explanation |
The size of a 7-character string within the application. As the name indicates, the string cannot be more than 7 characters. |
|
Immutable Value |
7 |
|
Property |
strongkeylite.cfg.maxlen.8charstring |
|
Explanation |
The size of an 8-character string within the application. As the name indicates, the string cannot be more than 8 characters. |
|
Immutable Value |
8 |
|
Property |
strongkeylite.cfg.maxlen.8192charstring |
|
Explanation |
The size of an 8192-character string within the application. As the name indicates, the string cannot be more than 8192 characters. |
|
Immutable Value |
8192 |
|
Property |
strongkeylite.cfg.maxlen.9charstring |
|
Explanation |
The size of a 9-character string within the application. As the name indicates, the string cannot be more than 9 characters. |
|
Immutable Value |
9 |
|
Property |
strongkeylite.cfg.property.admincertdnprefixsigning |
|
Explanation |
The prefix of the DN of the signing digital certificate issued to the DA. The unique domain identifier of the encryption domain is appended to this prefix during the creation of the certificate. The DA's signing certificate is used by the SAKA DACTool application to authenticate the DA to the SAKA server for administrative actions. |
|
Immutable Value |
CN=SAKA Domain Administrator Signing Certificate, OU=Domain ID |
|
Property |
strongkeylite.cfg.property.batchrequests.rootdir |
|
Explanation |
All batch jobs must transfer their files to the appliance (using SFTP, SMB or NFS, etc.) before the web service request for the transaction may be sent to the appliance. This configuration property identifies the root directory of all subdirectories where each encryption domain will transfer XML files in and out, before and after the cryptographic batch job is executed. The default location is |
|
Immutable Value |
/usr/local/strongauth/batchrequests |
|
Property |
strongkeylite.cfg.property.domaincertdnprefixencryption |
|
Explanation |
The prefix of the DN of the encryption digital certificate issued to the encryption domain. The unique domain identifier of the encryption domain is appended to this prefix during the creation of this certificate. The SAKA domain's encryption certificate keys are used to protect all symmetric keys within the domain. |
|
Immutable Value |
CN=SAKA Encryption Certificate, OU=Domain ID |
|
Property |
strongkeylite.cfg.property.domaincertdnprefixsigning |
|
Explanation |
The prefix of the DN of the signing digital certificate issued to the encryption domain. The unique domain identifier of the encryption domain is appended to this prefix during the creation of this certificate. The SAKA domain's signing certificate keys are used to sign all digital certificates issued by this encryption domain. In that sense, this signing key's certificate represents a “mini” Certificate Authority (CA) whose sole purpose is to issue certificates to resources within its encryption domain. This CA cannot be used for purposes outside SAKA. |
|
Immutable Value |
CN=SAKA Signing Certificate, OU=Domain ID |
|
Property |
strongkeylite.cfg.property.enckeyalgorithm |
|
Explanation |
The cryptographic algorithm used by the SAKA to perform symmetric encryption and decryption of sensitive data. The only algorithm currently supported by the SAKA is the Advanced Encryption Standard, or AES. |
|
Immutable Value |
AES |
|
Property |
strongkeylite.cfg.property.encprefix |
|
Explanation |
The prefix used to distinguish between cryptographic keys within an encryption domain. SAKA uses three types of symmetric keys: 1) for encryption; 2) for generating Hashed Message Authentication Codes (HMAC) of plaintext sensitive data; and 3) for generating HMACs of user passwords in the SAKA internal database. Each of these keys are labeled with a key prefix so they may be uniquely identified for their purpose. |
|
Immutable Value |
ENC- |
|
Property |
strongkeylite.cfg.property.encsuffix |
|
Explanation |
The suffix used to map keys within internal data-structures of the SAKA application. |
|
Immutable Value |
-ENC |
|
Property |
strongkeylite.cfg.property.hmacprefix |
|
Explanation |
The prefix used to distinguish cryptographic HMAC keys within an encryption domain. SAKA uses three types of symmetric keys: 1) for encryption; 2) for generating HMACs of plaintext sensitive data; and 3) for generating HMACs of user passwords in the SAKA internal database. Each of these keys are labeled with a key prefix so they may be uniquely identified for their purpose. |
|
Immutable Value |
HMAC- |
|
Property |
strongkeylite.cfg.property.jdbc.dbdriver |
|
Explanation |
The name of the Java Database Connectivity (JDBC) driver used by the key rotation modules to communicate with the database directly. While most of the SAKA uses Java Persistence API (JPA) to communicate with the database, the Rotate HMAC Keys and the Rotate Symmetric Keys jobs use JDBC to dramatically improve performance and minimize memory consumption. |
|
Immutable Value |
com.mysql.jdbc.Driver |
|
Property |
strongkeylite.cfg.property.jdbc.jndiname |
|
Explanation |
The Java Naming and Directory Interface (JNDI) name for the resource to access the MariaDB database. |
|
Immutable Value |
jdbc/strongkeylite |
|
Property |
strongkeylite.cfg.property.keyduration.hmac |
|
Explanation |
Cryptographic keys used by the web service application are changed frequently, based on the policy defined in this property. The policy for the HMAC key is to use a new key every year (annual). |
|
Immutable Value |
annual |
|
Property |
strongkeylite.cfg.property.keyduration.pwd |
|
Explanation |
Cryptographic keys used by the web service application are changed frequently, based on the policy defined in this property. The policy for the PWD key is to use a new key every year (annual). |
|
Immutable Value |
annual |
|
Property |
strongkeylite.cfg.property.keyuse.annualformat |
|
Explanation |
The suffix used to label cryptographic keys when symmetric cryptographic keys are used for an entire calendar year. This property value is concatenated with the key's prefix property to derive the unique label of a cryptographic key. For instance, an encryption key, used annually would have the label ENC-2010 in the calendar year 2010, while another symmetric key would have the label ENC-2011 in 2011. An HMAC key in 2010 would have the label HMAC-2010, etc. |
|
Immutable Value |
yyyy |
|
Property |
strongkeylite.cfg.property.keyuse.dailyformat |
|
Explanation |
The suffix used to label cryptographic keys when symmetric cryptographic keys are used for 24 hours. This property value is concatenated with the key's prefix property to derive the unique label of a cryptographic key. For instance, an encryption key, generated and used on the 1st day of January in 2010 would have the label ENC-01-JAN-2010, while a key generated and used on the 3rd day of March in 2010, would have the label ENC-03-MAR-2010. HMAC keys for the same dates would have the labels HMAC-01-JAN-2010 and HMAC-03-MAR-2010 respectively. |
|
Immutable Value |
dd-MMM-yyyy |
|
Property |
strongkeylite.cfg.property.keyuse.monthlyformat |
|
Explanation |
The suffix used to label cryptographic keys when symmetric cryptographic keys are used for one calendar month. This property value is concatenated with the key's prefix property to derive the unique label of a cryptographic key. For instance, an encryption key, used for the month of January in 2010 would have the label ENC-JAN-2010, while an HMAC key would have the label HMAC-JAN-2010. |
|
Immutable Value |
MMM-yyyy |
|
Property |
strongkeylite.cfg.property.keyuse.weeklyformat |
|
Explanation |
The suffix used to label cryptographic keys when symmetric cryptographic keys are used for one week, starting from the second past midnight on a Sunday (Universal Coordinated Time) through the last second of the Saturday the same week. Since weeks do not have names, the week is indicated by the numeric value of the week—the first week of a year is 1, while the last week of the calendar year would be 52. This property value is concatenated with the prefix property to arrive at the unique label of a cryptographic key. For instance, an encryption key, generated and used on January 5th, 2010 would have the label ENC-1-2010, while an HMAC key would have the label HMAC-1-2010. |
|
Immutable Value |
w-yyyy |
|
Property |
strongkeylite.cfg.property.ldapctxfactory |
|
Explanation |
The Java class used to create a Lightweight Directory Access Protocol (LDAP) context for querying an LDAP-based Directory server. |
|
Immutable Value |
com.sun.jndi.ldap.LdapCtxFactory |
|
Property |
strongkeylite.cfg.property.noncesigningalgorithmhsm |
|
Explanation |
The cryptographic algorithm used by application tools to digitally sign nonces for authentication, when an HSM is used as the cryptographic hardware module in the SAKA server. |
|
Immutable Value |
SHA256withECDSA |
|
Property |
strongkeylite.cfg.property.pwdprefix |
|
Explanation |
The prefix used to distinguish cryptographic HMAC keys used for generating HMACs of user passwords, within an encryption domain. SAKA uses three types of symmetric keys: 1) for encryption; 2) for generating HMACs of plaintext sensitive data; and 3) for generating HMACs of user passwords in the SAKA internal database. Each of these keys are labeled with a key prefix so they may be uniquely identified for their purpose. |
|
Immutable Value |
PWD- |
|
Property |
strongkeylite.cfg.property.sklesxsdnsurl |
|
Explanation |
SAKA converts XML files to Java objects and vice-versa. This URL defines the current XML Schema Definition (XSD) in use by the appliance. The current URL for this version of SAKA is: http://strongkeylite.strongauth.com/SKLES201009 |
|
Immutable Value |
http://strongkeylite.strongauth.com/SKLES201009 |
|
Property |
strongkeylite.cfg.property.strongkeylitehome |
|
Explanation |
The location on the SAKA file system where SAKA software components are installed. |
|
Immutable Value |
/usr/local/strongauth/strongkeylite |
Mutable Configuration
|
Property |
strongkeylite.cfg.property.addedpsn.reportprefix |
|
Explanation |
When a site originally chooses to use an HMAC value to represent the sensitive data as the “token” within their applications, they may choose to convert to Pseudo-Numbers (see Explanation for strongkeylite.cfg.property.tokentype) after the SAKA has gone live. During the conversion process, a report is generated indicating the pseudo-numbers that were added to the SAKA internal database during the conversion process. The report is saved to a file in |
|
Default Value |
AddedPseudoNumbers- |
|
Property |
strongkeylite.cfg.property.authsource |
|
Explanation |
The type of repository to use when verifying the authentication credentials of a requester. Options supported by SAKA are:
All requesters of cryptographic services must be defined in the SAKA database or LDAP before they start requesting services. |
|
Default Value |
DB |
|
Property |
strongkeylite.cfg.property.authsourcefirst |
|
Explanation |
The access control repository to check first when SAKA has been configured to use BOTH the internal database and an LDAP-based directory serverfor requester authorization. The strongkeylite.cfg.property.authsource property must have the value BOTH defined in it for the strongkeylite.cfg.property.authsourcefirst property to be referenced. If strongkeylite.cfg.property.authsource is set to either DB or LDAP, strongkeylite.cfg.property.authsourcefirst is ignored. |
|
Default Value |
DB |
|
Property |
strongkeylite.cfg.property.bytebuffer.enable |
|
Explanation |
The Entropy web service allows encryption users to gather true random numbers from the TRSM. This property determines whether SAKA auto-fills a bytebuffer to increase the speed in which random numbers can be returned. |
|
Default Value |
false |
|
Property |
strongkeylite.cfg.property.bytebuffer.size |
|
Explanation |
The bytebuffer stores true random numbers to be consumed by the Entropy web service. This property determines the size of the bytebuffer in bytes. |
|
Default Value |
1048576 (1 mb) |
|
Property |
strongkeylite.cfg.property.bytebuffer.trsmretrievalsize |
|
Explanation |
The bytebuffer stores true random numbers to be consumed by the Entropy Web service. This property determines how many bytes to recover from the TRSM each time SAKA populates the bytebuffer. |
|
Default Value |
64 |
|
Property |
strongkeylite.cfg.property.cacheprimer.enable |
|
Explanation |
After the TPM or HSM is activated, there may be a lot of symmetric keys that must be decrypted. The appliance will only decrypt on demand those keys which can cause delays once transactions start being sent to the appliance. By setting this property to true, the appliance will automatically attempt to decrypt all HMAC, ENC, and PWD symmetric keys after the cryptomodule is activated. |
|
Default Value |
true |
|
Property |
strongkeylite.cfg.property.cacheprimer.limit |
|
Explanation |
Once the cache primer engages, this property determines what is the total number of keys that it may decrypt per domain (in earliest to oldest order). |
|
Default Value |
365 |
|
Property |
strongkeylite.cfg.property.ccsautodelete |
|
Explanation |
The default behavior of the CCS getCardCaptureData web service is to encrypt the credit card data and return a token back to the calling application. By setting this property to true, the credit card will no longer be tokenized. This property is most useful when combined with strongkeylite.cfg.property.ccsplaintextpan to return the plaintext credit card. |
|
Default Value |
false |
|
Property |
strongkeylite.cfg.property.ccsresponseformat |
|
Explanation |
The CryptoCard Service (CCS) Servlet offers two different response types—json and xml. This property determines which response type the web service will use. |
|
Default Value |
json |
|
Property |
strongkeylite.cfg.property.ccsencodingformat |
|
Explanation |
This property is used to determine the encoding format used for data sent by PIN and magstripe readers. Valid values are hex and base64. |
|
Default Value |
hex |
|
Property |
strongkeylite.cfg.property.ccsplaintextpan |
|
Explanation |
The default behavior of the CCS getCardCaptureData is to encrypt the credit card data and return a token back to the calling application. By setting this property to true, the plaintext credit card number will also be returned along side the token. When this property is set to true, the getCardCaptureData web service user must have both encryption privilege and decryption privilege. |
|
Default Value |
false |
|
Property |
strongkeylite.cfg.property.ccsprocesstrack2 |
|
Explanation |
When processing a credit card through CCS, there are a number of tracks available in the card swipe. By default we only process track1 data. By setting this property to true, we will process the swipe's track2 data. |
|
Default Value |
false |
|
Property |
strongkeylite.cfg.property.ccsprocesstrack3 |
|
Explanation |
When processing a credit card through CCS, there are a number of tracks available in the card swipe. By default we only process track1 data. By setting this property to true, we will process the swipe's track3 data. |
|
Default Value |
false |
|
Property |
strongkeylite.cfg.property.cryptomodule.lock.waittime |
|
Explanation |
Access to the cryptomodule is locked to prevent overloading the module. If a lock has been acquired by another thread, the current thread may wait for this many seconds to acquire the lock before giving up. |
|
Default Value |
25 |
|
Property |
strongkeylite.cfg.property.cryptomodule.provider |
|
Explanation |
The type of cryptographic Hardware Security Module (HSM) used in the SAKA when it is configured with an HSM. The values currently supported by the SAKA are CRYPTOKI—for the HSM from Eracom (now SafeNet) and CryptoServer—for the HSM from Utimaco (now Sophos). This property is superfluous when SAKA is configured to use the TPM. |
|
Default Value |
CryptoServer |
|
Property |
strongkeylite.cfg.property.cryptomodule.provider.utimaco.adminkeyfile |
|
Explanation |
When using the Utimaco HSM, this property represents the file of the Administrator's key used to configure the HSM. This file is only required during the initialization of the HSM during the installation of the HSM. Once initialized, this file should be removed for security reasons. |
|
Default Value |
ADMIN.key |
|
Property |
strongkeylite.cfg.property.cryptomodule.provider.utimaco.device |
|
Explanation |
When SAKA is configured with a CryptoServer HSM from Utimaco, this property identifies the device address of the HSM with which the SAKA software will communicate. Before the HSM can be used, the device must already be configured using the tools supplied with SAKA. This property is neither used by the SafeNet HSM nor the TPM. |
|
Default Value |
/dev/cs2 |
|
Property |
strongkeylite.cfg.property.cryptomodule.provider.utimaco.listobjects |
|
Explanation |
When using the Utimaco HSM, this property indicates if objects within a keystore should be listed. |
|
Default Value |
false |
|
Property |
strongkeylite.cfg.property.cryptomodule.provider.utimaco.timeout |
|
Explanation |
When SAKA is configured with a CryptoServer HSM from Utimaco, this property identifies the number of milliseconds to wait before timing out for a connection to the HSM. This property is neither used by the SafeNet HSM nor the TPM. |
|
Default Value |
5000 |
|
Property |
strongkeylite.cfg.property.cryptomodule.provider.utimaco.userflags |
|
Explanation |
When using the Utimaco HSM, this property indicates the property flags to be used when a new user is created to access keystores within the HSM. More information about the meaning of these flags is available in the HSM documentation included in the software distribution directory of the appliance. |
|
Default Value |
,00000002,hmacpwd,no_login+sma, |
|
Property |
strongkeylite.cfg.property.cryptomodule.provider.utimaco.user |
|
Explanation |
When SAKA is configured with a CryptoServer HSM from Utimaco, this property identifies the username on the HSM authorized to access cryptographic keys and perform cryptographic functions. Before the HSM can be used, the credentials must already be configured using the tools supplied with SAKA. This property is neither used by the SafeNet HSM nor the TPM. |
|
Default Value |
strongauth |
|
Property |
strongkeylite.cfg.property.cryptomodule.slot |
|
Explanation |
When SAKA is configured with a Protect Server Gold (PSG) HSM from SafeNet, this property identifies the HSM slot where the domain keys are stored. Before the HSM can be used, the slot must have been configured using the supplied tools. This property is neither used by the Utimaco HSM nor the TPM. |
|
Default Value |
1 |
|
Property |
strongkeylite.cfg.property.cryptomodule.type |
|
Explanation |
The type of cryptographic hardware module used by SAKA. The appliance supports tpm—when using the Trusted Platform Module and hsm—when using a Hardware Security Module. A SAKA server may only use one type of cryptographic module—it cannot combine the TPM and the HSM within its operations. The choice of the cryptographic module is made during installation and must not be changed. Migrating from the TPM to the HSM, or vice versa, is not currently supported. |
|
Default Value |
tpm |
|
Property |
strongkeylite.cfg.property.cryptomodule.vendor |
|
Explanation |
When the SAKA server is configured to work with an HSM, this property identifies the manufacturer of the HSM. The appliance supports eracom—when using the PSG HSM from Eracom (now SafeNet) and utimaco—when using a CryptoServer HSM from Utimaco (now Sophos). For the strongkeylite.cfg.property.cryptomodule.vendor property to be relevant, the strongkeylite.cfg.property.cryptomodule.type property must be set to hsm. This property is ignored when the SAKA is configured to use a TPM. |
|
Default Value |
stm |
|
Property |
strongkeylite.cfg.property.debug.printentity |
|
Explanation |
In order to aid debugging, this property allows the application to log parameters as it traverses through different modules. Tracking changes to these parameters as they are processed aids in the debugging process. However, even when this property is set to true, SAKA does not log plaintext sensitive data to log files. |
|
Default Value |
false |
|
Property |
strongkeylite.cfg.property.decryption.usergranularity |
|
Explanation |
An indicator that tells SAKA whether to reject decryption requests from any other user than the one that originally encrypted the plaintext (or the special user recoveryuser). The default is not to compare the decrypting user to the encrypting user (false). The other acceptable value is true, in which case only the user which encrypted the plaintext, or the recoveryuser user, can decrypt the ciphertext. |
|
Default Value |
false |
|
Property |
strongkeylite.cfg.property.defaultmanufacturer |
|
Explanation |
The default manufacturer ID used by the CCS. This property was introduced to ease the transition when MFR was added to the web service. Valid values are 0 (for IDTECH), 1 (for UIC), 2 (for MAGTEK), and 3 (for INFINITE). |
|
Default Value |
0 |
|
Property |
strongkeylite.cfg.property.digestalgorithm |
|
Explanation |
The algorithm used for verifying message digests of Key Custodian passwords when they communicate with the SAKA server using the Key Custodian SetPIN Tool. Currently supported algorithms include:
|
|
Default Value |
SHA-256 |
|
Property |
strongkeylite.cfg.property.dnprefix |
|
Explanation |
When authenticating a requester within the LDAP directory, the web service application needs to know whether to search for the requester's identity based on the Common Name or the UserID of the requester's LDAP DN. This property defines how SAKA should authenticate requesters within the LDAP directory. Valid values for this property are:
NOTE: The value MUST be followed by an equals (“=”) sign for it to be valid. |
|
Default Value |
cn= |
|
Property |
strongkeylite.cfg.property.dnsuffix |
|
Explanation |
When SAKA is configured to use an LDAP directory server for determining the authorization of requesters, this property defines the suffix of the LDAP directory where the user's credential can be located. This is useful if a site has an Active Directory (AD) installation and would like to authorize requesters based on their AD credential. NOTE: If a site chooses to use an LDAP directory for access control, and if they also choose not to use an existing AD tree, or those who want to keep the SAKA requesters distinct from their regular AD users, MUST create the dnsuffix part of the tree within their directory server before SAKA can be used. NOTE: The comma (“,”) that precedes the value of the dnsuffix; this comma must be present in the property value to work correctly. In the default value shown below, document formatting might have the comma appear on its own separate line, but the value must be an unbroken line. |
|
Default Value |
,ou=users,ou=v1,ou=StrongKeyLite,ou=StrongAuth,ou=applications,dc=strongauth,dc=com |
|
Property |
strongkeylite.cfg.property.enckeysize |
|
Explanation |
The size of the symmetric encryption cryptographic key used to encrypt sensitive data. SAKA currently supports only the AES algorithm with the following sizes:
This property goes into effect only when a new symmetric key is generated (which may be the next day, week, month, or year depending on the key duration policy in effect in this encryption-domain); existing keys remain unmodified. |
|
Default Value |
256 |
|
Property |
strongkeylite.cfg.property.encryptionrequestremovaljob.cutoff |
|
Explanation |
The amount of time that must lapse between an encryption request and the request (with its encrypted sensitive data) being deleted permanently from the database. While there is no upper limit to the cutoff period, the lower limit is 1. Units for this property are defined by strongkeylite.cfg.property.encryptionrequestremovaljob.cutoff.units. Relevant only if the strongkeylite.cfg.property.encryptionreqestremovaljab.run property is set to true. |
|
Default Value |
30 |
|
Property |
strongkeylite.cfg.property.encryptionrequestremovaljob.cutoff.units |
|
Explanation |
Time unit for the strongkeylite.cfg.property.encryptionrequestremovaljob.cutoff property. Valid options are days, hours, minutes, and seconds. Relevant only if the strongkeylite.cfg.property.encryptionreqestremovaljob.run property is set to true. |
|
Default Value |
days |
|
Property |
strongkeylite.cfg.property.encryptionrequestremovaljob.log |
|
Explanation |
Determines if a log report should be generated in |
|
Default Value |
false |
|
Property |
strongkeylite.cfg.property.encryptionrequestremovaljob.reportprefix |
|
Explanation |
The prefix used for reports generated by the SAKA when encryption requests are deleted. The report's name is appended with the date and time of the run and stored in the |
|
Default Value |
DeletedEncryptionRequests- |
|
Property |
strongkeylite.cfg.property.encryptionrequestremovaljob.run |
|
Explanation |
Determines if SAKA runs the encryption removal job. If set to true, SAKA also looks at strongkeylite.cfg.property.encryptionreqestremovaljob.runfrequency so it knows how frequently to schedule the job. Setting the property to true will permanently delete encryption requests with associated encrypted sensitive data from the internal database. The implication is that future requests for decryption of that ciphertext will fail since the ciphertext will not exist in the database anymore. This property exists for sites whose business rules require deleting sensitive data after a specified duration. |
|
Default Value |
false |
|
Property |
strongkeylite.cfg.property.hmacgeneration |
|
Explanation |
In a cluster, an object may have been encrypted by one appliance, but might come into another node again for encryption. To determine if the object already exists, the appliance must HMAC the incoming object against all HMAC keys of the cluster nodes to search for them. This property indicates if the code should generate one HMAC at a time, then search the DB, or generate all HMACs at once and search the DB for each one. Performance will vary depending on node count per cluster, load on the machines, and number of objects encrypted in the cluster. Sites may try both strategies to see if performance improves. Valid values for this property are:
|
|
Default Value |
one |
|
Property |
strongkeylite.cfg.property.hmackeyalgorithm |
|
Explanation |
The cryptographic algorithm used for generating symmetric keys that will create HMACs of sensitive data. The key algorithm has a direct dependency on the strongkeylite.cfg.property.hmackeysize and the strongkeylite.cfg.property.hmactransform properties, so changes to these three properties must be carried out in tandem. SAKA currently supports the following HMAC key algorithms:
|
|
Default Value |
HmacSHA256 |
|
Property |
strongkeylite.cfg.property.hmackeysize |
|
Explanation |
Size of the symmetric HMAC key used to generate HMACs of sensitive data. SAKA currently only supports the following sizes:
Changes to the default values MUST have a corresponding change in the strongkeylite.cfg.property.hmackeyalgorithm and strongkeylite.cfg.property.hmactransform properties. |
|
Default Value |
256 |
|
Property |
strongkeylite.cfg.property.hmactransform |
|
Explanation |
Algorithm used to generate HMACs of sensitive data. The transform algorithm has a direct dependency on the strongkeylite.cfg.property.hmackeyalgorithm and the strongkeylite.cfg.property.hmackeysize properties, so changes to these properties must be carried out in tandem. SAKA currently supports the following HMAC algorithms:
|
|
Default Value |
HmacSHA256 |
|
Property |
strongkeylite.cfg.property.jdbc.dbcommitsize |
|
Explanation |
When executing one of the key rotation jobs (Rotate HMACs or Rotate Symmetric Keys), SAKA uses JDBC to communicate with the database instead of JPA. This vastly improves performance and memory utilization for very large databases. To further improve performance of the jobs, updated transactions are batched before being committed. The strongkeylite.cfg.property.jdbc.dbcommitsize property indicates how many records should be batched before being committed to the database. The fewer the records batched, the lower the risk of having to repeat the entire job again should anything go wrong. However, lower dbcommitsize numbers increase the time taken to complete the job. Depending on the database size and the stability of the environment, consider increasing this number to complete the jobs marginally faster. NOTE: This value may not be less than1. The application must commit at least one record per batched transaction. Enormous numbers will consume more memory and increase risk of a transaction rollback if something goes awry. |
|
Default Value |
200 |
|
Property |
strongkeylite.cfg.property.jdbc.dbfetchsize |
|
Explanation |
When executing one of the key rotation jobs (Rotate HMACs), SAKA uses JDBC to communicate with the database instead of JPA. This vastly improves performance and memory utilization for very large databases. The strongkeylite.cfg.property.jdbc.dbfetchsize property indicates how many records should be fetched by the JDBC driver when retrieving records. The fewer the records fetched, the lower the consumption of memory. NOTE: This value may not be less than 1. The application must commit at least one record per batched transaction. Enormous numbers will consume more memory and increase risk of a transaction rollback if something goes awry. |
|
Default Value |
500 |
|
Property |
strongkeylite.cfg.property.jdbc.dbprocesssize |
|
Explanation |
When executing one of the key-rotation jobs (Rotate HMACs), SAKA uses JDBC to communicate with the database instead of JPA. This vastly improves performance and memory utilization for very large databases. The strongkeylite.cfg.property.jdbc.dbprocesssize indicates how many records should be processed by the job in an iteration. The fewer the records fetched, the lower the consumption of memory, but the longer it takes to complete the entire job. However, a very large number will not only increase memory usage, but can increase the risk of a transaction rollback should there be a problem. However, the ultimate performance is determined by number of records encrypted by the specific key being rotated and how frequently the appliance must decrypt the key hierarchy to process the records. NOTE: This value may not be less than 1. The application must commit at least one record per batched transaction. |
|
Default Value |
10000 |
|
Property |
strongkeylite.cfg.property.keyduration.enc |
|
Explanation |
Cryptographic keys used by the web service application are changed frequently, based on the policy defined in this property. The default for a symmetric encryption key (ENC) is to use a new key every day. Advantages to this policy are:
|
|
Default Value |
monthly |
|
Property |
strongkeylite.cfg.property.keyremovaljob.cutoff |
|
Explanation |
The duration in seconds that must pass before SAKA removes symmetric encryption keys from its internal cache. Since symmetric keys on SAKA are encrypted under multiple layers of asymmetric keys when stored on disk, decrypting them requires the movement of multiple keys into cryptographic hardware modules and expensive cryptographic operations. Therefore, when a key is decrypted by SAKA, it holds the key in an internal cache for the duration of cutoff seconds before deleting them from the cache. Should the symmetric key be required before the cutoff duration has expired, there will be dramatic improvements to performance since the entire chain of keys need not be decrypted again. The lower the strongkeylite.cfg.property.keyremovaljob.cutoff value, the more secure the environment since keys are cached for a shorter duration. However, too short a duration can impact performance since a key that is flushed from its cache must be decrypted again. Know business transaction characteristics is important for realistically setting this value to balance performance and security. The default value of 300 (5 minutes) leans towards more security. |
|
Default Value |
86400 |
|
Property |
strongkeylite.cfg.property.keyremovaljob.run |
|
Explanation |
An indicator to tell SAKA whether to run the thread that removes symmetric keys from its cache. The default is to run the thread (true). The other acceptable value for this property is: false, in which case objects are cached as long as the server is up and running and memory resources are available. For security reasons, sites are encouraged to leave this property setting at its default value of true. |
|
Default Value |
true |
|
Property |
strongkeylite.cfg.property.keyremovaljob.runfrequency |
|
Explanation |
The frequency in seconds at which the thread executes that removes symmetric encryption keys from cache. The lower the strongkeylite.cfg.property.keyremovaljob.runfrequency value, the more secure the environment since keys are cached for a shorter duration. Do not set the value less than half of strongkeylite.cfg.property.keyremovaljob.cutoff. For example, if the cutoff property value is 300 seconds (the default), setting the property value of runfrequency to be less than 150 seconds only wastes computing resources as there will be instances when the job will do nothing. |
|
Default Value |
300 |
|
Property |
strongkeylite.cfg.property.ldapauthtype |
|
Explanation |
When SAKA is configured to use an LDAP-based directory server for managing access control to SAKA services, this property identifies the type of LDAP authentication to use with the directory server. In this release, SAKA supports the simple LDAP authentication. It is recommended that sites use LDAP over Transport Layer Security (TLS) or within an Internet Protocol Security (IPSec) tunnel to protect the LDAP passwords flowing between SAKA and the LDAP directory server. |
|
Default Value |
simple |
|
Property |
strongkeylite.cfg.property.ldapdecryptiongroup |
|
Explanation |
When SAKA is configured to use an LDAP-based directory server for managing access control to SAKA services, this property identifies the LDAP group authorized to request decryption services from SAKA. The members of this group must have valid LDAP credentials within the same directory server that can be verified by SAKA. While SAKA can use any group container in the directory, it is recommended using the value specified here as it will ensure better support. Sites must create this LDAP group container hierarchy before using the web service application. NOTE: An LDAP user's membership in this group does not authorize them to request encryption or deletion services from SAKA; that requires separate membership in the groups identified in the strongkeylite.cfg.property.ldapencryptiongroup and strongkeylite.cfg.property.ldapdeletiongroup properties, respectively. |
|
Default Value |
cn=DecryptionAuthorized,ou=groups,ou=v1,ou=StrongKeyLite,ou=StrongAuth,ou=applications,dc=strongauth,dc=com |
|
Property |
strongkeylite.cfg.property.ldapdeletiongroup |
|
Explanation |
When SAKA is configured to use an LDAP-based directory server for managing access control to SAKA services, this property identifies the LDAP group authorized to request deletion services from SAKA. The members of this group must have valid LDAP credentials within the same directory server that can be verified by SAKA. While SAKA can use any group container in the directory, it is recommended using the value specified here as it will ensure better support. Sites must create this LDAP group container hierarchy before using the web service application. NOTE: An LDAP user's membership in this group does not authorize them to request encryption or decryption services from SAKA; that requires separate membership in the groups identified in the strongkeylite.cfg.property.ldapencryptiongroup and strongkeylite.cfg.property.ldapdecryptiongroup properties, respectively. |
|
Default Value |
cn=DeletionAuthorized,ou=groups,ou=v1,ou=StrongKeyLite,ou=StrongAuth,ou=applications,dc=strongauth,dc=com |
|
Property |
strongkeylite.cfg.property.ldapencryptiongroup |
|
Explanation |
When SAKA is configured to use an LDAP-based directory server for managing access control to SAKA services, this property identifies the LDAP group authorized to request encryption services from SAKA. The members of this group must have valid LDAP credentials within the same directory server that can be verified by SAKA. While SAKA can use any group container in the directory, it is recommended using the value specified here as it will ensure better support. Sites must create this LDAP group container hierarchy before using the web service application. NOTE: An LDAP user's membership in this group does not authorize them to request decryption or deletion services from SAKA; that requires separate membership in the groups identified in the strongkeylite.cfg.property.ldapdecryptiongroup and strongkeylite.cfg.property.ldapdeletiongroup properties, respectively. |
|
Default Value |
cn=EncryptionAuthorized,ou=groups,ou=v1,ou=StrongKeyLite,ou=StrongAuth,ou=applications,dc=strongauth,dc=com |
|
Property |
strongkeylite.cfg.property.ldaprelaygroup |
|
Explanation |
When SAKA is configured to use an LDAP-based directory server for managing access control to SAKA services, this property identifies the LDAP group authorized to request relay services from SAKA. The members of this group must have valid LDAP credentials within the same directory server that can be verified by SAKA. While SAKA can use any group container in the directory, it is recommended using the value specified here as it will ensure better support. Sites must create this LDAP group container hierarchy before using the web service application. NOTE: An LDAP user's membership in this group does not necessarily authorize them to request other web services from SAKA. |
|
Default Value |
cn=RelayAuthorized,ou=groups,ou=v1,ou=StrongKeyLite,ou=StrongAuth,ou=applications,dc=strongauth,dc=com |
|
Property |
strongkeylite.cfg.property.ldapsearchgroup |
|
Explanation |
When SAKA is configured to use an LDAP-based directory server for managing access control to SAKA services, this property identifies the LDAP group authorized to request search services from SAKA. The members of this group must have valid LDAP credentials within the same directory server that can be verified by SAKA. While SAKA can use any group container in the directory, it is recommended using the value specified here as it will ensure better support. Sites must create this LDAP group container hierarchy before using the web service application. NOTE: An LDAP user's membership in this group does not authorize them to request encryption, decryption, or deletion services from SAKA; that requires separate membership in the groups identified in the strongkeylite.cfg.property.ldapencryptiongroup, strongkeylite.cfg.property.ldapdecryptiongroup, and the strongkeylite.cfg.property.ldapsearchgroup properties, respectively. |
|
Default Value |
cn=SearchAuthorized,ou=groups,ou=v1,ou=StrongKeyLite,ou=StrongAuth,ou=applications,dc=strongauth,dc=com |
|
Property |
strongkeylite.cfg.property.ldaptype |
|
Explanation |
Standard LDAP directories define LDAP groups as a groupOfUniqueNames object class. However, AD does not. This requires that determining a requester's authorization within AD must use a different query for AD than for a standard LDAP directory. This property tells SAKA with which type of LDAP directory it is dealing. The two valid values for this property are: AD—Active Directory and LDAP—for a standard LDAP directory server (the default) This property MUST be overridden if SAKA is to work with an Active Directory-based directory server. |
|
Default Value |
LDAP |
|
Property |
strongkeylite.cfg.property.ldapurl |
|
Explanation |
When SAKA is configured to use an LDAP-based directory server for managing access control to SAKA services, this property defines the FQDN of the LDAP directory server, the LDAP service listening port, and the security mode of the LDAP protocol.Valid values of this property may look like: ldaps://poseidon.strongauth.com:636 ...where the ldaps indicates that directory server requires TLS, and is listening over the default LDAPS port (636). This property MUST be overridden before SAKA is used successfully. If using LDAP, sites are strongly encouraged to use TLS for communications between SAKA and the directory server. |
|
Default Value |
ldap://poseidon.strongauth.com:389 |
|
Property |
strongkeylite.cfg.property.luhntokens |
|
Explanation |
Some sites may want to issue token numbers that conform to the Luhn algorithm used by credit card issuers (https://en.wikipedia.org/wiki/Luhn_algorithm). This property, when set to true, will return tokens that conform to the Luhn algorithm; by default, this property is set to false so that tokens are just incremented sequentially for each new request. This ensures that other software checking tokens for Luhn conformance will pass. However, this might reduce the transaction throughput of the appliance since it must test every token generated to ensure that it passes the Luhn algorithm check. How much of a reduction depends on how busy the appliance is and how many requests come in for processing at any given time. |
|
Default Value |
false |
|
Property |
strongkeylite.cfg.property.messaging.blpsleeptime |
|
Explanation |
Before an object is replicated to other appliances, the source appliance saves the object metadata in a replication table, and then publishes the object to subscribers. Sometimes, the acknowledgment from subscribers may not reach the publisher. On such occasions, the publisher has a BacklogProcessor (BLP) that attempts to resend the object to subscribers who did not receive it. However, to ensure that the BLP does not get caught in an endless loop sending the objects continuously, it sleeps for the period of seconds specified in this parameter before checking the replication table again to publish objects. |
|
Default Value |
60 |
|
Property |
strongkeylite.cfg.property.messaging.blpsuccpercent |
|
Explanation |
The BLP handles a job as a series of batches. After sending one of these batches the BLP will wait and count the number of acknowledgments it receives. This property determines the minimum percent of transactions (provided as a decimal) that must be acknowledged for the BLP to perform the next batch. |
|
Default Value |
.90 |
|
Property |
strongkeylite.cfg.property.messaging.blptestsize |
|
Explanation |
When the BLP first wakes up, before it sends the bulk of backlog messages, it sends a small batch of records to test whether the subscribing node is available to send acknowledgments. If no acknowledgments are received from this test, the BLP gives up on this iteration. This property determines the quantity of records send in this test. |
|
Default Value |
25 |
|
Property |
strongkeylite.cfg.property.messaging.timediff |
|
Explanation |
ZeroMQ normally replicates most objects to all appliances when they are created. However, there are occasions when there might be some leftover objects in the replication table that were either not acknowledged by recipients, or the publisher did not receive the acknowledgment as it was too busy. In these situations, the BLP attempts to replicate the object again as part oof the clean-up processor. The timediff property is the amount of seconds a record must be in the Replication table before the BLP attempts to resend it to other appliances. |
|
Default Value |
60 |
|
Property |
strongkeylite.cfg.property.messaging.statechange.waittime |
|
Explanation |
When a BLP is being started, stopped, other threads may call the messaging service to get an instance. This parameter tells the messaging service how long to wait while the service is undergoing a state change—such as when it might be starting or stopping. |
|
Default Value |
15 |
|
Property |
strongkeylite.cfg.property.objectremovaljob.cutoff |
|
Explanation |
The duration, in seconds, that must pass before SAKA removes metadata objects from its internal cache. The lower the cutoff value, the more efficient SAKA uses memory resources. However, too low a duration can impact performance since metadata objects flushed from cache will have to be retrieved from the internal database before they can be reused. Knowing business transaction characteristics is important for realistically setting this value to balance resource utilization and performance. The default value of 1800 seconds (30 minutes) leans towards better performance. There is no security implication in leaving these objects in memory for a longer duration; none of the cached metadata is sensitive. |
|
Default Value |
1800 |
|
Property |
strongkeylite.cfg.property.objectremovaljob.run |
|
Explanation |
An indicator that tells SAKA whether to run the thread that removes metadata objects from its internal cache. The default is to run the thread (true). The other acceptable value for this property is false, in which case objects are cached as long as the server is up and running and memory resources are available. |
|
Default Value |
true |
|
Property |
strongkeylite.cfg.property.objectremovaljob.runfrequency |
|
Explanation |
The frequency, in seconds, at which the thread that removes metadata objects from the SAKA internal cache, executes. The lower the runfrequency value, the more efficiently SAKA uses memory resources, since objects are cached for a shorter duration. However, too low a duration can impact performance, since metadata objects flushed from cache must be retrieved from the internal database before they can be reused. Do not set the value less than half the strongkeylite.cfg.property.objectremovaljob.cutoff property's value. For example, if the cutoff property value is 1800 seconds (the default), setting the value of runfrequency to be less than 900 seconds only wastes computing resources, as there will be instances when the job will do nothing. |
|
Default Value |
900 |
|
Property |
strongkeylite.cfg.property.pwdkeyalgorithm |
|
Explanation |
The cryptographic algorithm used for generating the symmetric key that will create HMACs of user-passwords. The key algorithm has a direct dependency on strongkeylite.cfg.property.pwdkeysize and strongkeylite.cfg.property.pwdtransform, so changes to any of these properties must be carried out in tandem. SAKA currently supports the following algorithms for the password HMAC generator:
|
|
Default Value |
HmacSHA256 |
|
Property |
strongkeylite.cfg.property.pwdkeysize |
|
Explanation |
The size of the symmetric HMAC key used to generate HMACs of user passwords. The SAKA currently only supports the following sizes:
Changes to the default values must include a corresponding change in the strongkeylite.cfg.property.pwdkeyalgorithm and the strongkeylite.cfg.property.pwdtransform properties. |
|
Default Value |
256 |
|
Property |
strongkeylite.cfg.property.pwdtransform |
|
Explanation |
The cryptographic algorithm used to generate HMACs of sensitive data. The transform algorithm has a direct dependency on the strongkeylite.cfg.property.pwdkeyalgorithm and the strongkeylite.cfg.property.pwdkeysize properties, so changes to these three properties must be carried out in tandem. SAKA currently supports the following algorithms:
|
|
Default Value |
HmacSHA256 |
|
Property |
strongkeylite.cfg.property.readonly |
|
Explanation |
Allows an appliance to be in Read-Only mode. It will perform individual Decryption and Search operations without logging anything to the database, but be responsive to applications to decrypt tokens. All logging is performed only in the |
|
Default Value |
false |
|
Property |
strongkeylite.cfg.property.relay.authorizedurls.1 |
|
Explanation |
Every authorized URL for the relay web service must be uniquely identified in its own property. The first URL will begin with the numeral 1, the second with 2, and so on. There is no limit to the number of URLs that can be configured. However, the total number of configured URLs must be specified in the property, strongkeylite.cfg.property.relay.authorizedurls.number. Having more URLs than the specified number will prevent the appliance from using any URL that exceeds strongkeylite.cfg.property.relay.authorizedurls.number. Having fewer than the specified number of URLs will cause NullPointerExceptions (NPE) to be thrown. Since DACTool does not provide the ability to add new properties per domain, the URL values must be added in the strongkeylite-configuration.properties file in the |
|
Default Value |
https://test.authorize.net |
|
Property |
strongkeylite.cfg.property.relay.authorizedurls.number |
|
Explanation |
The relay web service will only work when the service request is targeted at specific URLs of payment gateways. In order to configure the gateway URLs, one must know the number of URLs the service is authorized to communicate with. That number must be specified in this property. By default only one URL is authorized out of the box: |
|
Default Value |
1 |
|
Property |
strongkeylite.cfg.property.relay.namespaces.number |
|
Explanation |
In order to relay transactions to payment gateways, the appliance needs to parse XML content that is passed in as a parameter to the web service. The appliance needs to know the number and namespaces of the XML schemas that define the structure of XML being passed in. If new XML schema namespaces are added/deleted to the relay capability, this number must be changed to reflect the actual number of namespaces the appliance must recognize. |
|
Default Value |
6 |
|
Property |
strongkeylite.cfg.property.relay.namespaces.prefix.1 |
|
Explanation |
The relay web service permits the relay of HTTP and SOAP-based messages to external payment gateways. For SOAP messages to be validated correctly, the appliance must know all namespaces it must expect to process in the relay web service. There may be any number of prefixes configured, but each must be unique and must have a corresponding .relay.namespaces.url.N property (see below). |
|
Default Value |
adyen |
|
Property |
strongkeylite.cfg.property.relay.namespaces.prefix.2 |
|
Explanation |
The relay web service permits the relay of HTTP and SOAP based messages to external payment gateways. For SOAP messages to be validated correctly, the appliance must know all namespaces it must expect to process in the relay web service. There may be any number of prefixes configured, but each must be unique and must have a corresponding .relay.namespaces.url.N property (see below). |
|
Default Value |
ds |
|
Property |
strongkeylite.cfg.property.relay.namespaces.prefix.3 |
|
Explanation |
The relay web service permits the relay of HTTP and SOAP-based messages to external payment gateways. For SOAP messages to be validated correctly, the appliance must know all namespaces it must expect to process in the relay web service. There may be any number of prefixes configured, but each must be unique and must have a corresponding .relay.namespaces.url.N property (see below). |
|
Default Value |
soap |
|
Property |
strongkeylite.cfg.property.relay.namespaces.prefix.4 |
|
Explanation |
The relay web service permits the relay of HTTP and SOAP-based messages to external payment gateways. For SOAP messages to be validated correctly, the appliance must know all namespaces it must expect to process in the relay web service. There may be any number of prefixes configured, but each must be unique and must have a corresponding .relay.namespaces.url.N property (see below). |
|
Default Value |
skles |
|
Property |
strongkeylite.cfg.property.relay.namespaces.prefix.5 |
|
Explanation |
The relay web service permits the relay of HTTP and SOAP-based messages to external payment gateways. For SOAP messages to be validated correctly, the appliance must know all namespaces it must expect to process in the relay web service. There may be any number of prefixes configured, but each must be unique and must have a corresponding .relay.namespaces.url.N property (see below). |
|
Default Value |
skles |
|
Property |
strongkeylite.cfg.property.relay.namespaces.prefix.6< |
|
Explanation |
The relay web service permits the relay of HTTP and SOAP-based messages to external payment gateways. For SOAP messages to be validated correctly, the appliance must know all namespaces it must expect to process in the relay web service. There may be any number of prefixes configured, but each must be unique and must have a corresponding .relay.namespaces.url.N property (see below). |
|
Default Value |
xenc |
|
Property |
strongkeylite.cfg.property.relay.namespaces.url.1 |
|
Explanation |
The relay web service permits the relay of HTTP and SOAP-based messages to external payment gateways. For SOAP messages to be validated correctly, the appliance must know all namespaces it must expect to process in the relay web service. There may be any number of namespace URLs configured, but each must be unique and must have a corresponding .relay.namespaces.prefix.N property (see above). |
|
Default Value |
http://payment.services.adyen.com |
|
Property |
strongkeylite.cfg.property.relay.namespaces.url.2 |
|
Explanation |
The relay web service permits the relay of HTTP and SOAP-based messages to external payment gateways. For SOAP messages to be validated correctly, the appliance must know all namespaces it must expect to process in the relay web service. There may be any number of namespace URLs configured, but each must be unique and must have a corresponding .relay.namespaces.prefix.N property (see above). |
|
Default Value |
http://www.w3.org/2000/09/xmldsig# |
|
Property |
strongkeylite.cfg.property.relay.namespaces.url.3 |
|
Explanation |
The relay web service permits the relay of HTTP and SOAP-based messages to external payment gateways. For SOAP messages to be validated correctly, the appliance must know all namespaces it must expect to process in the relay web service. There may be any number of namespace URLs configured, but each must be unique and must have a corresponding .relay.namespaces.prefix.N property (see above). |
|
Default Value |
http://schemas.xmlsoap.org/soap/envelope/ |
|
Property |
strongkeylite.cfg.property.relay.namespaces.url.4 |
|
Explanation |
The relay web service permits the relay of HTTP and SOAP-based messages to external payment gateways. For SOAP messages to be validated correctly, the appliance must know all namespaces it must expect to process in the relay web service. There may be any number of namespace URLs configured, but each must be unique and must have a corresponding .relay.namespaces.prefix.N property (see above). |
|
Default Value |
http://strongkey.strongauth.com/SKES201101 |
|
Property |
strongkeylite.cfg.property.relay.namespaces.url.5 |
|
Explanation |
The relay web service permits the relay of HTTP and SOAP-based messages to external payment gateways. For SOAP messages to be validated correctly, the appliance must know all namespaces it must expect to process in the relay web service. There may be any number of namespace URLs configured, but each must be unique and must have a corresponding .relay.namespaces.prefix.N property (see above). |
|
Default Value |
http://strongkeylite.strongauth.com/SAKA201009 |
|
Property |
strongkeylite.cfg.property.relay.namespaces.url.6 |
|
Explanation |
The relay web service permits the relay of HTTP and SOAP-based messages to external payment gateways. For SOAP messages to be validated correctly, the appliance must know all namespaces it must expect to process in the relay web service. There may be any number of namespace URLs configured, but each must be unique and must have a corresponding .relay.namespaces.prefix.N property (see above). |
|
Default Value |
http://www.w3.org/2001/04/xmlenc# |
|
Property |
strongkeylite.cfg.property.relay.soapxpath.xpath |
|
Explanation |
The string containing the elements that make up the XPath expression that will be used to search for the tokens within embedded SOAP messages sent to the appliance for relay to payment gateways. |
|
Default Value |
/SoapRelayContent/Envelope |
|
Property |
strongkeylite.cfg.property.replicate.essentialonly |
|
Explanation |
By default, the appliance replicates all objects to other appliances in the cluster. However, some sites may choose to not replicate decryption and search requests to other appliances since the information is for audit purposes. Since the original responder server will have it in their database and application server logs, this may be sufficient for some sites. In those situations, setting this property to true will ensure that only essential objects are replicated to other appliances—which means, decryption and search requests are not replicated to other appliances. |
|
Default Value |
false |
|
Property |
strongkeylite.cfg.property.reqid.retryattempts |
|
Explanation |
The number of times the front-end web server tries to get a unique request ID number from the back-end SAKA server when it receives a web service request from a client application. When the web server doesn't receive a response within the configured number of attempts, it returns an error message to the client application. The request ID is used to track request transactions in the SAKA encryption domain. |
|
Default Value |
3 |
|
Property |
strongkeylite.cfg.property.rngtype |
|
Explanation |
The appliance supports two types of Random Number Generators: pseudo-RNG or true RNG. When this property has the value PRNG—the default—random bytes are extracted from the true RNG in cryptographic hardware when the application server is started; the TRNG bytes are used to seed a pseudo-RNG from which all future random bytes are generated. When the value of this property is TRNG, the appliance always uses the cryptographic hardware to generate random bytes. Using the PRNG is orders of magnitudes faster than using the TRNG. However, the appliance always uses the TRNG to generate random bytes for the cryptographic keys; initialization vectors and nonces for authentication are generated by the PRNG. |
|
Default Value |
PRNG |
|
Property |
strongkeylite.cfg.property.rotatedhmacs.reportprefix |
|
Explanation |
The prefix used for reports generated by SAKA when symmetric keys are rotated and encrypted objects are thus re-encrypted with the new key. The report's name is appended with the date and time of the run and stored in the Relevant only if the strongkeylite.cfg.property.rotatesymmetrickeysjob.run property is set to true. |
|
Default Value |
RotatedHMACs- |
|
Property |
strongkeylite.cfg.property.rotatehmacsjob.run |
|
Explanation |
This property tells SAKA whether to run the key rotation job. If set to true, SAKA will also look at strongkeylite.cfg.property.rotatehmacsjob.runfrequency to determine how frequently to schedule the job. If set to false, the job is never scheduled. To schedule even the on-demand execution of this job (from the DACTool) just once, this property value must be set to true to execute the job. |
|
Default Value |
true |
|
Property |
strongkeylite.cfg.property.rotatesymmetrickeysjob.cutoff |
|
Explanation |
Days that must elapse before a symmetric key is rotated. Key rotation is required by some regulations (annually for PCI DSS). SAKA has a built-in job that automatically generates new symmetric keys and re-encrypts data encrypted by the older key. Since the only externally mandated guideline currently is PCI DSS, a site's own security policies may or may not dictate how frequently the keys must be rotated within SAKA. The default value is to rotate keys at least one year old (365 days). |
|
Default Value |
365 |
|
Property |
strongkeylite.cfg.property.rotatesymmetrickeysjob.reportprefix |
|
Explanation |
The prefix used for reports generated by SAKA when symmetric keys are rotated and encrypted objects are thus re-encrypted with the new key. The report's name is appended with the date/time and stored in the Relevant only if the strongkeylite.cfg.property.rotatesymmetrickeysjob.run property is set to true. |
|
Default Value |
ReencryptedObjects- |
|
Property |
strongkeylite.cfg.property.rotatesymmetrickeysjob.run |
|
Explanation |
Tells SAKA whether to run the key rotation job. If the value is set to true, SAKA will also look at strongkeylite.cfg.property.rotatesymmetrickeysjob.runfrequency property to determine how frequently to schedule the job. If set to false, the job is never scheduled. To even schedule the on-demand execution of this job (from the DACTool) for a single run, this property value must be true before the job is submitted. |
|
Default Value |
true |
|
Property |
strongkeylite.cfg.property.rotatesymmetrickeysrangejob.run |
|
Explanation |
Tells SAKA whether to run the key rotation job for a range of records. This allows for smaller sets of records in the database to be re-encrypted ahead of schedule, thereby preventing a huge re-encryption job on the anniversary date of the symmetric key. If set to false, the job is never scheduled; even the on-demand execution of this job (from the DACTool) will fail if this property value is set to false. |
|
Default Value |
true |
|
Property |
strongkeylite.cfg.property.symmmetrickeylock.waittime |
|
Explanation |
To generate a symmetric key, the generating module must acquire a lock to avoid creating duplicate keys. If a lock has been acquired by another thread, the current thread may wait for waittime seconds each time, to acquire the lock before trying again. It will make strongkeylite.cfg.property.symmmetrickeylock.attempts times, waiting for strongkeylite.cfg.property.symmmetrickeylock.waittime seconds before completely giving up. |
|
Default Value |
30 |
|
Property |
strongkeylite.cfg.property.tokentype |
|
Explanation |
When a client application requests encryption services from SAKA, the server returns a token to uniquely identify the sensitive data in its internal database. Depending on the value configured for this property, the returned token is either an HMAC of the sensitive data or a pseudo-number. The valid values for this property are hmac—an alphanumeric HMAC, and pseudonumber—a numeric pseudo-number configured per site requirements Applications that currently store the HMAC in their database must convert that value to the assigned pseudo-number separately—SAKA does not provide any tools to do so other than the AddedPseudoNumbers- report that provides the assigned pseudo-number for a specific HMAC. |
|
Default Value |
pseudonumber |
|
Property |
strongkeylite.cfg.property.uniquetokens |
|
Explanation |
This property indicates whether SAKA will return unique token values for any sensitive data sent to the appliance for encryption. A value of true returns unique tokens, even if duplicate sensitive data is sent to the appliance. By default, the property is false, indicating that duplicate sensitive data will return previously generated tokens. NOTE: When a domain is using unique tokens, sensitive data cannot be searched for in that domain; the search web service will always return “false” because the appliance concatenates the unique encryption request ID to the plaintext to always generate unique plaintext, thus being able to generate unique tokens. To search in such domains are, create a second encryption domain where this property is set to its default (false) and query the second encryption domain to determine if a specific plaintext value is already encrypted in the database. |
|
Default Value |
false |
|
Property |
strongkeylite.cfg.property.sakasecret.autopinset |
|
Explanation |
This property defines whether SAKA will use PIN files for reading the Key Custodians' PINs to activate the cryptographic hardware module. If a site chooses to use unattended SAKA reboots/restarts, this value must be true. If the value is set to false (the default), the KCs must use SetPIN Tool to set their PINs manually for activating the hardware module on the SAKA server. However, they can do this securely even from a remote location. The PINs must be either readable from files or set by the KCs after each SAKA restart/reboot. Sites are strongly encouraged to leave this property at its default value (false) and use SetPIN Tool to activate the cryptographic module after restarts. |
|
Default Value |
false |
|
Property |
strongkeylite.cfg.property.sakasecret.k |
|
Explanation |
This property determines the minimum number of KCs necessary to activate the appliance through autopinset. To use this property there must be two accompanying properties for each KC to identify the location of their keystore and the password to their keystore in the form of:
The value N must be equal to or less than K and does not have to correspond to the name of the actual Key Custodian (i.e., keycustodian2.bcfks may be assigned to the property keycustodian1.location) |
|
Default Value |
0 |
Sample Configuration File
A sample strongkeylite-configuration.properties file that overrides the default properties may look like the following (actual values will depend on a sites configuration). The presence of this file in the STRONGKEYLITE_HOME/etc directory overrides properties of the same name in the bundled properties file in the web service application.
#

# Custom properties for this sites SAKA
#
strongkeylite.cfg.property.ldaptype=AD
strongkeylite.cfg.property.ldapurl=ldaps://ads01.diligentcompany.com:636
strongkeylite.cfg.property.basedn=dc=diligentcompany,dc=com
strongkeylite.cfg.property.dnsuffix=,ou=users,ou=v1,ou=StrongKeyLite,ou=StrongAuth,ou=applications,dc=diligentcompany,dc=com
strongkeylite.cfg.property.ldapencryptiongroup=cn=EncryptionAuthorized,ou=groups,ou=v1,ou=StrongKeyLite,ou=StrongAuth,ou=applications,dc=diligentcompany,dc=com
strongkeylite.cfg.property.ldapdecryptiongroup=cn=DecryptionAuthorized,ou=groups,ou=v1,ou=StrongKeyLite,ou=StrongAuth,ou=applications,dc=diligentcompany,dc=com
strongkeylite.cfg.property.ldapdeletiongroup=cn=DeletionAuthorized,ou=groups,ou=v1,ou=StrongKeyLite,ou=StrongAuth,ou=applications,dc=diligentcompany,dc=com
strongkeylite.cfg.property.ldaprelaygroup=cn=RelayAuthorized,ou=groups,ou=v1,ou=StrongKeyLite,ou=StrongAuth,ou=applications, dc=diligentcompany,dc=com
strongkeylite.cfg.property.ldapsearchgroup=cn=SearchAuthorized,ou=groups,ou=v1,ou=StrongKeyLite,ou=StrongAuth,ou=applications, dc=diligentcompany,dc=com
Integrating with Active Directory
All requesters of cryptographic services from SAKA must be authorized. A username and a password must be supplied in the web service call to SAKA. The username must be granted either the privilege to encrypt, decrypt, or both. SAKA provides you the option of choosing where to define authorized users of SAKA cryptographic services. By default, SAKA will use the internal database to authenticate users and determine their authorization. However, with the exception of the administrator1 credential, SAKA allows you the choice of using your Active Directory (or another LDAP-based directory server) to authenticate users and determine their authorization for cryptographic services.
Using AD for managing access control to SAKA requires either modifying the strongkeylite-configuration.properties file in the STRONGKEYLITE_HOME/etc directory of the appliances, or using DACTool to modify the configuration. The former applies to all encryption domains on the appliance, while the latter applies only to the modified encryption domain. Thus, it is possible to host multiple encryption domains on the same appliance and have them use the internal database, an external LDAP directory, or Active Directory at the same time in different domains.
To have all encryption domains in SAKA use Active Directory to authenticate and authorize users, perform the following tasks:
Login to your Windows AD server as a Domain Administrator.
From the Administration Tools menu, start the management tool to manage AD Users and Groups.
-
Create the following containers under your domain's base DN (you may also use the script identified in Appendix A to execute this from a Command Tool):
OU=applications
OU=StrongAuth, OU=applications
OU=StrongKeyLite, OU=StrongAuth, OU=applications
OU=v1, OU=StrongKeyLite, OU=StrongAuth, OU=applications
OU=Users, OU=v1, OU=StrongKeyLite, OU=StrongAuth, OU=applications
OU=groups, OU=v1, OU=StrongKeyLite, OU=StrongAuth, OU=applications
To use the same part of the AD tree that contains the domain users, specify the container DN for the strongkeylite.cfg.property.dnsuffix property so SAKA knows where to find AD users in the tree.
Create the following groups (or to use groups defined in the location where AD normally creates its groups, specify the container DN of the groups for the strongkeylite.cfg.property.ldapencryptiongroup, the strongkeylite.cfg.property.ldapdecryptiongroup, the strongkeylite.cfg.property.ldapdeletiongroup, the strongkeylite.cfg.property.ldaprelaygroup, and the strongkeylite.cfg.property.ldapsearchgroup properties):
CN=EncryptionAuthorized, OU=groups, OU=v1, OU=StrongKeyLite, OU=StrongAuth, OU=applications
CN=DecryptionAuthorized, OU=groups, OU=v1, OU=StrongKeyLite, OU=StrongAuth, OU=applications
CN=DeletionAuthorized, OU=groups, OU=v1, OU=StrongKeyLite, OU=StrongAuth, OU=applications
CN=RelayAuthorized, OU=groups, OU=v1, OU=StrongKeyLite, OU=StrongAuth, OU=applications
CN=SearchAuthorized, OU=groups, OU=v1, OU=StrongKeyLite, OU=StrongAuth, OU=applications
Add the users to the encryption and decryption groups as members so SAKA knows they are authorized for that operation.
Add the following properties to the strongkeylite-configuration.properties file in the
STRONGKEYLITE_HOMEdirectory. Make sure to replace “diligentcompany” and “com” with the appropriate values for your domain:# # Properties to use Active Directory for SAKA access control # strongkeylite.cfg.property.ldaptype=AD strongkeylite.cfg.property.ldapurl=ldaps://ads01.diligentcompany.com:636 strongkeylite.cfg.property.basedn=dc=diligentcompany,dc=com strongkeylite.cfg.property.dnsuffix=,ou=users,ou=v1,ou=StrongKeyLite,ou=StrongAuth,ou=applications,dc=diligentcompany,dc=com strongkeylite.cfg.property.ldapencryptiongroup=cn=EncryptionAuthorized,ou=groups,ou=v1,ou=StrongKeyLite,ou=StrongAuth,ou=applications,dc=diligentcompany,dc=com strongkeylite.cfg.property.ldapdecryptiongroup=cn=DecryptionAuthorized,ou=groups,ou=v1,ou=StrongKeyLite,ou=StrongAuth,ou=applications,dc=diligentcompany,dc=com strongkeylite.cfg.property.ldapdeletiongroup=cn=DeletionAuthorized,ou=groups,ou=v1,ou=StrongKeyLite,ou=StrongAuth,ou=applications,dc=diligentcompany,dc=com strongkeylite.cfg.property.ldaprelaygroup=cn=RelayAuthorized,ou=groups,ou=v1,ou=StrongKeyLite,ou=StrongAuth,ou=applications,dc=diligentcompany,dc=com strongkeylite.cfg.property.ldapsearchgroup=cn=SearchAuthorized,ou=groups,ou=v1,ou=StrongKeyLite,ou=StrongAuth,ou=applications, dc=diligentcompany,dc=com
Test the connection by using the
ldapsearchcommand on the appliance to connect to the ldapurl specified in the properties file; try to access each of the containers specified in the properties files—specifically the ones specifying the dnsuffix and the two groups. Until you can successfully connect and access these groups from the command line, don't attempt to test SAKA for AD integration. If AD cannot be reached from the command line, SAKA will never be able to do so, either. See the main page for ldapsearch to see how to use the tool.After verifying connection to AD using ldapsearch, restart the application server on the SAKA instance (or restart SAKA). Set the PINs for the cryptographic hardware module before cryptographic services are available (see Chapter 10—KAM KCSetPINTool for details).
To enable AD integration for a specific encryption domain, as opposed to all SAKA domains, perform the same tasks described above, but instead of adding the properties to the strongkeylite-configuration.properties file, use the DACTool and add them to the domain's Mutable Configuration.
However, because SAKA configuration through DACTool goes into effect immediately, it is advisable to test the values from the command line (using ldapsearch) before modifying the properties in DACTool.
NOTE: It is strongly advised that before making changes to SAKA affecting access control, that it is thoroughly tested, and to pause application service requests for 10‒15 minutes while you make the final changes.
Integrating with Another Directory Server
If using a centralized identity-management system on a LDAP-based directory server—such as OpenDJ (https://backstage.forgerock.com/downloads/search?q=opendj%203.0.0)—the configuration is the same as for AD, except the following property must use the value LDAP instead of AD. All other parameters and instructions apply for LDAP integration as described for integrating with AD.
Following is an example of the strongkeylite-configuration.properties file for standard LDAP directory integration:
strongkeylite.cfg.property.ldaptype=LDAP
KAM Key Management
This chapter provides some information about how SAKA uses cryptographic keys and hardware modules, and the type of key management functions it enables.
Cryptographic Hardware Modules
SAKA uses a hardware-based cryptographic module to protect all cryptographic keys generated and used within the appliance. SAKA uses either a Trusted Platform Module (TPM) or a Hardware Security Module (HSM). While there are many differences between these two types of devices, they deliver similar benefits for some functions. SAKA leverages those specific functions and can, thus, deliver identical cryptographic services regardless of the type of cryptographic hardware used in the appliance.
Keys used within SAKA are organized into hierarchies, as shown here:
Trusted Platform Module (TPM)
On machines using the TPM, SAKA generates a single 256-bit EC asymmetric key pair—known as the Storage Root Key (SRK) in TPM terminology—within the TPM during its initialization. The SRK is stored inside the TPM, never leaves the TPM and is used to encrypt other objects—usually cryptographic keys. All such encrypted objects are stored on the hard disk and must be brought inside the TPM—with the proper authorization—to be decrypted. The software libraries interacting with the TPM handle this and shield applications from such details. Your applications only interact with the web services provided by the SAKA and are further shielded from these mechanical details.
SAKA instances using the TPM require three (3) Key Custodians to be physically present during the installation to initialize the hardware. Three Key Custodians are also required to remotely activate the TPM for use each time the appliance is restarted. This ensures if the appliance is ever stolen, the attacker will never find anything on the appliance that can compromise the hardware module. Key Custodians use the KCSetPINTool to activate the TPM, either locally or from remote locations; see 11 for details on KCSetPINTool.
Hardware Security Module (HSM)
On machines using HSM, SAKA generates a single 521-bit EC asymmetric key pair—called the HSM Root Key (HRK)—within the HSM during its initialization. The HRK is stored inside the HSM, but unlike the TPM, can leave the HSM when encrypted. This feature is used to clone the key from the Primary SAKA to others at a site. The HRK is used to encrypt other objects—usually cryptographic keys. All such encrypted objects are stored within the HSM's internal Database and can only be decrypted with the proper authorization. The software libraries interacting with the HSM handles such details.
SAKA instances using the HSM require two (2) HSM Administrators to be present to perform HRK key management functions—generation, export, import, etc. Their Personal Identification Numbers (PINs) to the HSM ensure that the knowledge to access all keys—including the symmetric encryption keys that encrypt sensitive data—is split across multiple Administrators. The three (3) Key Custodians use the KC SetPIN Tool to activate the HSM from remote locations; see 11—KAM-KCSetPINTool for more details on KCSetPINTool.
Encryption Domain Keys
To allow sites to manage the encryption policies of different applications, SAKA uses encryption domains. An encryption domain is a logical collection of keys, policies, users, and encrypted data, all of which are protected under a unique encryption domain key (EDK) to encrypt all symmetric keys. The EDK is a 256-bit EC asymmetric key pair generated and protected by SAKA's Cryptographic Hardward Module. As part of the domain creation process, the EDK must be manually replicated from the Primary appliance to all other known SAKA instances at the site. Every encryption domain is unique and never shares its EDK with other encryption domains.
Symmetric Cryptography Keys
Every domain consists of three types of symmetric keys encrypted by the EDK:
Data encryption keys (DEKs)—AES cryptographic keys with the default size of 256 bits. These keys are used to encrypt data SAKA receives. The default can be changed to 128 or 192 bits through the DACTool.
Data HMAC keys (HMAC Keys or DHKs)—256-bit cryptographic keys used to generate hashed message authentication codes of unencrypted data. SAKA uses HMAC keys to determine the integrity of sensitive data before and after a cryptographic operation. SAKA supports four different key sizes and algorithms for generating an HMAC—the HmacSHA224, HmacSHA256, HmacSHA384 and the HmacSHA512. The default algorithm is HmacSHA256, but sites may change this through the DACTool.
Password HMAC keys (PWD keys, PWD HMAC keys)—256-bit cryptographic keys used to generate HMACs of user passwords in the internal database for subsequent matching. Just like the Data HMAC keys, the Password HMAC also supports the previously mentioned four algorithms.
Decrypting any symmetric key within an encryption domain requires the cryptographic hardware module to have been activated by the Key Custodians at startup. Until the hardware module is activated, no cryptographic key can be used, and thus, the cryptographic web services are unavailable to applications even if the application server is working and listening for requests. The only action SAKA will accept in that state is to receive activation commands from Key Custodians.
Key Duration
While regulations such as PCI DSS call for annual key rotation to ensure that the risk of any specific key becoming vulnerable due to prolonged use is mitigated, SAKA goes above and beyond such regulations. It supports four (4) key durations for data encryption keys to mitigate such risks. Sites may choose any duration at any time to meet their security needs. The four key-durations are:
Daily—A new AES symmetric encryption key is generated every day upon the first encryption request past the stroke of midnight in the SAKA's time-zone. All new encryption requests for that calendar day are serviced with the encryption-key-of-the-day. This is the most aggressive key-duration policy. A total of 365 keys are, thus, generated for a calendar year (366 in leap-years). However, if no new encryption requests are made in any given calendar day—perhaps due to holidays or other reasons—a symmetric key is not generated during that day. So, the number of encryption keys can range anywhere from zero (0) to 365/366 for any given year.
Weekly—A new AES symmetric encryption key is generated upon the first encryption request past the stroke of midnight on Sunday in the SAKA time zone. All new encryption requests for that calendar week are serviced with the encryption key of the week. A maximum of fifty-two (52) such keys are generated and used in a calendar year with this key duration policy.
Monthly—A new AES symmetric encryption key is generated upon the first encryption request past the stroke of midnight on the first of the calendar month in the SAKA time zone. All new encryption requests for that calendar month are serviced with the encryption key of the month. A maximum of twelve (12) such keys are generated and used in a calendar year with this key duration policy.
Annual—A new AES symmetric encryption key is generated upon the first encryption request past the stroke of midnight on the first of the calendar year in the SAKA time zone. All new encryption requests for that calendar year are serviced with the encryption key of the year. Just one single key is generated and used in a calendar year with this key duration policy.
Regardless of which key duration policy is chosen by a site, all data encryption keys are generated, encrypted, recovered and if the job is scheduled through the DACTool, rotated automatically by the system. No human intervention is required other than to specify the key duration policy to use and to set up rotation jobs.
Regardless of which key duration policy is chosen by a site, all data encryption keys must be rotated annually if the system must be compliant to PCI DSS. If no such regulation constrains your business use of this appliance, you can choose to rotate keys based on your own internal security policies. The DACTool has programmed modules to perform the key rotation automatically without the need to stop cryptographic services to applications. See the 12—KAM DACTool for more details on DACTool.
The default key-duration of HMAC and Password-HMAC keys is Annual. These keys are used internally by SAKA for verifying the integrity of data before and after cryptographic processing. They are not currently regulated by PCI DSS or any other regulation. Hence, their key duration policy is not as aggressive as the data encryption key duration policy.
Key Generation
With the exception of the initialization of the TPM and the HSM when SAKA is being installed, Key Custodians never have to be involved in the generation of cryptographic keys on the SAKA. All symmetric cryptographic keys are generated automatically based on the key duration policy and authorized requests for cryptographic services from applications.
Even when the key duration policy is changed—for example, from Daily to Weekly—the change goes into effect immediately and the next encryption request that comes into the appliance triggers the generation of a new symmetric key that conforms to the new key duration policy. However, any object encrypted with a specific key will always be decrypted with the correct key, regardless of what the key duration policy might have been at the time of encryption.
Key Storage
How many keys can be generated and stored on a SAKA server? This depends on the capacity of your SAKA's internal database. The database automatically grows to accommodate its needs and the file system should have over 700GB available for the database to grow. Since a 256-bit symmetric key uses less than 1024 bits, even after it is encrypted and encoded into Base64, SAKA has sufficient capacity to store billions of cryptographic keys. However, even with the daily key duration policy it is anticipated that most SAKA instances will generate and use less than 1,000 keys (Data-encryption, HMAC, and Password HMAC) per year—potentially giving you many millenia worth of cryptographic keys within one encryption domain.
Key Backup
The SAKA automatically replicates all symmetric keys to other configured SAKA instances at a site, thereby protecting against failure of any single appliance with two or more configured.
The SRK on the TPM cannot be backed up or replicated. At least two appliances at a site protects against the failure of any single TPM. The encrypted EDKs can be backed up after the creation of a new domain by making a copy of the entire STRONGAUTH_HOME/tpm2 directory. Because every appliance has a unique SRK, the encrypted EDKs will need to be backed up on a per-appliance basis. Ensure that backups are clearly labeled because an EDK backup from one node will not be decryptable on any other node.
On HSM-based appliances, the asymmetric keys that must be backed up manually are the HRK and EDKs. This is done during the appliance setup and the creation of new domains. The backed up HRK is available on smart cards in the event a site loses all HSMs and can be recovered on a new HSM under control of the Key Custodians. The EDKs are backed up to files encrypted by the HRK and can be recovered in a new HSM after the HRK has been restored.
The only regular backup a site may want to perform is of the internal database. This not only backs up the encrypted symmetric keys, but also the encrypted data, logs, and other meta-information used by the appliance. Since all data is protected before it is persisted to the database, the backup of the internal database does not need to have any special considerations. However, it is recommended that backups of the database data be stored separately from standard backups in the event vulnerabilities in the encryption algorithm are discovered in the future. Controlled access to database backups will minimize any damage from such potential discoveries. The keys in the hardware modules cannot be backed up with your regular backup tools, so they will be unable to access it (the SRK can never be backed up with any tool, so its a moot issue).
Key Recovery
Recovering keys in SAKA is a matter of recovering the encrypted files and database backup from your backup library. As long as the TPM is not reinitialized, it can decrypt keys restored from backup tapes and continue providing cryptographic services to applications as before.
The only keys requiring specific recovery steps are the HRK and EDKs of HSM-based appliances. This process depends on the manufacturer of the HSM. Refer to the HSM vendor's documentation supplied with SAKA for details on key backup and recovery on the HSM.
Key Rotation
One of the most complex aspects of key management is key rotation—the act of changing cryptographic keys used by an application. This becomes complex when businesses require applications to be continuously available, even when this housekeeping activity is occurring in the background.
SAKA architecture enables all symmetric cryptographic keys to be rotated automatically without having to shut your applications down. Even as the key-rotation is being performed by a thread in SAKA, other threads continue to service encryption and decryption requests with new and/or existing keys. Should a decryption request come for an object whose key is being rotated, the transaction management enabled in the Java Enterprise Edition (JEE) application server manages this so that a request's handles remain consistent throughout the transaction.
To configure automatic rotation, the Domain Administrator must configure the Rotate Symmetric Keys job through the DACTool (see 11—KAM DACTool, Section 6.1 for details). If you would prefer to schedule the job manually, rather than automatically, this can also be done through the DACTool. If the jobs are not scheduled to run automatically, execute the job manually, else the keys will not get rotated.
Impact of Key Rotation on Applications
To better understand how SAKA rotates keys, it is important to understand how they are used and how the key duration policy of the symmetric keys affect the process. Additionally, it is important to understand how applications are affected when symmetric keys are rotated.
All unencrypted data (plaintext) are encrypted using DEKs. The default key duration policy for DEKs is Monthly, which implies that a new key is used every month to encrypt new transactions. However, applications never receive this encrypted data (ciphertext) or the DEK. As a result, they have no control over these objects directly (and are thus not within scope for audits with respect to encryption and key management controls).
Plaintext sent to SAKA also have their HMACs calculated before encryption—also after every decryption to verify their integrity. The HMACs of plaintext are calculated with DHKs, which have an Annual key duration. The HMACs are stored in the internal database along with the ciphertext and the key identifiers of the DEK and DHK.
If a site chooses not to use Tokenization—the substitution of a data-value resembling the plaintext characteristically but which is completely useless outside the scope of SAKA—the HMAC is returned to the calling application as a “token” to store and use within their applications. However, if the site chooses to use tokenization, instead of returning the HMAC, SAKA generates a unique Pseudo-Number (PSN) based on rules configured in the encryption domain, and returns the PSN as the token. This token becomes the unique identifier that authorized applications must use to retrieve the original plaintext.
A consideration for applications is whether to use the HMAC or PSN as the token. This consideration is important as it has implications on data stored by the application and the business processes it must implement.
Using the HMAC as the Token
If a site has business rules that encrypt sensitive data but delete it after a short and fixed period—for example, at the end of the month, quarter, or even a year—using the HMAC will result in just slightly faster processing of transactions on SAKA and the use of less storage—SAKA will have no need to execute either the tokenization code on the appliance or to store any PSNs. However, the performance and storage benefits are very marginal and should not be relied upon to make a significant difference.
Using HMACs as tokens works best only when businesses do not expect to query SAKA past the end of the year—the maximum key-duration of the DHK—unless they coordinate the change in HMAC values after execution of the HMAC key rotation job with their applications. At the start of a new calendar year, SAKA will use a new DHK to calculate the HMAC of all new encryption requests. Thus, a credit card number used in December of a year will generate a new HMAC in January of the following year based on the new HMAC key.
In some businesses, this is not a relevant issue since the business process does not expect to query SAKA past the single transaction and will delete the ciphertext and HMACs of the plaintext at the end of each business cycle—a day, week, or month—after the transactions are “settled.”
However, if a business requires use of the same token for long durations—many years—and does not want the key rotation to impact applications and the token they store, they must use PSNs for their tokens.
Using the PSN as the Token
The PSN is a simple concept. During new domain creation, you must choose the starting value of the PSN and the number of digits you want to use for your PSN. By default, SAKA is configured to use 16 digits as the PSN (to accommodate credit card numbers) and the starting value defaults to 1000000000000001 for server ID #1, 2000000000000001 for server ID #2 and so on. The New-Domain-Setup-Wizard.sh script that sets up new encryption domains in SAKA allows specification of the number of digits in the PSN and the starting number for each server of the cluster. Once specified, it is not a good idea to change it. It will be less complicated to create a new encryption domain with custom token numbers and write a small batch program to decrypt the old tokens; then re-encrypt them in the new encryption domain while updating your database with the new domain ID and token numbers.
By using PSNs, after the SAKA has completed encrypting the plaintext with the DEK and generated an HMAC with the DHK, it creates a new PSN for the object based on configured parameters, and returns the PSN to the calling application.
The advantage of using the PSN is that it never changes. The same PSN, regardless of the DEK or the DHK, will always result in the same plaintext as long as PSNs are used from the beginning when SAKA goes into production. Authorized applications that store the PSN as the token never need change the token value and can always call upon SAKA to return the original plaintext, regardless of how many key rotations have taken place between the initial encryption and decryption transactions.
This is because, when SAKA receives a new encryption request, even before it encrypts the data, it calculates the HMAC of the plaintext with the current DHK and checks to see if the internal database already has the HMAC stored in it. If it does exist, based on the value of tokentype, it returns either the HMAC or the PSN without doing any further processing. No duplicate record is created, but the fact that the request was found in the database is logged in the server's log file. Authorized applications do not see any difference in their request processing whether the value exists in the database or not—they always get back a token.
When the DEK and DHK change, the new ciphertext and HMAC values are calculated and stored in the internal database, but the PSN does not change. This allows applications to continue using the PSN to request decryption services from SAKA and get the same plaintext regardless of which DEK or DHK is in use at the current time.
NOTE: It is strongly recommended that sites always use the PSN even if they believe they will never store objects past the end of a calendar year. Business requirements may change, but by using the PSN from the start, applications will not have to change due to the new requirement.
The appliance also has the ability to issue tokens that conform to the Luhn algorithm1. This allows tokens to be used within application that check for conformance to the Luhn algorithm. This can be enabled by configuring the strongkeylite.cfg.property.luhntokens property to be true; this can be done on at the level of the encryption domain, so one domain may be using Luhn-conformant tokens while others need not. It is necessary to restart the Payara application server before this property goes into effect. It is also recommended that this property be turned on immediately after creating the encryption domain to ensure that tokens are generated that conform to this specification.
NOTE: It is possible to store a significant number of unique PSNs for credit card numbers (hardware capacity permitting), given that startvalue for the PSN is 1000000000000001 by default; almost one quadrillion (1,000,000,000,000,000) unique credit card numbers can be stored. If this isn't enough, it is possible to create additional encryption domains and use startvalue all over again, thus creating almost infinite capacity. Since the Domain ID is a required piece of information in all SAKA web requests, SAKA knows from which encryption domain to retrieve the value. Of course, to avoid having to change database schemas if they choose to add additional encryption domains in the future, applications must store the unique Domain ID in their database with the token.
ANSI X9.24-1 Keys
The SAKA is capable of storing externally generated ANSI X9.24-1 Keys for use in the various DUKPT operations supported by the CardCrypto Service. These keys can be stored on the SAKA in two ways:
Through the loading of 2‒3 separate key components into SAKA after which the SAKA can assemble the key by combining the components
The key can be submitted to SAKA in an encrypted form if the wrapping key has already been loaded into SAKA
Once the plaintext key has been assembled or unwrapped, the key is reencrypted by the current data encryption key and is assigned a token number which is returned to the user. The key's token must be submitted to the SAKA any time the key is needed by a web service operation.
The following diagram describes the process of storing a key from key components:
In Steps 1‒3 of the above diagram, up to three key components are submitted to the appliance.
In Step 4, the components are combined into the Assembled Key—either a Base Derivation Key (BDK) or Local Terminal Master Key (LTMK).
In Step 5, the assembled key is encrypted using the current data encryption key and its ciphertext is stored in the database. At this point, the assembled key bytes are discarded.
A token reference for this key is assigned and returned to the user in Step 6.
The following diagram describes storing a key wrapped by another stored key:
In Step 1, the user submits a token which identifies a previously stored wrapping key and the encrypted key to be stored.
In Step 2, SAKA recovers the ciphertext of the wrapping key from the token and uses the data encryption key to decrypt the Wrapping Key.
In Step 3, the Wrapping Key is used to decrypt the encrypted key ciphertext, resulting in the Unwrapped Key—either a Terminal Master Key (TMK) or a Terminal PIN Key (TPK).
In Step 4, the Unwrapped Key is encrypted using the current data encryption key and its ciphertext is stored in the database. At this point, the unwrapped key bytes and wrapping key bytes are discarded.
A token reference for this key is assigned and returned to the user in Step 5.
In this manner, a hierarchy of keys can be stored in SAKA to be used for DUKPT operations or PIN Block decryption and encryption.
HSM Integration
This chapter explains how SAKA integrates with a Hardware Security Module (HSM) and how to administrate the HSM. Customers using a Trusted Platform Module (TPM) can skip this chapter.
Building the HSM Driver
SAKA ships with the HSM driver pre-built by default, so for most customers it is not necessary to build the driver. But there may be times when the security requirements of a deployment demand that the driver be built from source after the appliance has been shipped to a customer. If this is the case, follow these steps as the root user to build the driver:
Copy the StrongKey-supplied HSM distribution to the folder
/usr/local/software/hsmon the appliance.Check the sha1sum and sha256sum of the distribution against the values provided by StrongKey.
Untar the distribution in
/usr/local/software/hsm.Change directory to
/usr/local/software/hsm/utimaco.Execute the install_HSM.sh script.
Building the HSM driver is complete. An example of this process follows:
shell> sha1sum /usr/local/software/hsm/Utimaco-HSM-Distribution-4.00.0.5.tgz
b3bdf74383b7840b2d064fca68b383a558c6e35e  /usr/local/software/hsm/Utimaco-HSM-Distribution-4.00.0.5.tgz

shell> sha256sum /usr/local/software/hsm/Utimaco-HSM-Distribution-4.00.0.5.tgz
7ea615bdb0cd5d2ef5f5b43091e7b650abb953616e860ac940802dcd6069fe22  /usr/local/software/hsm/Utimaco-HSM-Distribution-4.00.0.5.tgz

shell> tar zxf /usr/local/software/hsm/Utimaco-HSM-Distribution-4.00.0.5.tgz -C /usr/local/software/hsm

shell> cd /usr/local/software/hsm/utimaco

shell> ./install_HSM.sh
Installing HSM ...
make -C /usr/src/kernels/2.6.32-358.el6.x86_64 SUBDIRS=/usr/local/software/hsm/utimaco/V4.00.0.5/Software/Linux/Driver modules
make[1]: Entering directory '/usr/src/kernels/2.6.32-358.el6.x86_64'
  CC [M]  /usr/local/software/hsm/utimaco/V4.00.0.5/Software/Linux/Driver/cs2.o
  Building modules, stage 2.
  MODPOST 1 modules
  CC      /usr/local/software/hsm/utimaco/V4.00.0.5/Software/Linux/Driver/cs2.mod.o
  LD [M]  /usr/local/software/hsm/utimaco/V4.00.0.5/Software/Linux/Driver/cs2.ko.unsigned
  NO SIGN [M] /usr/local/software/hsm/utimaco/V4.00.0.5/Software/Linux/Driver/cs2.ko
make[1]: Leaving directory '/usr/src/kernels/2.6.32-358.el6.x86_64'
Rebuilding the HSM Driver
The HSM driver is custom built for a specific version of the Linux Kernel. This means if the kernel version changes, the driver will not be loaded until it is rebuilt for the new kernel. This usually only occurs if SAKA is rebooted after updating to a newer kernel. It is important to note that after running an update through Yum, the new kernel isn't immediately loaded.
To ensure there are no unexpected issues during future maintenance periods, the appliance should immediately be rebooted and the driver rebuilt after updating the kernel. After rebooting the appliance, run the following steps as the root user to rebuild the driver:
Change directory to
/usr/local/software/hsm/utimaco.Execute the
rebuilt_driver.shscript.
That completes rebuilding the HSM Driver. An example of this process follows.
HSM Administration Basics
This section presents the basic tools and skills an administrator will need to get started administering the HSM.
Checking the HSM Status
The easiest way to gather information about the status of the HSM is through the command line tool csadm. The csadm command can be used to perform nearly all administrative tasks, though we recommend using the much more user-friendly GUI tool CryptoServer Administration Tool. But csadm is very helpful to quickly see the state of the HSM through the use of the subcommand csadm getstate. An example of the getstate output follows:
shell> csadm getstate
mode      = Operational Mode
state     = INITIALIZED (0x00100004)
temp      = 33.2 [C]
alarm     = OFF
bl_ver    = 3.00.2.1          (Model: Se-Series)
uid       = b9000011 0c5f4b01                   |      _K
adm1      = 53653130 20202020 43533434 34363835 | Se10    CS444685
adm2      = 53656375 72697479 53657276 65720000 | SecurityServer
adm3      = 494e5354 414c4c45 44000000 00000000 | INSTALLED
The most important pieces of information displayed here are the mode (Operational), the alarm state (OFF), and, to a lesser extent, the service tag (CS444685). Another piece of helpful information is that the command returned successfully, indicating the HSM hardware is recognized by the operating system and is responsive.
Here is example output from a non-functional HSM:
shell> csadm getstate
Error B9018016
      CryptoServer API LINUX
      ioctl error (locking)
      errno = 22
Starting CryptoServer Adminstration Tool (CAT)
While csadm provides a robust interface for administering the HSM, it is difficult to use for those administrators who only interact with the HSM a few times per year. The HSM provides a Graphical User Interface (GUI)-based Java application that includes all the functionality of csadm with an easy-to-use interface. This tool is called CryptoServer Administration Tool, or CAT. CAT is accessed through the Java application cat.jar. Starting the tool requires either console access or an SSH session with X11 forwarding. Start CAT with the following command:
java -jar /usr/local/bin/cat.jar.
This will open the CAT GUI.
Take notice of the status on the bottom bar in CAT. As with csadm we can see the mode and alarm state. Two other important labels are the Login State and the Session. These will be covered in detail later.
The first time CAT is started by this Linux user, the CryptoServer Devices window opens.
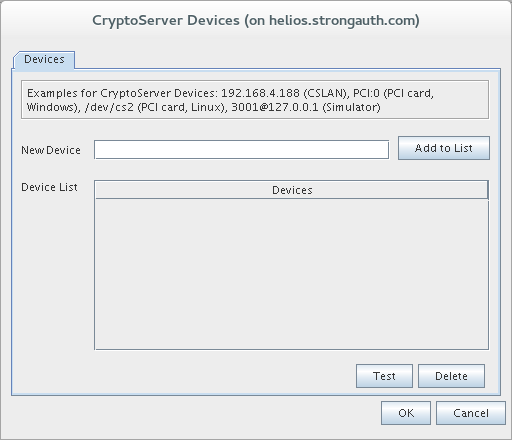
If this window displays, enter a New Device called /dev/cs2 and click Add to List. Click Test to ensure CAT can connect to the HSM. If it is successful, click OK to close the window.
Setting Up the Smart Card Reader
Besides the default administrator, ADMIN, all administrators will require a smart card for strong authentication to the HSM. To create and use smart cards, the HSM comes with a Universal Serial Bus (USB)-based smart card reader. Despite there being USB slots on the HSM, this reader must be plugged into the SAKA server and not the HSM. Additionally, for the reader to work, the Linux root account must be logged in. Once these requirements are met, CAT can be configured to use the smart card reader.
In CAT, click File → Settings to open the Settings window. In this window, ensure that the Pin Pad Type is REINER SCT Cyberjack and Port is USB Port.
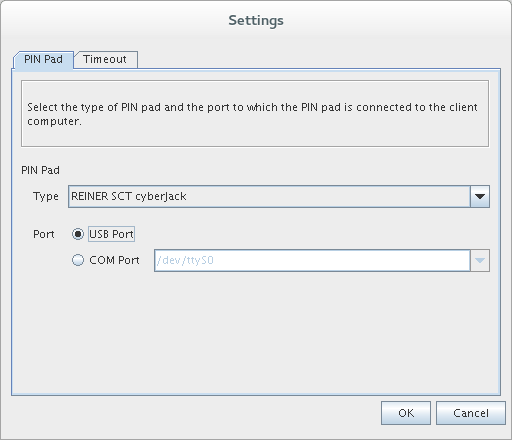
When finished with these changes, click OK to close the window.
Logging in to the HSM
If this is the first time using the HSM, there will be a single administrator available named ADMIN. The default ADMIN is protected with a keyfile provided on SAKA, located at /usr/local/strongauth/strongkeylite/etc/admin.key. To login this admin, follow these steps.
-
Click Manage → Login/Logoff on the menu.
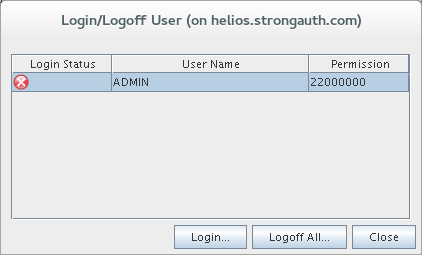
-
Select ADMIN and click Login. The following window displays:
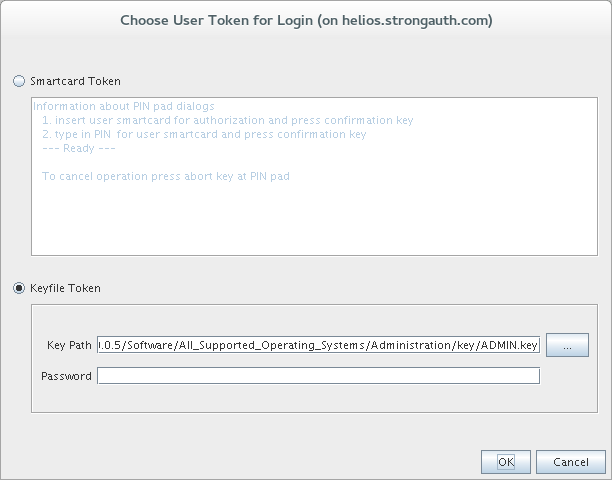
-
Click Keyfile Token, which enables Key Path and Password. For the default administrator, browse to (using the … button) or type the Key Path
/usr/local/strongauth/strongkeylite/etc/admin.keyand leave Password blank. Once done, select OK to login ADMIN.
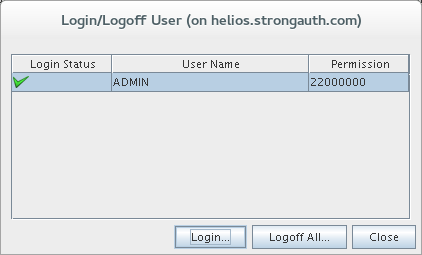
After closing the Login/Logoff window, note the Login State and Session value at the bottom of CAT. Logging in the default administrator yields a Login State of 22000000. The first number represents the User Management permission. This permission allows an administrator to add and remove administrators. The second number represents the System Management permission. This permission allows the administrator to access the Master Backup Key (MBK) functions, perform backup and recovery, clear the HSM, load firmware, and reset alarms. For ease of use, StrongKey recommends creating all administrators with both permissions.
-
These permissions are 220000000 instead of 11000000 because the HSM supports the creation of administrators with half the privileges needed to administer the HSM. In these cases, at least two administrators must be logged in at the same time for any administrative functions to work. The following shows an example of two administrators logged in granting enough privilege to administer the HSM:
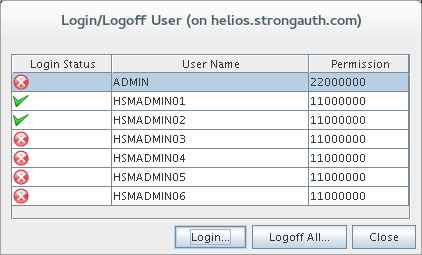
-
The process for logging in a smart-card-based administrator is similar to using the keyfile. After selecting the administrator to login, the Choose User Token for Login window displays. With Smartcard Token selected, click OK and have the administrator follow the directions on the smart card reader.
Clearing the HSM
An important first step before using an HSM in a new installation is to perform an HSM Clear to ensure the HSM is in a pristine state before creating new key material on it. Clearing out production data is also an important security procedure taken before shipping an HSM from site to site.
After a Clear is issued, the next step to bringing the HSM back to an operational state is to load the correct Utimaco-provided firmware into the HSM. This firmware is stored locally on each SAKA server in the /usr/local/software/hsm/utimaco directory and is also distributed to customers on Utimaco-supplied DVDs.
Once the firmware is restored and the HSM is in operational state, it is recommended to check the Real Time Clock (RTC) to ensure the time on the HSM is correct. With the HSM cleared, firmware loaded, and clock synchronized, the HSM is ready to securely contain sensitive materials.
Running Clear
The process of clearing the HSM is quick and fairly simple.
Log in enough administrators to reach Login State 22000000.
Select the menu option Manage → Clear.
-
A confirmation displays asking to clear the HSM:
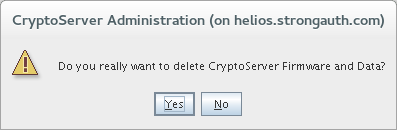
After confirming the Clear operation by selecting Yes in the dialog, the HSM will start clearing files and firmware. After the process finishes, the only data left on the HSM will be any token-based (i.e., keyfile or smart card) administrators.
NOTE: If the Clear operation fails, it is recommended you close CAT completely and try the process again. In rare circumstances the Clear fails but will generally work after a second attempt.
Loading Firmware
If your HSM was just cleared as part of a new installation or if the HSM needs to be reinitialized after being shipped, you will need to reload the HSM firmware back into the HSM before the HSM can perform more than its most basic functions.
To load the firmware, log in enough administrators to reach Login State 22000000. Next select the menu option Manage → Firmware. This opens the Setup Cryptoserver dialog:
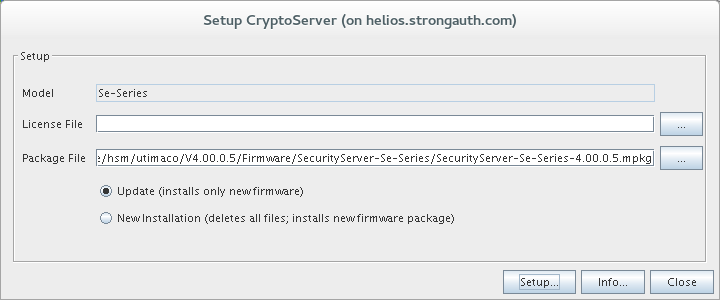
The License File field may start populated but should be completely cleared. The Package File field should be filled with the path to the firmware file. This file can be found in /usr/local/software/hsm/utimaco/V****/Firmware/SecurityServer-Se-Series/ where V**** may be different depending on the HSM distribution version on your appliance. In the case shown above, that folder is V4.00.0.5 and the firmware found in this directory is SecurityServer-Se-Series-4.00.0.5.mpkg. Since the HSM has been cleared, the radio button can be set to Update. Once everything is set, click Setup:
After confirming the firmware update, the HSM will start working to check and load all the firmware modules. If the firmware load operation fails, it is recommended to close CAT completely and try the process again. In rare circumstances the load fails but will generally work after a second attempt.
Setting the Real Time Clock
As part of the HSM setup process, it is recommended to check the RTC on the HSM to ensure the time is set correctly.
Log in enough administrators to reach Login State 22000000.
-
Click the menu option Manage → Date/Time. The CryptoServer Date/Time window opens:
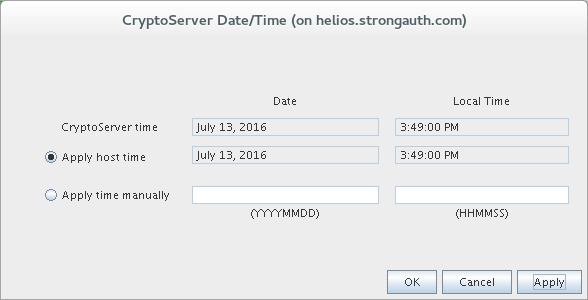
The current date and time according to the HSM is displayed by the CryptoServer time field. The current date and time known to the operating system is displayed next to the Apply host time radio button. If the time and date next to Apply host time is accurate, select that radio button and click Apply.
The correct time and date may also be manually entered in the Apply time manually fields. Select the Apply time manually radio button and use the format as shown under each text field to enter the date and time. For example, July 13th 2016 at 3:49:00 PM would be entered as 20160713 and 154900. Once finished, click Apply.
Click OK to exit.
Setting Up the HSM
This section describes the steps used to setup a freshly cleared HSM with new administrators and MBK. If you haven't Cleared the HSM, see the section on Clearing the HSM.
This section starts by walking you through all the steps necessary to setup HSM administrators using the supplied Utimaco smart cards and reader. It finishes with creating the MBK on another set of smart cards.
Initializing an Admin Smart Card
The smart cards provided with the HSM come -loaded with the keyfile for the default ADMIN. This means any unmodified smart cards can b used to login the default ADMIN instead of the keyfile provided on the file system. This also means that before administrative privilege is given to a smart card a new key pair must be generated on it.
CAT can be used to perform this operation, and as it isn’t actually being performed on the HSM itself, administrative privilege is not necessary. From CAT, select Authentication Token → Smartcard. This opens the Smartcard Token Management window:
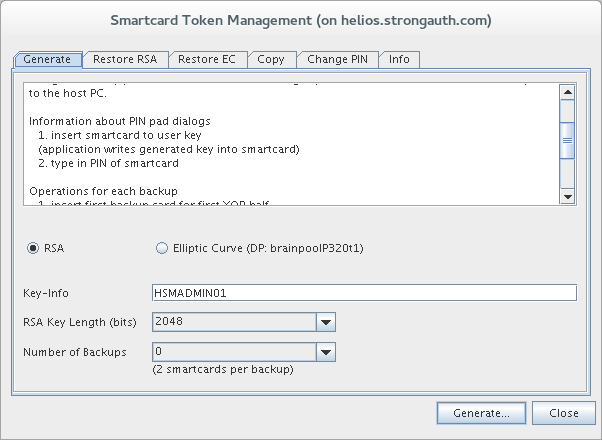
The Generate tab is used to create a new key on a smart card. Follow these steps to do so:
It is recommended to select the Elliptic Curve radio button
In the Key Info field, enter a label to describe this key on the smart card. Name this however you would name the administrator of this smart card, in this case HSMADMIN01.
If a card is lost or stolen, backups would be a liability rather than a benefit as the trust of the credential would be questioned. Instead of making a backup, StrongKey’s recommendation is to maintain enough extra administrative credentials so a credential can be revoked and replaced if the situation arises. Select 0 as the Number of Backups for this key.
Once you are ready, click Generate.
The administrator of the smart card must follow the prompts on the smart card reader to complete the generation. At this point if the PIN has not already been changed, each smart card will be protected by a default PIN of 123456. Once the administrator has run through the prompts on the smart card reader successfully, the new key will be generated.
StrongKey recommends paring at least six (6) administrator smart cards in this way.
NOTE: If incorrect PINs are entered three times consecutively, the smart card will trigger a security protocol and be permanently disabled.
Changing an Administrator Smart Card PIN
CAT offers the ability to change the PIN that protects an administrator smart card's credential. This should be done after generating a new key on a smart card or as a standard process of a company's security policy for HSM administrators. This operation has no effect on the HSM itself, and thus does not require administrators to login to CAT.
Make sure you have your smart card reader configured properly for operations with CAT (see Setting Up the Smart Card Reader).
-
From CAT, select Authentication Token → Smartcard. In the Smartcard Token Management window, select the Change PIN tab.
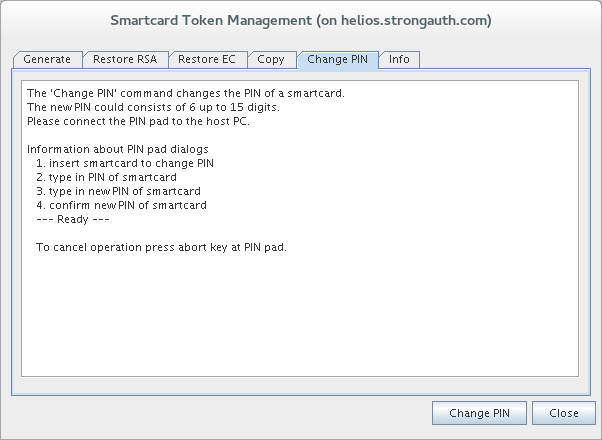
Click Change PIN. The administrator of the smart card must follow the prompts on the smart card reader to complete the PIN change. If the PIN has not been changed before, each smart card will be protected by a default PIN of 123456. Once the administrator has run through the prompts on the smart card reader successfully, the PIN will be changed.
NOTE: If incorrect PINs are entered three times consecutively, the smart card will trigger a security protocol and be permanently disabled.
Creating an Admin
We have been calling the smart cards administrator smart cards, but until a smart card has actually been granted administrative privilege through CAT, it is really just a secure container for a key. The next step is to grant administrator privileges to these smart cards.
Start by logging in to CAT with enough administrators to reach a 22000000 Login State (just the default ADMIN is enough if this is a new installation).
-
Select the menu option Manage → User:
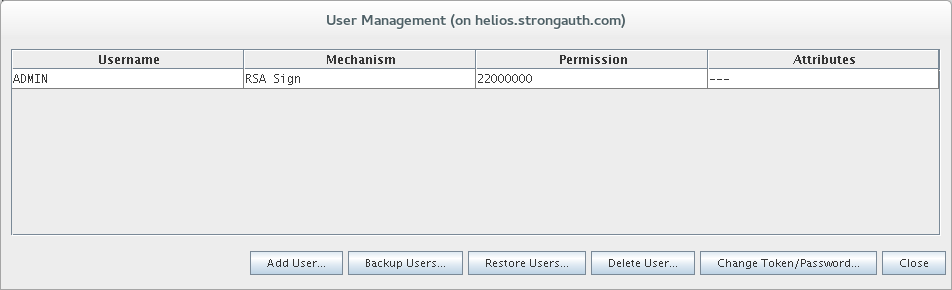
-
From the User Management window, select Add User:
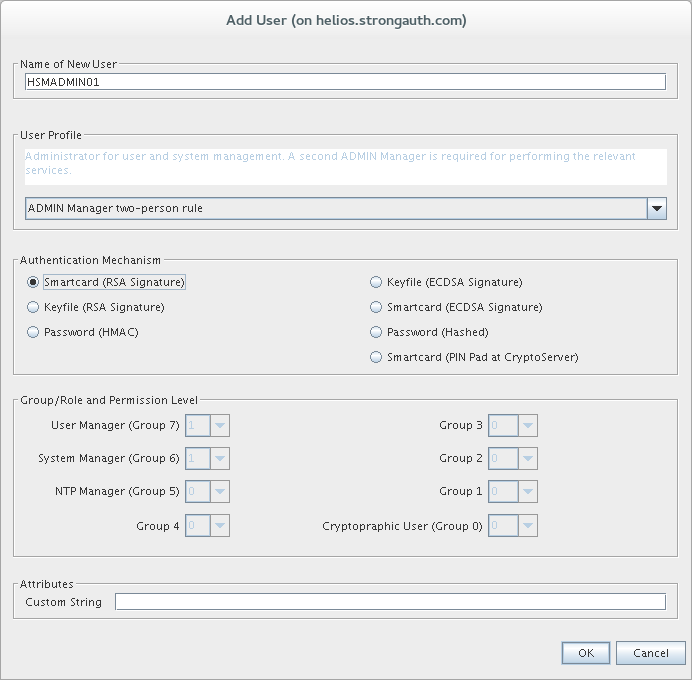
The Add User window provides all the specifications for how this administrator will be authenticated and what privileges they have. Create a name for the admin in the Name of New User field. From the User Profile drop down, select the ADMIN Manager two-person rule. This rule grants the administrator 11000000 privileges—only half of what is required to administer through CAT. The Authentication Mechanism will be Smartcard (ECDSA Signature). Custom String must be left blank.
-
Once the selections are complete, click OK to proceed:
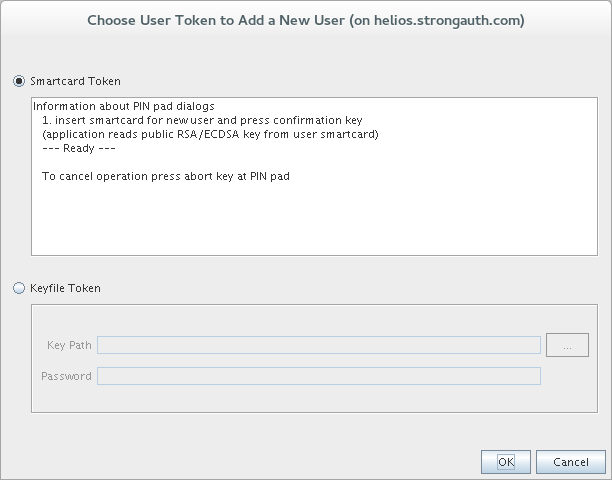
In the Choose User Token to Add a New User window, make sure Smartcard Token is selected and click OK.
The administrator of the smart card must follow the prompts on the smart card reader to complete the process. Behind the scenes, the smart card will provide its EC public key to CAT. Because the private key is not being accessed no PIN is required.
StrongKey recommends creating at least six (6) administrators in this way.
Creating the Master Backup Key
The MBK is the primary encryption key used by HSM to create and restore backups. The MBK is considered so critical to the life cycle of the HSM that an HSM must have an MBK loaded before it will even accept sensitive key material.
Login to CAT with the default ADMIN.
-
Then select the menu option Manage → Master Backup Key:
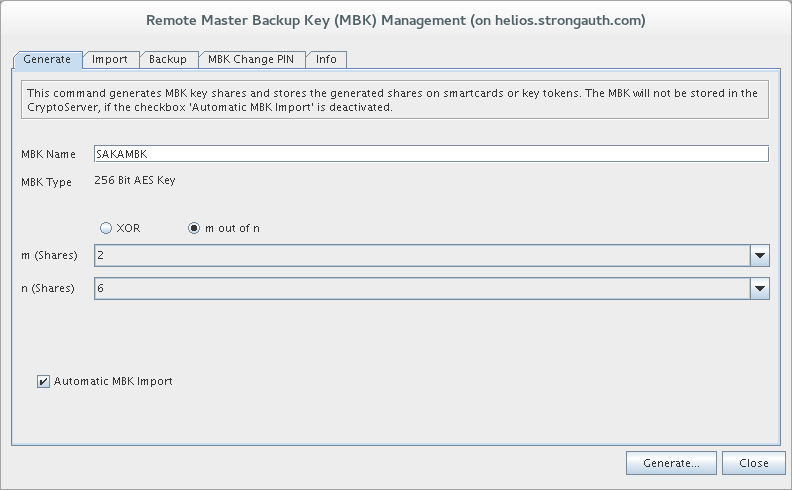
The Remote Master Backup Key (MBK) Management window defaults to the Generate tab. This tab allows the MBK to be backed up on smart cards. Each smart card will hold a portion of the key data using a secret sharing algorithm. While the smart cards provided with the HSM are capable of holding both an Administration credential and a share of the MBK, It is recommended not to mix MBK and admin credentials on the same smart card so as to keep the role of each individual smart card clear. For this step take out six (6) new smart cards to hold shares of the MBK. To restore the MBK on an HSM requires any combination of 2 cards from the 6 being made.
From this window, enter a label from the MBK in the MBK Name field. It can be anything, but the above example uses SAKAMBK.
Leave the radio button as m out of n.
Under m (Shares) leave the default value of 2. This value determines the minimum number of Shares required to reassemble the MBK.
Under n (Shares), select the value 6. This determines the number of shares to create.
Lastly, check the box for Automatic MBK Import.
-
Once finished, click Generate...:
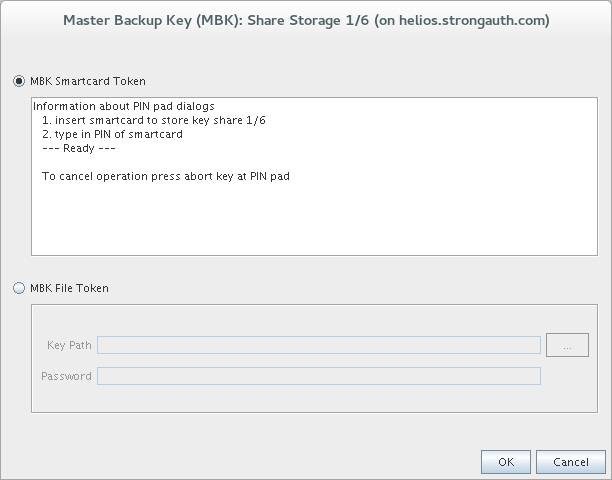
The Master Backup Key (MBK): Share Storage window allows a choice between creating the MBK backup on smart cards or keyfiles. Leave the selection as MBK Smartcard Token and click OK.
The MBK smart card holder must then follow directions on the smart card reader. It will prompt for the MBK PIN for that smart card, which should be the default: 123456. Once CAT is done with this share, it will move on to the next share. Continue this process until all shares have been generated.
After completing MBK generation, close the Remote Master Backup (MBK) Management window. Then open it again with the menu option Manage → Master Backup Key. It must be closed and opened again to refresh the information in the Info tab; it is not automatically refreshed after generating an MBK.
-
Now select the Info tab:
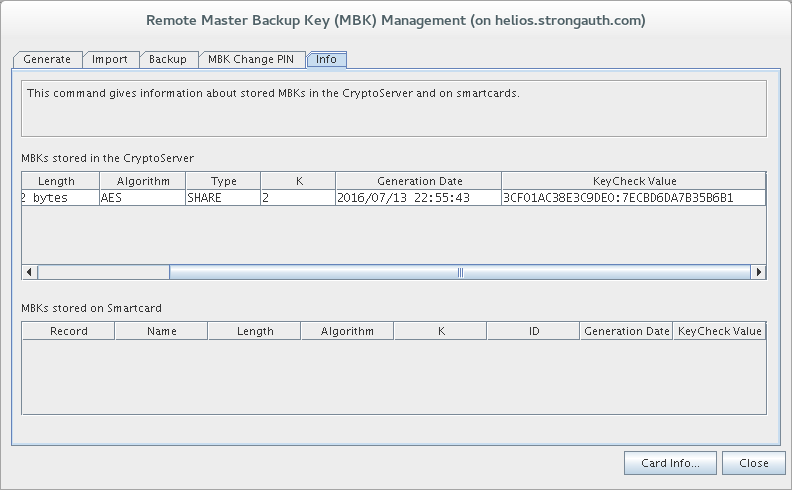
The Info tab shows details about this MBK. The HSM is capable of storing multiple MBKs but there will only ever be one. View all the details of the MBK under the MBKs store in the CryptoServer panel. The most important value is the KeyCheck Value, which uniquely identifies this key. Record this value so it can be checked whenever the MBK is imported into a new HSM.
Changing a MBK Smart Card PIN
Just like for administrator smart cards, CAT offers the ability to change the PIN protecting an MBK smart card's share. This should be done after generating the MBK share on a smart card or as a standard process of a company's security policy for the HSM. This operation has no effect on the HSM itself, and thus does not require administrators to log into CAT.
Make sure you have your smart card reader setup properly for operations with CAT (see Setting Up the Smart Card Reader). From CAT, select Manage → Master Backup Key.
-
In the Remote Master Backup Key (MBK) Management window, select the MBK Change PIN tab:
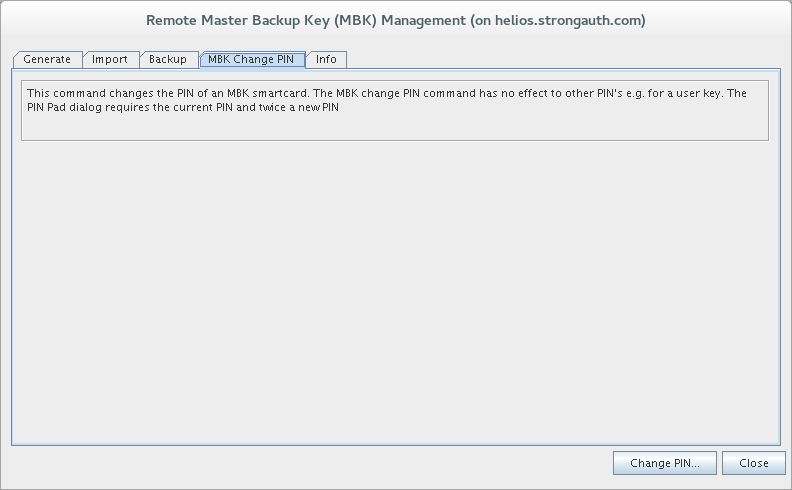
Click Change PIN.
The administrator of the smart card must follow the prompts on the smart card reader to complete the PIN Change. If the PIN has not been changed before, each smart card will be protected by a default PIN of 123456. Once the administrator has run through the prompts on the smart card reader successfully, the PIN will be changed.
NOTE: If incorrect PINs are entered three times consecutively, the smart card will trigger a security protocol and become permanently disabled.
Backing up the HSM
Every time new key material is generated or the administrators change on the HSM, the HSM must be backed up. From SAKA's point of view, the only time new key material is generated on the HSM is after a new SAKA domain is created.
These backups come in the form of encrypted database files created from the MBK. It is recommended that the backups are kept on USB flash drives as well as on the SAKA file system. Because the files are encrypted and they will be protected under the root user, there shouldn't be too much of a security concern. The files can be maintained solely on USB backups if ferred, but from an operations perspective it is easier to have them where they are needed.
Deleting an Admin
If this backup is being taken as part of the appliance installation, the default ADMIN will still be available on the HSM. This section describes the process of deleting the default ADMIN before taking a backup.
-
Start by logging in to CAT with two smart card administrators to reach a 22000000 Login State. Then select the menu option Manage → User.
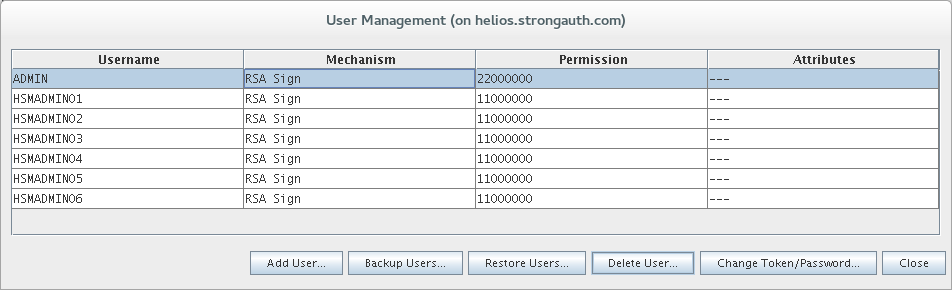
-
From the User Management window, select the default ADMIN from the table and click Delete User.
-
A prompt displays to confirm the deletion of the ADMIN user. Delete the user by clicking Yes. Only your smart card administrators should be left on the HSM:
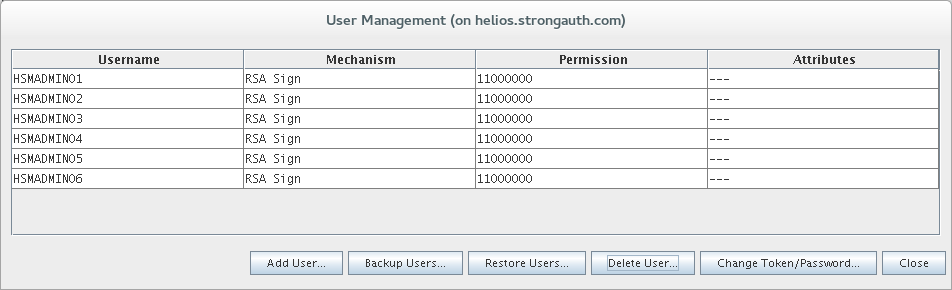
Exporting the HSM Database
Before creating the encrypted backup, have a place ready to store these files, whether in a folder on the file system—such as /root/backups or an external USB device.
-
Ensure the Login State of 22000000 in CAT by logging in up to two administrators if necessary. Then select the menu option Manage → Backup/Restore.
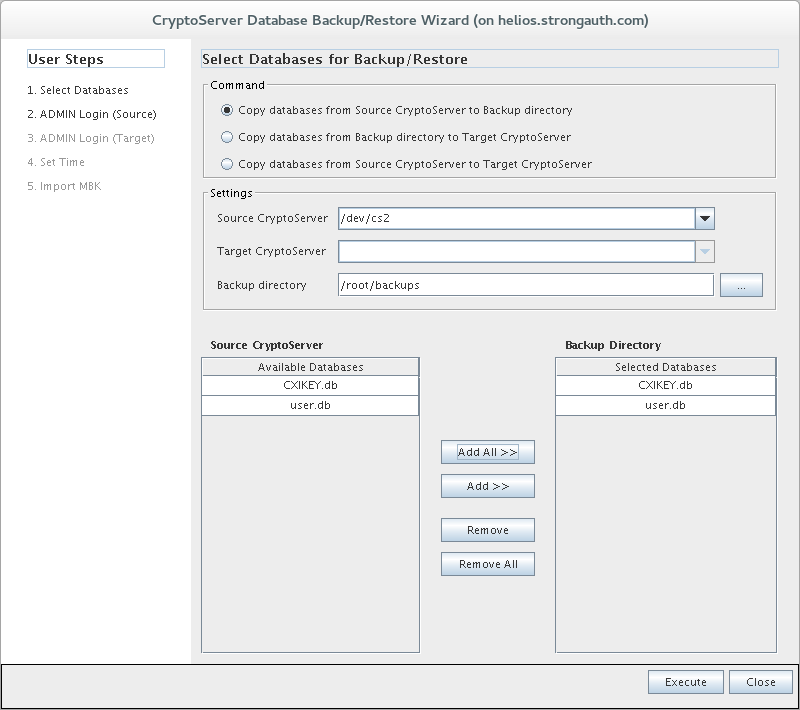
The CryptoServer Database Backup/Restore Wizard controls the type and specifications of the operation you will be performing. The Command to create the backup is Copy databases from Source CryptoServer to Backup directory. The Source CryptoServer will be
/dev/cs2. Select the backup directory—either a local folder such as/root/backupsor the path to a mounted USB device. Click the Add All >> button to add bothCXIKEY.dbanduser.dbunder Backup Directory.Once finished making these changes, click the Execute button.
Upon a successful backup, a list of exported files displays.

If these files were backup up to a local folder, it is still recommended they also be copied to a backup USB device for more redundancy.
Restoring from a Backup
There are two types of restorations you may need to perform—a full HSM restoration and an incremental database restoration. The full HSM restoration will clear the HSM, restore the firmware, reload an MBK from backups, and restore encrypted databases to the HSM. The incremental database restoration will load any new keys and administrators from an encrypted backup.
If you are working with a new HSM that hasn't been initialized before, then you should complete Clearing the HSM and then return to complete this section.
Loading the MBK
This section assumes that the HSM has already been pared for accepting a sensitive key material by being cleared and reloaded.
Working from a clean HSM, there are two primary steps to restore an HSM to production readiness. The first step is to load the MBK on the HSM from MBK smart card backups. After the MBK is loaded, then encrypted backups can be loaded into the HSM.
Login to CAT with the default ADMIN.
Click the menu option Manage → Master Backup Key.
-
Change to the Import tab:
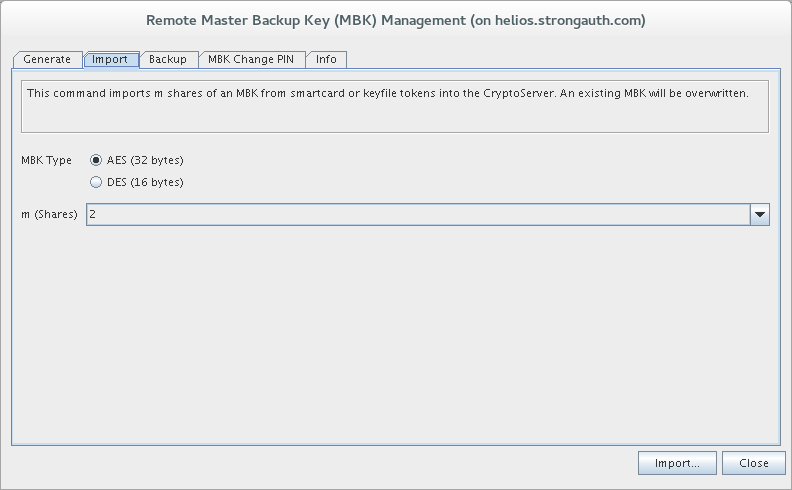
Leave MBK Type as AES (32 bytes) and m (shares) as 2.
-
Click Import:
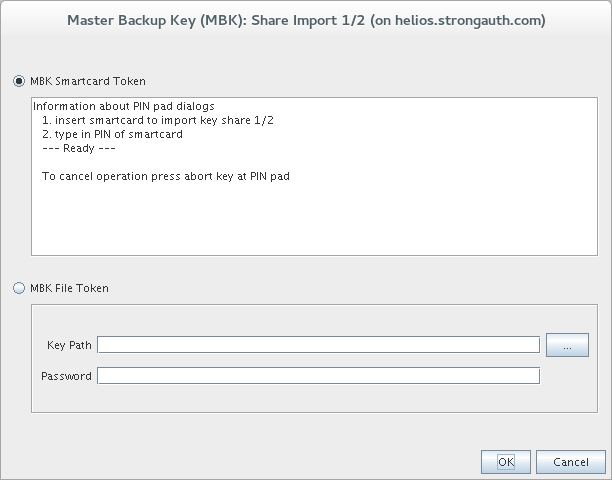
The Master Backup Key (MBK): Share Import window allows importing the MBK backup from a choice between smart cards or keyfiles. Leave the selection as MBK Smartcard Token and click OK.
Use any two MBK smart cards from the six MBK cards originally created. The chosen MBK smart card holder must then follow directions on the smart card reader.
Once CAT is done with this share, it will move on to the second share. Import the second share to finish the process.
After finishing the MBK import, Close the Remote Master Backup (MBK) Management window. Open it again with the menu option Manage → Master Backup Key. It must be closed and opened again to refresh the information in the Info tab (it is not automatically refreshed after generating an MBK).
-
Now select the Info tab:
The Info tab shows details about this MBK. Verify the MBK KeyCheck Value is the same as when it was first generated.
Importing the HSM Database
Whether this is a full HSM recovery or an incremental database recovery, at this point you should have an HSM with the correct MBK loaded. Before restoring the encrypted backup, make sure you have file system access to the encrypted backups whether they are in a folder such as /root/backups or an external USB device.
Ensure a Login State of 22000000 in CAT by logging in up to two administrators if necessary.
-
Click the menu option Manage → Backup/Restore.
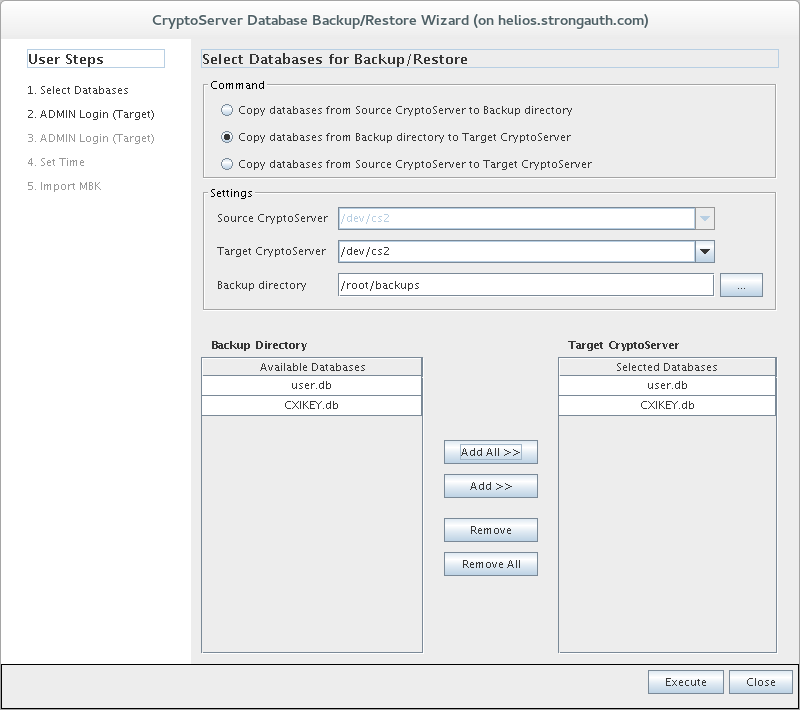
The CryptoServer Database Backup/Restore Wizard allows control over the type and specifications of the operation to be performed. The Command to create the backup is Copy databases from Backup directory to Target CryptoServer. The Target CryptoServer will be
/dev/cs2. Select the backup directory—either a local folder such as/root/backupsor the path to a mounted USB device. Click Add All >> to see bothCXIKEY.dbanduser.dbadded under Target CryptoServer. Once finished making these changes, click the Execute button.-
If the import is successful, you will be shown a list of imported files:
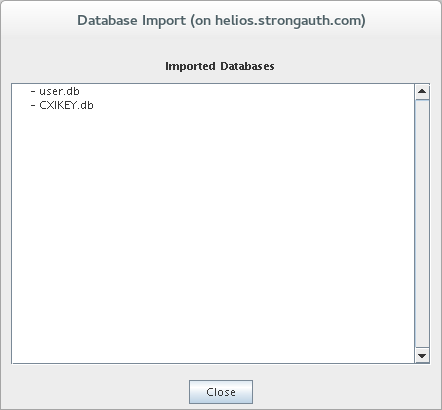
This process will import all new content from the encrypted database backups into this HSM. Take note that any administrators you already have on this HSM will not be deleted to match those administrators in the user.db backup. This means if the default ADMIN is on the HSM, or if any other HSM admin is revoked and replaced, then the extra administrators will need to be deleted after this step. See the process for Deleting an Admin for more details.
Managing Credentials
This section of the Reference document describes changing passwords for components in SAKA. Some of these passwords have little impact on the operations of the appliance, while some have the ability to destroy all encrypted data, creating either temporary disruption to services or a complete denial-of-service attack (depending on operational procedures).
KAM Credentials
These credentials are specific to SAKA’s Key Appliance Module (KAM).
Web Service Users
For application users with privileges to request web services in SAKA, the processes for changing passwords is described in 11—DACTool, Section 5—Users.
Domain Administrators
The process for changing the password for the Domain Administrator is described in 11.1—Changing DA Passwords.
Key Custodians
The process for changing passwords for Key Custodians is described in 10.2—Changing KC Passwords.
HSM Credentials
These credentials are specific to the HSM if your SAKA utilizes an HSM instead of TPM.
Admin Smart Cards
The process for changing the PIN of admin smart cards is described in 16—HSM Integration, Section 4.2—Changing an Admin Smart Card PIN.
MBK Smart Cards
The process for changing the PIN of MBK smart cards is described in 16—HSM Integration, Section 4.5—Changing a MBK Smart Card PIN.
System Credentials
These credentials are specific to the Operating System, Payara, and MariaDB.
Hardware System BIOS
When the SAKA boots—cold or warm reboot—the appliance provides the option to go into the machine's BIOS Setup to modify its configuration parameters, including access to the Trusted Platform Module (TPM).
The SAKA Model-T appliance relies on the TPM cryptographic hardware to generate, store, and protect the appliances Storage Root Key (SRK) within the TPM. The SRK protects the key hierarchy (described in 15—KAM Key Management) and sensitive data on the appliance.
Access to the TPM is provided either through the system BIOS or programmatically through software. Accessing the TPM through software requires the three Key Custodians to activate the TPM with their respective PINs, but access to the TPM through the BIOS is controlled through the system BIOS password.
While a malicious insider with access to the BIOS cannot compromise encrypted data or keys protected by the TPM, the attacker can clear the TPM. Clearing the TPM erases the SRK, effectively making impossible on that appliance the decryption of any cryptographic key protected by the SRK. This is a permanent effect.
NOTE: StrongKey's standard implementation requires a minimum of two SAKA servers in the Production environment. The appliances replicate encryption domain keys and data between them, thus protecting a site from catastrophic loss of a single appliance's TPM. However, if all TPMs are cleared through an attack or accident, while no sensitive data will be compromised, it will be impossible to recover sensitive data even if the site has full backups of the appliance's database and file system. Thus, protecting access to the TPM is critical to a site's ongoing operations.
StrongKey typically supplies a default password—Abcd1234!—to the BIOS during installation, with instructions to change it immediately. The process to change the password is as follows:
Boot or reboot the appliance.
As soon as BIOS screen prompts are visible, ss the appropriate function key to enter the System Setup.
When prompted for a BIOS password, either type in Abcd1234! or the current password. If there is no BIOS password, the Setup screen will open directly without any prompts.
Navigate to the Security screen and the menu option to set a password for the BIOS Setup.
Change the password. It may prompt once for the current password if one is set. The new password must be entered twice.
Save the password with the appropriate function key prompts and exit the Setup screen.
Repeat this process on all other SAKA servers.
Linux root
Changing the password of the Linux root user on the appliance is a simple process. It can be performed at any time without impacting production applications. StrongKey supplies a default password—Abcd1234!—for this user, with instructions to change it immediately. The process to change the password is as follows:
Login to the appliance as the Linux root user, either on the console or through a secure shell (SSH) over the network. The SSH port should be open by default.
If logged in on the console of the appliance and in GUI mode, open a terminal.
Type in the
passwdcommand in the terminal to change the root password.It should prompt for the new password twice.
The password for the Linux root user is changed. Repeat this process on all other SAKA servers.
An example of changing the root password is shown below:
shell> passwd
Changing password for user root.
New UNIX password:
Retype new UNIX password:
passwd: all authentication tokens updated successfully.
Linux strongauth
Changing the password of the Linux strongauth user on the appliance is similar to changing the password for the root user. It can be performed at any time without impacting production applications. StrongKey typically supplies a default password—ShaZam123—for this user, with instructions to change it immediately. The process to change the password is as follows:
Login to the appliance as the Linux root user or the Linux strongauth user, either on the console or via SSH over the network. The SSH port should be open by default.
If logged in on the console of the appliance and in GUI mode, open up a terminal.
If logged in as strongauth, type the
passwdcommand in the terminal to change the password. If logged in as root, type inpasswd strongauthin the terminal to change the password.If logged in as strongauth you will be prompted for the current password; if logged in as root, you will not be prompted.
You will be prompted twice for the new password.
That should change the password for the Linux strongauth user.
Repeat this process on all other SAKA servers.
An example of changing the password is shown below, as performed by the root user:
shell> passwd strongauth
Changing password for user strongauth.
New UNIX password:
Retype new UNIX password:
passwd: all authentication tokens updated successfully.
MariaDB root
The password of the MariaDB root user on the appliance can be changed at any time without impacting production applications. StrongKey typically supplies a default password—BigKahuna—for this user, with instructions to change it immediately. The process to change the password is as follows:
Login to the appliance as the Linux strongauth user, either on the console or through SSH over the network.
If logged in on the console of the appliance and in GUI mode, open up a terminal.
-
Start the MariaDB client application as the root user with the following command:
mysql -u root -p mysql
Enter the current password when prompted. -
When logged in, type the following command to change the password. (replace the phrase new-password with your new password):
update user set password=password('new-password') where user = 'root'; -
Type the following to ensure the password changes are visible to the database engine:
flush privileges;
Exit from the MariaDB program with the
exitcommand.
That should change the password for the MariaDB root user. Perform Steps 1‒6 on all other SAKA servers. An example of changing the root password is shown below:
shell> mysql -u root -p mysql
Enter password:
Welcome to the MariaDB monitor.  Commands end with ; or \g.
Your MariaDB connection id is 3422
Server version: 10.1.8-MariaDB-log MariaDB Server

Copyright (c) 2000, 2015, Oracle, MariaDB Corporation Ab and others.

Type 'help;' or '\h' for help. Type '\c' to clear the current input statement.

mysql> update user set password=password('MyNewPassword') where user = 'root';
Query OK, 3 rows affected (0.01 sec)
Rows matched: 3  Changed: 3  Warnings: 0

mysql> flush privileges;
Query OK, 0 rows affected (0.00 sec)

mysql> exit
Bye
MariaDB skles
Changing the password of the MariaDB skles user on the appliance is a slightly involved process, as it requires restarting the Payara Application Server and having the Key Custodians reactivate the cryptographic hardware module on the appliance. So, it must be performed only at a time when production applications can afford to wait for cryptographic services during this activity.
StrongKey typically supplies a default password—AbracaDabra—for this user, with instructions to change it immediately. The process to change the password is as follows:
Ensure that appliance is not processing transactions and all Key Custodians are pared to reactivate the appliance.
Login to the appliance as the Linux strongauth user, either on the console or through SSH over the network. The SSH port should be open by default.
If logged in on the console of the appliance and in GUI mode, open a terminal.
-
Start the MariaDB client application as the root user with the following command:
mysql -u root -p mysql
Enter the current password when prompted.
-
When logged in, type the following command to change the MariaDB password: (replace the phrase new-password with the desired new password):
update user set password=password('new-password') where user = 'skles'; -
Type the following to ensure the password changes are visible to the database engine:
flush privileges;
Exit from the MariaDB program with the
exitcommand.
That should change the password for the MariaDB skles user inside the MariaDB database.
A Payara Application Server property must be modified; it allows the SAKA key management application to access the MariaDB database using the new password; perform this with the Payara Administration command line tool asadmin.
-
Type the following command to change the password in Payara:
asadmin set resources.jdbc-connection-pool.SAKAPool.property.password=<NewPass>
-
Restart Payara for the password change to take effect:
sudo service glassfishd restart.
-
Once the restart has completed, have Key Custodians set PINs on this SAKA to activate the cryptographic services.
This completes changing the MariaDB skles user password. Repeat this process on all other SAKA servers.
Payara admin
Changing the password of the Payara Application Server's admin user on the appliance is a simple process which can be performed at any time without impacting production applications. StrongKey typically supplies a default password—adminadmin—for this user with instructions to change it immediately. The process to change the password follows:
Login to the appliance as the Linux strongauth user, either on the console or through SSH over the network. The SSH port should be open by default.
If logged in on the console of the appliance and in GUI mode, open up a terminal.
-
Change the admin password using the following command:
asadmin change-admin-password
It will prompt for the old password once, and if correct, it will prompt twice for the new password.
This completes the process of changing the password for the Payara admin user.
Repeat these steps on all other SAKA servers to change the Payara admin passwords. A sample output of the command processing is shown here:
shell> asadmin change-admin-password
Please enter the old admin password>
Please enter the new admin password>
Please enter the new admin password again>
Command change-admin-password executed successfully.
Changing Hostname and IP
After SAKA has been operational, the Transmission Control Protocol/Internet Protocol (TCP/IP) address of the appliance's primary interface and/or the fully qualified domain name (FQDN) of the appliance may require changing. This chapter walks through the process of how to do this.
If the SAKA appliance is already in production, this activity will have to be coordinated with the application(s) that request cryptographic web services from the appliance, as well as the Domain Name Service (DNS) that provides name and address resolution within the network. If the appliance is not providing services to any application yet—either in production or development—perform this task anytime, as it will not affect any applications. However, the need to coordinate with the DNS configuration still exists, as the application itself may be relying upon name services from DNS for its own network configuration.
Changing the IP Address
Before starting these steps, ensure no traffic is being sent to the SAKA having its IP Address changed. This process will stop Payara on that node, change the networking configuration on that node, change the firewall configuration on every other node, reboot the node, and afterwards restart Payara on all other nodes. Before starting this process, be sure a plan is pared for restarting each node (one at a time is fine).
To change the IP address after the appliance is in production, perform these tasks:
Login as root into the appliance—either on the console or using Secure Shell (SSH).
Stop Payara with the following:
service glassfishd stop
Update your DNS master to reflect the new TCP/IP address of the appliance, then propagate it to the network. Verify that the new address is visible using
digon Linux ornslookupon Windows and UNIX-like operating systems. Alternatively (or additionally), update the/etc/hostsfile on all SAKA servers in the cluster to update the IP Address for this host.If using static TCP/IP address—which is strongly recommended—make a copy of the
/etc/sysconfig/network-scripts/ifcfg-em1file (in case it becomes necessary to reverse your changes).This file may alternatively be called
/etc/sysconfig/network-scripts/ifcfg-eth0depending on the hardware in your appliance.Edit the
ifcfg-eth0orifcfg-em1file with a text editor and modify the GATEWAY, IPADDR, and NETMASK variables with values corresponding to the new TCP/IP address. Save the file.On all other SAKA servers in the cluster, update the firewall
/etc/sysconfig/iptablesand update the IP Address in the configuration to match the new IP Address. When finished, restart the firewall to persist the changes:
service iptables restart
Reboot the appliance that changed the IP Address.
If the changes are accurate, test it by using another machine and try to SSH into the appliance using the FQDN. If able to connect, the changes were successful at the network layer. If unable to connect, retrace the steps and correct any errors; if still having trouble after that, contact a network administrator for help.
When the SAKA server has rebooted, activate the TPM. If the Key Custodians can reach the appliance using the KCSetPINTool from their remote PCs, this implies that the IP address changes are successful.
Each other appliance in the cluster will need Payara to be restarted before replication will be able to properly connect to the appliance which had its IP Address changed.
Changing the Hostname
Before starting these steps, ensure no traffic is being sent to the SAKA having its FQDN changed. This process will stop Payara on that node, change the FQDN on that node, reboot the node, and afterwards restart Payara on all other nodes. Before starting this process, be sure a plan is pared for restarting each node (one at a time is fine).
To change the IP address after the appliance is in production, perform these tasks:
Login as the root user into the appliance—either on the console directly or using SSH;
-
Stop Payara with the following:
service glassfishd stop
Update your DNS master to reflect the new FQDN of the appliance, and propagate it to your network. Verify that the new name is visible using
digon Linux ornslookupon Windows and UNIX-like operating systems. Alternatively (or additionally), update the/etc/hostsfile on all SAKA servers in the cluster to update the FQDN for this host.Make a copy of the
/etc/sysconfig/networkfile (in case you need to reverse your changes).Edit the
networkfile with a text editor and modify the HOSTNAME variable with the appropriate value. Save the file after the changes.Using the
hostnamecommand on the command line, change the FQDN of the appliance:hostnamectl set-hostname <new hostname>
From a remote PC, SSH into the appliance using the new FQDN. if it connects, the changes are successful at the network layer. If unable to connect, retrace the steps and correct any errors; if still having trouble, contact a network administrator for help.
Once connected to the appliance, change directory to
/usr/local/software/saka.Execute the script
change-fqdn.sh, supplying the SID and the FQDN of this appliance. You will be prompted to generate a new self signed certificate. Example:/change-fqdn.sh 1 saka02.company.com
Reboot the appliance.
Each other appliance in the cluster will need to run
change-fqdn.shusing the same input parameters of SID and FQDN, with the exception that you will not be prompted to generate a new keystore.After running the script, Payara needs to be restarted before replication will be able to properly connect to the appliance which had its FQDN changed
Internal Repositories
The SAKA utilizes the Yellowdog Updater, Modified (yum) for installing and updating operating system packages. By default, the appliance will try to reach out to the standard CentOS mirror list to download updates. This approach can become problematic after SAKA has been installed in a secure production environment.
Standard security practice is to block internet traffic to and from SAKA once it has been installed in a data center. While this is a smart security decision, it has the adverse effect of cutting off the appliance from system updates. Fortunately, it is a fairly straightforward process to create an internal CentOS Repository that can make updates accessible to the SAKA.
If SAKA is blocked from making calls to the CentOS mirror list, dedicate a server—or more likely a Virtual Machine (VM)—to the purpose of hosting CentOS packages for SAKA. This document describes setting up the repository server and configuring the SAKA server(s) to communicate with your new internal repository.
Repository Requirements
Requirements for the VM or server hosting the internal repository are as follows:
The VM or server hosting the internal repository must be some flavor of Linux. There is no specific requirement for what type of Linux, as long as it supports cron, rsync, and apache httpd. StrongKey recommends CentOS 6. This document and all commands run in this document are tested only on CentOS 6.
At least 50GB of free disk space and 512 MB of Random Access Memory (RAM) for the internal repository.
The internal repository must have access to the internet to download packages from an online repository.
SAKA must access port 80 on the internal repository from which it will download packages.
The internal repository must be configured with a static IP address, an FQDN, and DNS must have a record which resolves the FQDN to the IP address.
Choosing an Online Mirror
For the internal repository to have the packages it needs to serve an internal network, it must download those packages from a server on the internet. The official CentOS repository cannot handle the demand for updates from all desktops and servers on the internet, so a list of trusted mirrors exists around the world. Select one of these mirrors from which the internal repository will download.
The official CentOS Mirrorlist is here: https://www.centos.org/download/mirrors/. The mirror you choose must support rsync. Other than that, choose a mirror which is geographically close to your internal repository.
Internal Repository Setup
After setting up a server or provisioning a VM that meets the above requirements, follow these steps to set up the repository.
Login to your internal repository as the root user through SSH or the console.
-
The rsync, cronie, and httpd packages must be functional to create a repository. Install these packages by running the command:
shell> yum install rsync httpd cronie
This will install any of those packages if they are missing. -
Make a set of directories that will host the repository packages:
shell> mkdir -p /var/www/html/centos/6/{os,updates}/x86_64 -
Use
rsyncto create a clone of the base OS packages from the ferred online mirror. In the following command, replace<mirror-url>with thersyncURL for the chosen online repository:shell> /usr/bin/rsync -avrt <mirror-url> /6/os/x86_64 --exclude=debug /var/www/html/centos/6/os/
Example command using the UC Berkeley mirror:shell>/usr/bin/rsync -avrt rsync://mirrors.ocf.berkeley.edu/centos /6/os/x86_64 --exclude=debug /var/www/html/centos/6/os/
This will download approximately 6 GB of packages to the internal repository. -
Use
rsyncto create a clone of the update packages from the ferred online mirror. In the following command, replace<mirror-url>with thersyncurl for the chosen online repository:shell> /usr/bin/rsync -avrt <mirror-url>/6/updates/x86_64 --exclude=debug /var/www/html/centos/6/updates/
This will download approximately 9 GB of packages to your internal repository. -
With all the packages in place, the internal repository is almost ready to distribute packages. Start the Apache httpd server to bring the repository online:
shell> service httpd start
-
Use the following command to ensure
httpdis started automatically whenever the repository is restarted:shell>chkconfig httpd on
-
The local CentOS firewall is most likely blocking access to the internal repository by default. Edit the
/etc/sysconfig/iptablesfile and add a new rule to allow traffic to port 80. Your newiptablesconfiguration should look similar to the following. The new rule that must be added is highlighted: -
After the new rule has been added and the file is saved, restart the firewall with the command:
shell>service iptables restart
-
The internal repository has all the current packages now, but it will quickly become out of date as new updates are pushed out to the online repositories. To keep the internal repository up to date, setup a
cronjob to periodically download updates from the ferred repository. To create acronjob, run the command:shell> crontab -e
This will open an editor to add thecronscript. Write out the following on a single line in the editor (replacing<mirror-url>with thersyncurl for your chosen online repository):00 00 * * * /usr/bin/rsync -avrt
This will download updates from the online repository every midnight.<mirror-url>/6/updates/x86_64 --delete --exclude=debug /var/www/html/centos/6/updates/
# Firewall configuration written by system-config-firewall # Manual customization of this file is not recommended.
*filter
:INPUT ACCEPT [0:0]
:FORWARD ACCEPT [0:0]
:OUTPUT ACCEPT [0:0]
-A INPUT -m state --state ESTABLISHED,RELATED -j ACCEPT
-A INPUT -p icmp -j ACCEPT
-A INPUT -i lo -j ACCEPT
-A INPUT -m state --state NEW -m tcp -p tcp --dport 22 -j ACCEPT
-A INPUT -m state --state NEW -m tcp -p tcp --dport 80 -j ACCEPT
-A INPUT -j REJECT --reject-with icmp-host-prohibited
-A FORWARD -j REJECT --reject-with icmp-host-prohibited
COMMIT
The internal repository is setup, ready for use, and configured to update itself automatically. The next section will cover configuring your SAKA to use the internal repository for package management.
KA Setup
Once the internal repository is setup, configure each SAKA server to communicate with the internal repository for updates. On each SAKA server, follow these steps:
Login to this SAKA as the root user through SSH or the console.
-
Change directory to the yum
reposfolder:shell>cd /etc/yum.repos.d
Modify the default repository configuration to disable the default repo. Edit
CentOS-Base.repoand add the lines highlighted:# CentOS-Base.repo # # The mirror system uses the connecting IP address of the client and the # update status of each mirror to pick mirrors that are updated to and # geographically close to the client. You should use this for CentOS updates # unless you are manually picking other mirrors. # # If the mirrorlist= does not work for you, as a fall back you can try the # remarked out baseurl= line instead. # [base] name=CentOS-$releasever - Base mirrorlist=http://mirrorlist.centos.org/?release=$releasever&arch=$basearch&repo=os&infra=$infra #baseurl=http://mirror.centos.org/centos/$releasever/os/$basearch/ gpgcheck=1 enabled=0 gpgkey=file:///etc/pki/rpm-gpg/RPM-GPG-KEY-CentOS-6 #released updates [updates] name=CentOS-$releasever - Updates mirrorlist=http://mirrorlist.centos.org/?release=$releasever&arch=$basearch&repo=updates&infra=$infra #baseurl=http://mirror.centos.org/centos/$releasever/updates/$basearch/ gpgcheck=1 enabled=0 gpgkey=file:///etc/pki/rpm-gpg/RPM-GPG-KEY-CentOS-6 #additional packages that may be useful [extras] name=CentOS-$releasever - Extras mirrorlist=http://mirrorlist.centos.org/?release=$releasever&arch=$basearch&repo=extras&infra=$infra #baseurl=http://mirror.centos.org/centos/$releasever/extras/$basearch/ gpgcheck=1 enabled=0 gpgkey=file:///etc/pki/rpm-gpg/RPM-GPG-KEY-CentOS-6 #additional packages that extend functionality of existing packages [centosplus] name=CentOS-$releasever - Plus mirrorlist=http://mirrorlist.centos.org/?release=$releasever&arch=$basearch&repo=centosplus&infra=$infra #baseurl=http://mirror.centos.org/centos/$releasever/centosplus/$basearch/ gpgcheck=1 enabled=0 gpgkey=file:///etc/pki/rpm-gpg/RPM-GPG-KEY-CentOS-6 #contrib - packages by Centos Users [contrib] name=CentOS-$releasever - Contrib mirrorlist=http://mirrorlist.centos.org/?release=$releasever&arch=$basearch&repo=contrib&infra=$infra #baseurl=http://mirror.centos.org/centos/$releasever/contrib/$basearch/ gpgcheck=1 enabled=0 gpgkey=file:///etc/pki/rpm-gpg/RPM-GPG-KEY-CentOS-6
-
Create a new file called
internal.repo. This file will host the configurations for the internal repository. Create the file as follows, replacing <internal-repo> with the FQDN of your internal repository:[internal-base] name=Internal CentOS-$releasever - Base baseurl=http://<internal-repo>/centos/$releasever/os/$basearch/ gpgcheck=1 gpgkey=file:///etc/pki/rpm-gpg/RPM-GPG-KEY-CentOS-6 #released updates [internal-updates] name=Internal CentOS-$releasever - Updates baseurl=http://<internal-repo>/centos/$releasever/updates/$basearch/ gpgcheck=1 gpgkey=file:///etc/pki/rpm-gpg/RPM-GPG-KEY-CentOS-6
Clear the yum cache with the following command:
shell> yum clean all
-
Check whether SAKA is configured properly and if it can connect to the internal repository by running the following command:
yum repolist/shell>
-
If everything is working correctly, the command returns output similar to the following:
shell> Loading mirror speeds from cached hostfile
internal-base
internal-updates
repo id                         repo name
internal-base                   Internal CentOS-6 - Base
internal-updates                Internal CentOS-6 – Updates
A PYCURL ERROR indicates SAKA could not connect to the internal repository. Check that there are no routing issues or firewall issues and try again.
Now SAKA is configured to receive yum updates through the internal repository. Update this SAKA through the command yum update.
Remember that before making any updates to production appliances, make updates to your development/test appliance first. As part of the regression process, try restarting the development/test appliance and run any regression tests to confirm sane operations after the restart. A regression on the development/test appliance is absolutely required before updating production appliances.
Appliance Security
This chapter provides information about how SAKA is secured and what a site needs to be aware of to preserve the security of that environment.
Physical Security
SAKA assumes the site is operating the appliance in a physically secure environment where only authorized personnel have access to the server.
Since the most critical elements of the SAKA server are in the Trusted Platform Module (TPM) or Hardware Security Module (HSM), SAKA takes advantage of security features enabled in these devices. The TPM cannot be removed from the machine without destroying its contents; the only way to steal a usable TPM is to steal the entire machine itself. However, launching a dictionary attack to defeat the TPM's protection engages firmware that slows down response time with each unsuccessful attempt. Thus dictionary attacks that depend of trying a significant number of passwords/ PINs against the system, will be thwarted by the slow response of the hardware device.
On appliances using the HSM, if the HSM is stolen from the appliance, it activates firmware that zeroes out the contents of the HSM if it is tampered with. This has the advantage that even if an attacker gets their hands on the HSM, they will not be able to acquire the cryptographic keys that protect sensitive data on the machine.
To recover from such an attack or a disaster to the SAKA, sites must plan for business-continuity by having a secondary appliance in a remote location where keys and data can be recovered for normal operations.
Operating System
Since the SAKA uses the Linux operating system, all security settings indicated below pertain to the Linux operating system. A site may supplement the standard Linux capabilities with third-party security tools, if their security policy requires it.
Sites are responsible for ensuring that the addition of third-party tools to the SAKA do not violate the security settings created during system setup. Any reduction in the operating system security of the SAKA can create potential vulnerabilities which void StrongKey's warranty on the appliance.
The Linux firewall, iptables, is configured to only make port 22 (for Secure Shell (SSH)) and port 8181 (for the SAKA EncryptionService) accessible over the network using the Transport Layer Security (TLS) protocol. System Administrators require the use of port 22 for administering the machine remotely, while applications will access the SAKA web service over port 8181. Additionally, ports 7001, 7002, and 7003 are opened selectively between SAKA nodes to enable database replication. Clients outside the SAKA cluster will not be able to access these ports. All other ports, including the Internet Control Message Protocol (ICMP), are blocked from the machine. The denial of ICMP traffic implies that the SAKA server cannot even be pinged on the network. Network Administrators will need to determine if port 8181 is accessible to check for network connectivity to the appliance.
The SAKA installation process creates some application accounts, but locks all accounts not necessary for the administration of the appliance. This minimizes user access to the Linux operating system from the console or remotely over SSH to just two administrative accounts—root and strongauth.
Please consult Linux documentation for how to enhance the security of your appliance above and beyond what is provided in the base installation.
Network
Since the only two ports that are publicly visible on the network are port 22 (SSH) and 8181 (SAKA EncryptionService), all data traversing the network to these two ports are protected from attacks on the wire. SSH encrypts data with a randomly generated session key, while the SAKA uses Transport Layer Security (TLS) 1.2, which also protects data with a randomly generated session key. Both applications use public key cryptography to protect the session keys on the network.
The SAKA SSH key pair is generated during the installation of the Linux operating system, and its keys are protected using operating system controls. The TLS key pair and digital certificate for the SAKA service are generated during the installation of the Java Enterprise Edition (JEE) application server and are protected using operating system controls and a password.
Sites may choose to enhance their security by using the HSM for generating and storing the key pairs for both services. However, this is not a standard part of the SAKA installation and requires additional work to be done by the site's System Administrators to enable this enhanced security.
Relational Database
The SAKA uses a standard relational database management system (RDBMS) to store data about encrypted objects and decryption requests. However, sensitive data in this database is not vulnerable since it is encrypted by keys resident on the cryptographic hardware module. All other data is metadata useful only to the SAKA application.
The database service is accessible only from the local machine. Remote clients and applications will be unable to access the database directly because of the firewall controls on the operating system. This does not prevent the SAKA application from accessing the database locally.
While there are no special requirements for database security (other than what may be required of a site's security policy for Production databases), it is recommended that backups of the database are stored separately from standard backups in the event that vulnerabilities in the encryption algorithm are discovered in the future. Controlled access to database backups will minimize any damage from such potential discoveries.
JEE Application Server
The SAKA uses a standard JEE Application Server to process web service requests. While the Application Server hosts the application, nothing in the configuration of the Application Server allows someone to gain access to sensitive data in the database.
Lightweight Directory Access Protocol (LDAP)
The SAKA is capable of integrating with LDAP on the network to authenticate and determine the authorization of users who request its web services. The LDAP service may either be an industry standard LDAP service or Microsoft's Active Directory.
When a user requests an encryption or decryption web service from SAKA, they must pass to the web service an LDAP username and password with the data. The EncryptionService uses this username and password to authenticate to the LDAP service and then determines whether the user is a member of one of two LDAP groups—the EncryptionAuthorized or DecryptionAuthorized groups—based on the type of service requested by the user. Only when the two LDAP checks pass does the SAKA continue with the performance of the service.
All LDAP-related configurations are specified through DACTool. If the LDAP service is not protected on the network using either TLS or Internet Protocol Security (IPSec), there is a possibility that attackers may snoop the LDAP credentials between the SAKA server and the LDAP server. The compromise of these credentials will allow attackers to legitimately request cryptographic web services from the SAKA server using the compromised credentials.
It is strongly recommended that sites either use the LDAP over TLS capability, or tunnel the LDAP service over IPSec. In either case, the encryption on the wire will protect the user credentials being sent to the LDAP service for authentication.
Appliance Credentials
This section describes various accounts used in SAKA.
The most important element of cryptographic security is to protect cryptographic keys from unauthorized entities. All unauthorized entities, when launching an attack on a system, must compromise some credential of the system before attempting to gain access to cryptographic keys. No matter which credential gets compromised first, the target credential required by attackers is the root superuser of the system or the strongauth owner of the application—the credential authorized to execute the web service application's cryptographic functions. The web service applicationID has direct access to key material, while the superuser—with the ability to assume any user's identity on a system, including that of the applicationID—has indirect access.
Consequently, protecting data on the SAKA server comes down to ensuring that the web service application credential is protected, while placing strong controls on the superuser of the system.
The Security Conundrum
Businesses often require application services to restart automatically if they undergo a power outage or the hosting machine reboots. This poses a problem for applications that must authenticate to the cryptographic module to use it, such as the web service application provided by SAKA. For the web service to have automatic access to keys on the cryptographic module upon a restart, the PINs of the Key Custodians must be available to the web service application on the SAKA, so it can pass them to the hardware for authentication.
However, this poses a security risk: if the web service application can read these PINs from persisted files, so can an attacker who has compromised the web service application's account. If the attacker gains access to the PINs that protect access to keys on the hardware module, they will be in a position to decrypt sensitive data and transfer them out of the SAKA.
The only sure way of ensuring the PINs do not fall into unauthorized hands is to not persist the PINs on the machine—they should be provided by the Key Custodians each time the web service application starts up. This ensures that only the running web service application has access to the PINs. However, this level of security comes at the inconvenience of having Key Custodians available at unpredictable times (although this requirement can be mitigated by having Highly Available (HA) systems that replicate data to each other in real time to ensure that no single SAKA becomes a single point of failure).
The SAKA ships with a tool—the Key Custodian SetPIN Tool—that alleviates some of the inconvenience of having Key Custodians show up at a remote data center to activate the hardware module. The KCSetPINTool allows a custodian to use their cryptographic credential on a USB flash drive, and set their part of the PIN over a secure tunnel, on the SAKA. When all three custodians have set their PINs, the SAKA hardware is activated and can start servicing applications. While this does add a small delay to the startup process—perhaps 10-15 minutes—it provides significant security over the alternative of storing PINs on the appliance for an automatic restart.
If the business entity chooses to accept and manage the risk of storing the Key Custodian PINs on the system for unattended reboots of the SAKA system, the procedures described in this section can help mitigate some of the risks.
In all cases, it is imperative that the site maintain strong network- and host-based security to prevent all unauthorized access to SAKA.
Credential Matrix
The following table describes the credentials used on SAKA and their access to the keys on the hardware module. It helps in summarizing the degree of vulnerability each SAKA credential can have on the keys and sensitive data in the database.
|
Credential |
Purpose |
Access to Keys? |
|---|---|---|
|
Linux root |
The superuser of the operating system normally has unlimited control over everything on the computer system, but without the required PINs for authentication to the hardware module, even the root user is incapable of accessing keys on the module. Because of the privileged status of the root user, he/she can assume the identity of any user on the Linux operating system. As a result, additional controls must be placed around this credential if the site security policy wishes to restrict individuals (with access to root) from accessing cryptographic keys on the hardware module. While the controls described in the Protecting PINs from root section of this document provides one method of restricting this access, sites must ultimately use methods that are in compliance to their internal security policies. |
Indirectly |
|
Linux strongauth |
This operating system user ID owns the web service application software that makes up SAKA. Since the web service application uses this user ID within the Linux operating system, this account has access to the PINs for the hardware module (so it can authenticate to the module before performing cryptographic operations on data). Care must be taken to secure this account and only provide its credential to trusted administrators. |
Yes |
|
MariaDB root |
This superuser account of the SAKA RDBMS has full control over everything inside all databases on the system. However, since data stored in the SAKA database only consists of ciphertext (data encrypted by the SAKA web application before it reaches the database) without any sensitive material that could decrypt them, this user cannot decrypt ciphertext despite their full control over database data. |
No |
|
MariaDB skles |
The owner of database schemas and data in the SAKA internal database has unlimited control over everything inside this database schema and objects. However, as already indicated, since data stored in this internal database only consists of ciphertext without any sensitive material that could lead to its decryption, this user cannot decrypt ciphertext. |
No |
|
Payara admin |
This administration account of the JEE Application Server has full control over the application server's configuration. However, since this is not an operating system account, this administrator cannot read or modify anything other than the application server configuration files. This credential only exists to facilitate the administration of the application server through a web interface. |
No |
|
Key Custodian #1 |
This role in the hardware module provides the first of three authentication PINs required to access cryptographic keys inside a hardware module. Since the Key Custodian #1 only has part of the PIN to access the module, this individual cannot access any of the keys on the hardware module by themselves. In HSM-based SAKA, this role also has one of the multi-card smart card backups of the HSM slot and its keys. The smart card and the PIN to the smart card do not provide this individual with access to any cryptographic keys—the key backup is split across three smart cards. |
No |
|
Key Custodian #2 |
This role in the hardware module provides the second of three authentication PINs required to access cryptographic keys inside a hardware module. Since Key Custodian #2 only has part of the PIN to access the module, this individual cannot access any of the keys on the hardware module by themselves. In HSM-based SAKA, this role also has one of the multi-card smart card backups of the HSM slot and its keys. The smart card and the PIN to the smart card do not provide this individual with access to any cryptographic keys—the key backup is split across three smart cards. |
No |
|
Key Custodian #3 |
This role in the hardware module provides the third of three authentication PINs required to access cryptographic keys inside a hardware module. Since Key Custodian #3 only has part of the PIN to access the module, this individual cannot access any of the keys on the hardware module by themselves. In HSM-based SAKA, this role also has one of the multi-card smart card backups of the HSM slot and its keys. The smart card and the PIN to the smart card do not provide this individual with access to any cryptographic keys—the key backup is split across three smart cards. |
No |
|
HSM Administrator |
HSM role used to manage the HSM firmware and to facilitate backups of the HSM Root Key (HRK) and HSM database. This role cannot access cryptographic keys in the HSM—intrinsic to the HSM security design. |
No |
|
Web Service Credential |
This credential is used by SAKA to authenticate a requester of web services. Depending on the SAKA configuration, this can be against the SAKA managed users or against an LDAP-based Directory Server. This credential is verified by the SAKA web service application before it performs the cryptographic operation. Since the credential has no operating system, RDBMS, Application Server, or hardware module privileges, this user cannot access cryptographic keys in the module. If this credential has decryption privilege, it will have the ability to request decryption services from SAKA. As a consequence, the password to this credential must be protected by the applications that will include them in their web service request to SAKA; SAKA does not maintain this credential's password. |
Indirectly |
Protecting PINs from root
The root credential is the most powerful credential on a Linux/UNIX computer. If this credential is compromised, it is generally considered a full system compromise. While the default SAKA security—using Key Custodians to set their PINs to activate the hardware module each time the system starts up—is a reasonably secure procedure, it is generally recommended to have user applications run WITHOUT root privileges—if the application has bugs or is exploited, it will not give up privileged access.
SAKA practices this defense strategy by not requiring or using root privileges for normal operations—some parts of the installation process require root privileges, but once completed, the web service application that provides cryptographic services does not need root access. Because any human (or attacker) that has access to the root account can assume the identity of any other Linux account, it would be possible for an attacker who has compromised the root account to assume the SAKA web service application ID and gain access to the PINs that guard the keys in the cryptographic hardware module from main memory with the appropriate tools.
As a consequence, sites may want to ensure that the root account is restricted through policy, procedural and technical controls. While this document does not go into the policy and procedural aspects of controlling root access, the following technical controls can help mitigate some of the risks of the root account becoming compromised. Site administrators are encouraged to review other resources to determine the optimum mechanism for protecting and/or controlling root privileges on their systems, so they gain a broader perspective on these controls.
Setup an unlock account on the Linux system. This account becomes the fail-safe measure to recover access to the root account in the event it is needed for extraordinary administrative actions.
-
Add the unlock account to
/etc/sudoerswith the ability to unlock the root account. Replace the<FQDN>with the fully-qualified domain name of the SAKA server.shell>unlock <FQDN>=/usr/sbin/usermod --unlock root
Add the normal Linux account of the Systems Administrator (SA) to
/etc/sudoersto perform specific SA tasks (as defined by company policy). This ensures that SAs can perform their day-to-day jobs—backup, restore, log management, performance management, patching, etc. These accounts must be the only legitimate means of managing the SAKA system.For tighter control, depending on company policy, sites may add multi-factor authentication tokens to the system to ensure only legitimate SAs with 2-factor tokens can login into SA accounts in SAKA.
-
Add a watch on
/etc/sudoersand on/usr/bin/sudoto audit modifications to the former and use of the latter:auditctl -w /etc/sudoers -pwar -k sudoers auditctl -w /usr/bin/sudo -px -k sudo-exec
This first watch monitors for writes, appends, and reads of the/etc/sudoersfile, then logs them. Logged records can be searched with filter keysudoers. The second watches for execution of thesudocommand and log any matches with a filter key ofsudo-exec.auditdshould be turned on to monitor for access to thesudocommand and report it to appropriate authorities for review (third-party reporting tools may also be used for this purpose, if desired). -
Finally, lock the root account on the system:
shell>>/usr/sbin/usermod --lock root
This has the effect of disabling the root account so no one can gain access to the account.
Protecting the strongauth Application Credential
The strongauth credential is the only one that has direct access to cryptographic keys in the cryptomodule. This access is enabled through the web service application that provides cryptographic services to requesting applications. This web service application—called EncryptionService—working though a back-end module, must have knowledge of the three PINs that guard cryptographic keys in the cryptomodule. Without knowledge of the PINs it is incapable of encrypting, decrypting, generating hashed message authentication codes (HMAC) and verifying them.
While the strongauth credential does not require any other privileged access on the system (that may compromise the system), the fact that this credential has access to cryptographic key material that can disclose sensitive data—such as a credit-card's Primary Account Number (PAN)—makes this account highly sensitive. Consequently, it must be protected as diligently as the privileged root account of the system.
The following controls can help protect the strongauth account:
| Control | Description |
|---|---|
|
Setup an unlock account on the Linux system (if it hasn't already been created for controlling the root account) |
This account becomes the fail-safe measure to recover access to the strongauth account in the event it is needed for extraordinary administrative actions. |
|
Add the unlock account to |
Replace the unlock <FQDN>=/usr/sbin/usermod --unlock strongauth |
|
Add the normal Linux account of the Systems Administrator to |
This ensures that SAs can perform their day-to-day jobs with the SAKA software—backup, restore, log management, performance management, patching, etc. These accounts must be the only legitimate means of managing the SAKA software. For tighter control, depending on company policy, sites may add multi-factor authentication tokens to the system to ensure only legitimate SAs with 2-factor tokens can login into SA accounts on the SAKA. |
|
Add these watches to audit modifications to various configuration files. |
This first watch listed below will monitor for writes, appends and reads of the The second will watch for execution of the
auditctl -w <file> -pwar -k <filter key> |
|
|
|
shell>STRONGKEYLITE_HOME/etc/strongkeylite-configuration.properties
|
shell>strongkeylite-configuration
|
shell>GLASSFISH_HOME/domains/domain1/config/domain.xml
|
shell>glassfish-config
|
|
Finally, lock the strongauth account on the system. |
This has the effect of disabling the strongauth account so no one can gain access to the account. shell>/usr/sbin/usermod --lock strongauth
|
Other Controls
In addition to the above-mentioned controls, sites should turn on System Accounting to track every command executed by logged-in users (if any). While this feature will not prevent someone from compromising the system, it will provide forensic data on how the system was compromised and through which account. Third-party controls may also be used by sites to track such activity.
PCI DSS 3.2
The Payment Card Industry (PCI) released version 3.2 of its Data Security Standard (DSS) on April 2016 (https://www.pcisecuritystandards.org/pci_security).
PCI DSS covers security requirements of many information technology components with which companies processing and/or storing credit card numbers must comply. This chapter focuses specifically on analyzing Sections 3.4 through 3.6 (Protect Cardholder Data) of the DSS, to show how SAKA addresses these requirements.
The format of this chapter presents the PCI DSS requirement first, followed by how SAKA addresses the requirement. An assumption made in this analysis is that the company in question needs to store the Primary Account Number (PAN); if there is no need to store the PAN, then there may be no need for SAKA in your environment.
Requirement 3: Protect Stored Cardholder Data
PCI DSS Requirement 3.4
Render PAN unreadable anywhere it is stored (including on portable digital media, backup media, and in logs) by using any of the following approaches:
One way hashes based on strong cryptography,(hash must be of the entire PAN)
Truncation (hashing cannot be used to replace the truncated segment of PAN)
Index tokens and pads (pads must be securely stored)
Strong cryptography with associated key management processes and procedures
The MINIMUM account information that must be rendered unreadable is the PAN.
How SAKA meets this requirement: SAKA does not generate message digests, but supports Hashed Message Authentication Codes (HMAC) to internally create unique identifiers. HMACs require symmetric cryptographic keys; these keys are generated and managed automatically by the appliance. SAKA generates HMACs based on the HmacSHA256, HmacSHA384, and HmacSHA512 algorithms.
Applications may choose to use the HMAC or a Psuedo-Number (PSN)—a substituted value which resembles a PAN—for the HMAC through Tokenization. Using the PSN as a token, applications can be effectively taken out of PCI DSS scope for encryption and key management controls, since all keys and PAN are stored only in SAKA; neither the keys nor the sensitive data are stored on the client application.
PCI DSS Requirement 3.4.1
If disk encryption is used (rather than file- or column-level database encryption), logical access must be managed separately and independently of native operating system authentication and access control mechanisms (for example, by not using local user account databases or general network login credentials). Decryption keys must not be associated with user accounts.
How SAKA meets this requirement: SAKA does not support disk-based, file-, and/or column-level database encryption. SAKA currently supports only application-level encryption through its exposed web services, thus minimizing the “attack surface” of the application.
Disk encryption (encryption performed at the disk drive layer either by an operating system driver supplied by the disk drive manufacturer, or by the firmware on the disk drive controller) can, potentially, mitigate risks associated with stolen or lost computing devices containing sensitive data. However, disk encryption cannot protect a company from online attacks on a system that is powered up and operational.
This is because, once a user has legitimately authenticated themselves to the machine's drive encryption software (even with a separate password or PIN), all data blocks are automatically decrypted by the cryptographic software—regardless which application, running under the authenticated user's ID, requests the data. Thus, if an attacker managed to execute malware on the machine, because the user is already authenticated to the drive, the malware will be able to read data much as the legitimate user would.
Additionally, encrypting in the disk drive—which is the lowest layer of an application's technology stack—leaves all layers above the disk drive vulnerable to snooping by attackers. Given the complexity of today's applications, there are potentially numerous opportunities for attackers to snoop unencrypted data on a compromised machine.
While disk drive encryption has some short term risk mitigation properties, StrongKey believes that the strongest long term data protection comes from encrypting and decrypting data within the application layer by the application itself. In this paradigm, data is protected no matter what the storage media, no matter which network the data traverses, and no matter how many software layers intervene between the application and storage media.
PCI DSS Requirement 3.5
Document and implement procedures to protect keys used to secure stored cardholder data against disclosure and misuse.
How SAKA meets this requirement: These are just some of the protection mechanisms used by the SAKA to protect cryptographic keys:
Strong cryptographic algorithms: the Advanced Encryption System (AES)
Large key sizes for Data Encryption Keys (DEK): 128‒256-bit AES
Large key sizes for Key Encryption Keys (KEK) that encrypt DEKs: 256-bit AES keys
Federal Information Processing Standard (FIPS) 140-2 Level 3 certified Hardware Security Modules (HSM)
Federal Information Processing Standard (FIPS) 140-2 Level 2 certified Trusted Platform Modules (TPM) and digitally signed and encrypted messages over the network for Key Custodians (KCs) and encryption Domain Administrators
While the security of any environment depends on more than just technology, SAKA provides significant levels of integration in hardware, software, and cryptographic components towards protecting keys from disclosure and misuse.
|
PCI DSS Requirement |
How SAKA Meets this Requirement |
|---|---|
|
3.6.1—Generation of strong cryptographic keys. |
How SAKA meets this requirement: SAKA generates DEKs using content from FIPS-certified HSM or TPM, both of which provide a true Random Number Generator (RNG) as a product feature. SAKA only generates 128-, 192-, and 256-bit AES, and 256-bit EC keys. |
|
3.5.1—Additional requirement for service providers only: Maintain a documented description of the cryptographic architecture that includes:
|
HowSAKA meets this requirement: StrongKey is not a service provider. However, it does provide an appliance—SAKA—whose primary function is to protect cardholder data (CHD) using cryptography. As such, this response provides information about the SAKA and its elements related to cryptography. SAKA uses a hardware-based cryptographic module to protect all cryptographic keys generated and used within the appliance. SAKA uses either a FIPS 140-2 Level 2 TPM or a FIPS 140-2 Level 3 certified HSM. While there are many differences between these two types of devices, they deliver similar benefits for some key management functions. SAKA leverages those specific functions, and can thus deliver identical cryptographic services regardless of the type of cryptographic hardware used in the appliance. On machines using the TPM, the SAKA appliance generates a single 256-bit EC asymmetric key pair—known as the Storage Root Key (SRK) in TPM terminology—within the TPM during its initialization. The SRK is stored inside the TPM, never leaves the TPM, and is used to encrypt other objects—usually cryptographic keys. All such encrypted objects are stored on the hard disk and must be brought inside the TPM—with the proper authorization—to be decrypted. The software libraries interacting with the TPM handle this and shield applications from such details. Your applications only interact with the web services provided by SAKA and are further shielded from these mechanical details. On machines using the HSM, the SAKA appliance generates a single 256-bit EC asymmetric key pair—the HSM Root Key (HRK)—within the HSM during its initialization. The HRK is stored inside the HSM, but unlike the TPM, can leave the HSM when encrypted. This feature is used to clone the key from the Primary SAKA server to other SAKA appliances at a site. The HRK is used to encrypt other objects—usually cryptographic keys. All such encrypted objects are stored on the hard disk and must be brought inside the HSM—with the proper authorization—to be decrypted. The software libraries interacting with the HSM handle such details. SAKA supports the management of different encryption policies through the use of encryption domains. An encryption domain is a logical collection of keys, policies, users, and encrypted data, all of which are protected under a unique encryption domain key (EDK) to encrypt all symmetric keys. The EDK is a 256-bit EC key protected by the SRK/HRK. SAKA appliances require three (3) KCs to be present to activate the TPM/HSM each time the appliance is restarted. This ensures that if the appliance is ever stolen, the attacker will never find anything on the appliance that can compromise the hardware module. SAKA uses the following symmetric encryption keys:
All three symmetric key types defined above are encrypted under the EDK. |
|
3.5.2—Restrict access to cryptographic keys to the fewest number of custodians necessary. |
How SAKA meets this requirement: SAKA uses a sophisticated “Chain of Control” mechanism, allowing KCs to be divorced from the generation, transport, and access of the DEK. Domain Administrators establish policies that direct which users can request encryption, decryption, or both services—and can exclude Key Custodians from gaining access to DEKs. Once a SAKA server is installed, all DEKs generated and accessed by applications are managed directly by SAKA and do not require the involvement of KCs. The custodians are required only to activate the cryptographic hardware module when the SAKA service must be started after a system reboot, or when a new encryption domain must be created. |
|
3.5.3—Store secret and private keys used to encrypt/decrypt CHD in one (or more) of the following forms at all times:
|
How SAKA meets this requirement: SAKA generates and stores ALL DEKs centrally, and “escrows” them encrypted under the encryption domain's 256-bit EC key. The encryption domain's EC keys are ultimately encrypted by another 256-bit EC key pair generated and stored on a hardware cryptographic module to protect against tampering or unauthorized access. With the exception of the keys inside the hardware module, all keys are replicated to failover SAKA appliances securely. |
|
3.5.4—Store cryptographic keys in the fewest possible locations. |
How SAKA meets this requirement: SAKA only stores keys internally within itself and other SAKA nodes. No keys are ever transported to requesting applications. Thus, only SAKA appliances actually have the cryptographic keys that manage the encryption/decryption of PANs. |
|
PCI DSS Requirement |
How SAKA Meets this Requirement |
|---|---|
|
3.6.1—Generation of strong cryptographic keys. |
How SAKA meets this requirement: SAKA generates DEKs using content from FIPS-certified HSM or TPM, both of which provide a true Random Number Generator (RNG) as a product feature. SAKA only generates 128-, 192-, and 256-bit AES, and 256-bit EC keys. |
|
3.6.2—Secure cryptographic key distribution. |
How SAKA meets this requirement: SAKA does not hand out cryptographic keys to any requesting application. All keys are generated, stored, and used within the appliance and only replicated to another appliance over a trusted network. However, even if the encrypted keys fall into the wrong hands, without the cryptographic hardware module, it is computationally infeasible to decrypt them, since the Root 2048-bit key that can decrypt the chain is unavailable outside the cryptographic hardware module. |
|
3.6.3—Secure cryptographic key storage. |
How SAKA meets this requirement: SAKA's use of the “Chain of Control” concept allows DEKs to be treated like ordinary files on the operating system, or like records within a database. However, because DEKs are always encrypted under an encryption domain's key, and because the private key (which can decrypt the encrypted keys) of the Root key is stored inside cryptographic hardware modules (which in turn are protected by multiple KCs), access to the decrypted DEK is non-trivial to very difficult for unauthorized entities. The standard use of approved cryptographic hardware modules in SAKA ensures that in the event the hardware module detects attacks, the modules can either lock up (requiring a Security Officer to reset the module), zero out (erase) key material inside the keystore, and/or introduce increasing delays in responses when subjected to dictionary and/or rainbow table attacks. |
|
3.6.4—Cryptographic key changes for keys that have reached the end of their crypto-period (for example, after a defined period of time has passed, and/or after a certain amount of ciphertext has been produced by a given key), as defined by the associated application vendor or key owner, and based on industry best practices and guidelines (for example, NIST Special Publication 800-57). |
How SAKA meets this requirement: SAKA includes the ability to automatically rotate DEKs without shutting down cryptographic services or applications that rely on them. Since keys never leave SAKA, and applications store a “token” to uniquely identify a PAN, SAKA can rotate keys at will or periodically without changing the token, thus isolating applications from this housekeeping duty. |
|
3.6.5—Retirement or replacement (for example, archiving, destruction, and/or revocation) of keys as deemed necessary when the integrity of the key has been weakened (for example, departure of an employee with knowledge of a cleartext key component), or keys are suspected of being compromised. |
How SAKA meets this requirement: Using the same methodology described in the earlier section (for key rollover), SAKA can be used to replace compromised DEKs. DEKs can also be rotated at will at any time without affecting the applications. The SAKA also provides software “jobs” to delete encrypted PANs when they are past their data retention period (which is customizable). Once all encrypted PANs are deleted from the SAKA, site personnel have the ability to delete DEKs from the SAKA appliance. |
|
3.6.6—If manual cleartext cryptographic key management operations are used, these operations must be managed using split knowledge and dual control. |
How SAKA meets this requirement: SAKA meets this requirement through its “Chain of Control” concept. The SAKA installation requires a minimum of three KCs who are issued strong credentials (256-bit EC key pairs) used to digitally sign commands activating the cryptographic hardware module within SAKA. Until all KCs activate the cryptographic hardware module, the cryptographic services will not be enabled even if the database and application server are running. |
|
3.6.7—prevention of unauthorized substitution of cryptographic keys. |
How SAKA meets this requirement: SAKA automatically generates, encrypts, and manages all DEKs. To substitute DEKs inside the SAKA, attackers must not only compromise operating system and database security, but must also compromise the cryptographic hardware module to access its key pair, then encrypt the DEK and substitute it in the database. While there is no such things as perfect security, this degree of compromise requires a significant level of access to the SAKA appliance that is normally detected though other PCI DSS controls. |
|
3.6.8—Requirement for cryptographic KCs to formally acknowledge that they understand and accept their responsibilities. |
How SAKA meets this requirement: This is a procedural requirement addressed outside the realm of technology. |
Requirement 6: Develop and Maintain Secure Systems and Applications
PCI DSS Requirement 6.4.5Change control procedures must include the following:
|
PCI DSS Requirement |
How SAKA Meets this Requirement |
|---|---|
|
6.4.5.1—Documentation of impact |
For the impact on PANs, this requirement must be fulfilled by customer sites. StrongKey evaluates the potential impact of changes to SAKA components, to ensure that the security of the appliance is not compromised. |
|
6.4.5.2—Documented change approval by authorized parties |
For changes to system components in the customer's infrastructure, this requirement must be fulfilled by customers. Any changes to SAKA components are always signed off by StrongKey management before implementation. |
|
6.4.5.3—Functionality testing to verify that the change does not adversely impact the security of the system |
For customer infrastructure, this requirement must be fulfilled by customers. All changes to SAKA components are tested before release to customers. |
|
6.4.5.4—Back-out procedures |
For customer infrastructure, this requirement must be fulfilled by customers. SAKA software is maintained in a software repository under the control of strong authentication. Any change that jeopardizes the integrity of the SAKA appliance can be backed out to a previous release at any time. |
PCI DSS Requirement 6.5
Develop all web applications (internal and external, and including web administrative access to application) based on secure coding guidelines such as the Open Web Application Security Project Guide. Cover prevention of common coding vulnerabilities in software development processes, to include the following:
NOTE: The vulnerabilities listed at 6.5.1 through 6.5.10 were current in the Open Web Application Security Project (OWASP) guide when this version of PCI DSS was published. However, if and when the OWASP guide is updated, the current version must be used for these requirements.
|
PCI DSS Requirement |
How SAKA Meets this Requirement |
|---|---|
|
6.5.1—Injection flaws, particularly SQL injection; also consider Lightweight Directory Access Protocol (LDAP) and Xpath injection flaws as well as other injection flaws |
The SAKA servlet does not use Structured Query Language (SQL) to communicate with its internal database (IDB)—it uses Enterprise Java Beans (EJB), which in turn use Java Persistence API (JPA) to interact with the IDB. As a result, SQL injection attacks do not work on the SAKA messaging protocol. |
|
6.5.2—Buffer overflows |
Buffer overflows are a characteristic of programming languages that do not automatically check the size of data being written to the address of a variable. SAKA is written in 100% Java, which was designed with strong typing and protection from buffer overflows in the Java Virtual Machine (JVM). As a result, SAKA does not succumb to buffer overflow attacks; any attempt to write data larger than the size of the type allocated for a variable results in an Exception from the JVM, thus protecting the application. |
|
6.5.3—Insecure cryptographic storage |
The SAKA appliance uses either a FIPS 140-2 Level 3 certified, or a CC EAL4+ certified cryptographic hardware module to store the root key of the SAKA key hierarchy. All keys under the root key are encrypted when stored on the hard disk of the appliance. |
|
6.5.4—Insecure communications |
The SAKA appliances generates its own Transport Layer Security (TLS) certificates for secure communication with clients. Not only does this provide message confidentiality and integrity on the network, but it has the added benefit that computers that do not know of the SAKA's TLS certificate will receive error messages when communicating with the appliance. Furthermore, the SAKA can be equipped to use TLS client authentication so that client systems must also possess an X509 digital certificate when communicating with SAKA. However, the client and appliance's TLS certificates must come from a Public Key Infrastructure (PKI) to enable this level of security. |
|
6.5.5—Improper Error Handling |
The SAKA appliance logs all application level errors with a unique Error ID (EID) and message. Additionally, errors received at the operating system, database, and/or application server are logged by each component individually, thus allowing customer sites to tailor their Security Incident Event Management (SIEM) tools to handle errors appropriately. |
|
6.5.6—All “high risk” vulnerabilities identified in the vulnerability identification process (as defined in PCI DSS Requirement 6.1, above) |
SAKA protects from such vulnerabilities by updating components used in the appliance software when vulnerabilities are discovered and/or made public by their manufacturers. It is noteworthy to mention that SAKA has strong controls by default. The built-in SAKA firewall restricts access to the web service port only for internal IP addresses on which authorized applications call for cryptographic services. The SAKA servers neither require, nor are enabled by StrongKey customers to have internet access. |
|
6.5.7—Cross-site scripting (XSS) |
SAKA does not use Representational State Transfer (REST)-based messages or HTML (typically used to carry out cross-site scripting attacks) between client applications and the appliance; it only uses Simple Object Access Protocol (SOAP)-based messages, and accepts and returns only XML. As such, the SAKA appliance is, in theory, immune to XSS attacks. |
|
6.5.8—Improper access control (such as insecure direct object references, failure to restrict URL access, directory traversal, and failure to restrict user access to functions) |
The SAKA appliance does not return any internal object references. The design of the appliance's key management software forces a separation of the web tier (servicing web service requests) from the EJB tier which processes the request. All objects passed/returned between the web and EJB tiers are passed by value—not as references. SAKA uses a single URL to provide all services from the appliance. The URL only accepts SOAP messages and neither redirects the calling application to any other URL nor displays any HTML. As such, the use of any other URL on the SAKA appliance results in an error message to the caller. |
|
6.5.9—Cross-site request forgery (CSRF) |
Just as SAKA avoids falling prey to XSS attacks through the use of SOAP-based calls and XML objects (as opposed to REST-based calls and HTML), it similarly avoids falling prey to CSRF attacks. |
|
6.5.10—Broken authentication and session management |
The SAKA appliance does not maintain sessions. All requests to the appliance must specify authentication credentials, and each request is authenticated independent of another. |
PCI DSS Requirement 6.6
For public-facing web applications, address new threats and vulnerabilities on an ongoing basis and ensure these applications are protected against known attacks by either of the following methods:
Reviewing public-facing web applications via manual or automated application vulnerability security assessment tools or methods, at least annually and after any changes
Installing an automated technical solution (for example, a web application firewall) that detects and prevents web-based attacks in front of public-facing web applications, to continually check all traffic
How SAKA meets this requirement: This requirement must be fulfilled by customer sites if they choose to place the SAKA appliance facing the public web.
PCI DSS Requirement 6.7
Ensure security policies and operational procedures for developing and maintaining secure systems and applications are documented, in use, and known to all affected parties.
How SAKA meets this requirement: While StrongKey does not have written security policies and procedures—it is a small company of less than ten employees with highly specialized skills – StrongKey's security is fairly rigid for a company of its size:
It only uses Linux computers for all day-to-day work and software development;
It restricts root access to a smaller subset of employees with a prohibition for using this account for day-to-day work;
It segments its office network from its testing network and uses dedicated machines for quality assurance;
It uses digital certificates from an internal PKI for committing changes to its source code repository;
It uses TLS for all internal systems with the exception of its internal wiki for storing generalized technical data and documentation;
It uses the highest security levels as defaults in its software: at the time of writing this document (mid-2016), StrongKey is using 256-bit AES keys, 256-bit ECDSA keys, TLS 1.2;
It tests web applications using OWASP tools and guidelines to ensure it eliminates vulnerabilities before software is released.
StrongKey periodically reviews and updates its security environment to ensure it continues to remain secure while building secure applications.
KC Responsibilities
This section answers two questions:
What are Key Custodian (KC) responsibilities in an environment running SAKA?
How are these responsibilities carried out?
Security policies at companies define what company employees may and may not do with company resources. Since Enterprise Key Management (EKM) is a relatively new and specialized discipline, companies are unlikely to have policies associated with EKM and what specific roles within the EKM Infrastructure (EKMI)can do.
The following is a template of a policy that can be adapted and used by SAKA customers to define the responsibilities of Key Custodians and other roles touching upon the SAKA. While it is unlikely to cover all possible situations, it does identify the core responsibilities of the roles involved.
|
POLICY INFORMATION |
|
|---|---|
|
Version |
1.0 |
|
Effective Date |
September 12, 2018 |
|
Intranet URL |
http://intranet.company.com/policies/security/pci-dss/keycustodians.html NOTE: You may want to link this policy to an internal website for distribution. |
|
CONTENTS |
|
|
|
General Information Roles Resources Processes Responsibilities Related Policies Other Resources Document Information |
|
GENERAL INFORMATION |
|
|
Purpose |
This document defines COMPANYNAME's policy for the responsibilities of Key Custodians (KC) as required by the Payment Card Industry's Data Security Standard (PCI DSS). |
|
Applicability |
This policy applies to all Employees, Contractors, Consultants, Outsourcers, and Service Providers of COMPANYNAME who are designated and required to perform in the capacity of a KC. |
|
Background |
The Payment Card Industry Data Security Standard‡ (PCI DSS) is an industry regulation for the protection of sensitive credit card data. Amongst many security requirements, it mandates the encryption of Personal Account Numbers (PAN) when stored on a computerized device. Cryptographic encryption keys used for protecting the information are required to be managed with “appropriate key management” operations as defined in the PCI DSS Key Management (KM) section of Requirements and Security Assessment Procedures, Version 3.2, dated April 2016. |
|
Policy Owner |
The creation, implementation and any subsequent changes to this policy is the responsibility of the Chief Security Officer (CSO). This policy and any subsequent changes must be approved by two or more of the following officers of the company:
NOTE: Depending on the size of the company, you can choose to use any role appropriate for authorizing policies of this nature. |
|
Sensitive Data |
Confidential personal information (to be hereinafter called Sensitive Data) is currently defined by the company, to be any one of the following:
NOTE: You can choose to define whatever information you want as Sensitive Data to cover more than what's mandated by law, or which you believe will get included into law as time goes by. Examples are – credit scores, health information, etc. |
|
ROLES |
|
|
Chief Security Officer |
The CSO is the owner of this policy. |
|
Key Custodian |
The KC is a part owner of the cryptographic keys established by COMPANYNAME to protect Sensitive Data. |
|
Encryption Domain Administrator |
The encryption domain administrator (EDA or DA) is the technical administrator of the cryptographic keys and data created and maintained by COMPANYNAME. |
|
Authorized Users |
Any human user or software application executing on any device that needs to access Sensitive Data is an Authorized User (AU). AUs must be explicitly permitted to perform any function within the cryptographic systems established by COMPANYNAME. |
|
RESOURCES |
|
|
StrongAuth KeyAppliance |
COMPANYNAME has purchased and deployed the StrongKey KeyAppliance (SAKA) to comply with PCI DSS requirements for encryption and key management (EKM). While many of the statements in this policy document are technology-independent, some statements are specific to the implementation chosen by COMPANYNAME and how they are carried out within SAKA. In the event SAKA conflicts with this policy, COMPANYNAME will work with the vendor to resolve the differences. Where SAKA goes above and beyond this policy, all roles are required to adhere to the requirements of the SAKA implementation. |
|
|
NOTE: Put in information about other resources deployed in COMPANYNAME to comply with this policy. |
|
PROCESSES |
|
|
Requesting Access to the SAKA |
NOTE: Define your process by which a user and/or an application may request access to the cryptographic services on the SAKA. The process must describe how to grant access to an existing encryption domain, how to create a new encryption domain and how To modify access to an existing encryption domain. |
|
Revoking Access to the SAKA |
NOTE: Define the conditions and process by which a user's and/or an application's access to the cryptographic services on the SAKA may/must be revoked. |
|
RESPONSIBILITIES |
|
|
All Employees |
All Employees, Contractors and Consultants employed by COMPANYNAME are required to comply with this policy, without exception. |
|
Chief Security Officer |
The CSO is responsible for:
|
|
Key Custodians |
The KC is responsible for:
|
|
Encryption Domain Administrator |
The EDA/DA is responsible for:
|
|
Internal Auditor |
The IA is responsible for:
|
|
RELATED POLICIES |
|
|
|
NOTE: Fill in links to other policies within your company that have a bearing on this one. For example, one that has a direct relationship to this is an Information Protection Policy that defines how information is classified within your company and what polices define its protection. |
|
OTHER RESOURCES |
|
|
|
|
|
|
SAKA Documentation |
|
|
NOTE: Fill in links to other resources within and outside your company that have a bearing on this.] |
|
DOCUMENT INFORMATION |
|
|
Version |
1.0 |
|
Date |
|
|
Notes |
DRAFT template of policy |
|
Author |
John Doe, Legal |
|
Reviewed By |
John Doe, Legal Sherlock Holmes, Internal Audit |
|
Approved By |
James T. Kirk, CEO |
Appendix A. Release Notes
The StrongAuth KeyApplianceTM(SAKA), StrongKey's flagship product, has undergone a radical change in the 4.0 release. The SAKA 4.0 retains all the great features of the 3.0 release, but also adds significant new capability.
It updates all underlying components, such as the Java Virtual Machine (JVM), the relational database, the application server and cryptographic libraries to the latest releases. While this not only fixes many bugs, it also helps with regulatory compliance since residual vulnerabilities in previous releases are addressed in the newer components.
It replaces the standard BouncyCastle library with the latest BouncyCastle FIPS library. BC-FIPS is a Federal Information Processing Standards (FIPS) 140-2 level 1 certified module, which is used to perform all cryptography. To manage this, all cryptographic code has been collapsed into a single module in the code.
All public key cryptography has moved from RSA to Elliptic Curve Digital Signature Algorithm (ECDSA or just EC) cryptography.
Updates support from Trusted Platform Module (TPM) 1.2 to TPM 2.0. TPM 2.0 is a FIPS 140-2 Level 2 certified cryptographic module.
Customers of existing SAKA—1.0, 2.0, or 3.0—with current Support contracts are entitled to free upgrades to the 4.0 release. Please contact us at support@strongkey.com to learn how to upgrade your existing SAKA (or SKLES).
For a full list of application changes, read the Key Appliance Release Notes.
Copyrights and Notices
Copyright 2001-2018 StrongAuth, Inc. (d/b/a StrongKey)
20045 Stevens Creek Blvd. Suite 2A, Cupertino, CA 95014, U.S.A
All rights reserved.
StrongAuth, Inc. has intellectual property rights relating to technology embodied in the product that is described in this document.
In particular, and without limitation, these intellectual property rights may include one or more U.S. patents
or pending patent applications in the U.S. and in other countries.
U.S. Government Rights―Commercial software. Government users are subject to the StrongAuth, Inc.
standard license agreement and applicable provisions of the Federal Acquisition Regulations and its supplements.
This distribution may include materials developed by third parties.
StrongAuth, StrongKey, StrongKey Lite, StrongKey CryptoCabinet, StrongKey CryptoEngine, the StrongAuth logo,
the StrongKey logo, the StrongKey Lite logo, the StrongKey CryptoCabinet logo and the StrongKey CryptoEngine logo
are trademarks or registered trademarks of StrongAuth, Inc. or its subsidiaries in the U.S. and other countries.
Products covered by and information contained in this publication are controlled by U.S. Export Control laws
and may be subject to the export or import laws in other countries.
Nuclear, missile, chemical or biological weapons or nuclear maritime end uses or end users, whether direct or indirect, are strictly prohibited.
Export or reexport to countries subject to U.S. embargo or to entities identified on U.S. export exclusion lists, including, but not limited to,
the denied persons and specially designated nationals lists is strictly prohibited.
DOCUMENTATION IS PROVIDED "AS IS" AND ALL EXPRESS OR IMPLIED CONDITIONS, REPRESENTATIONS AND WARRANTIES,
INCLUDING ANY IMPLIED WARRANTY OF MERCHANTABILITY, FITNESS FOR A PARTICULAR PURPOSE OR NON-INFRINGEMENT,
ARE DISCLAIMED, EXCEPT TO THE EXTENT THAT SUCH DISCLAIMERS ARE HELD TO BE LEGALLY INVALID.
STRONGKEY
20045 Stevens Creek Boulevard Suite 2A
Cupertino, CA 95014
USA
‡https://www.pcisecuritystandards.org/